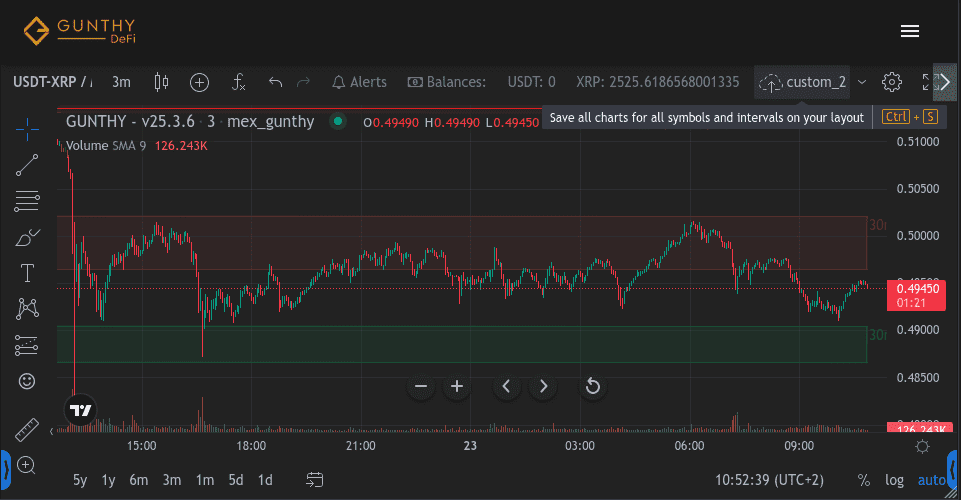
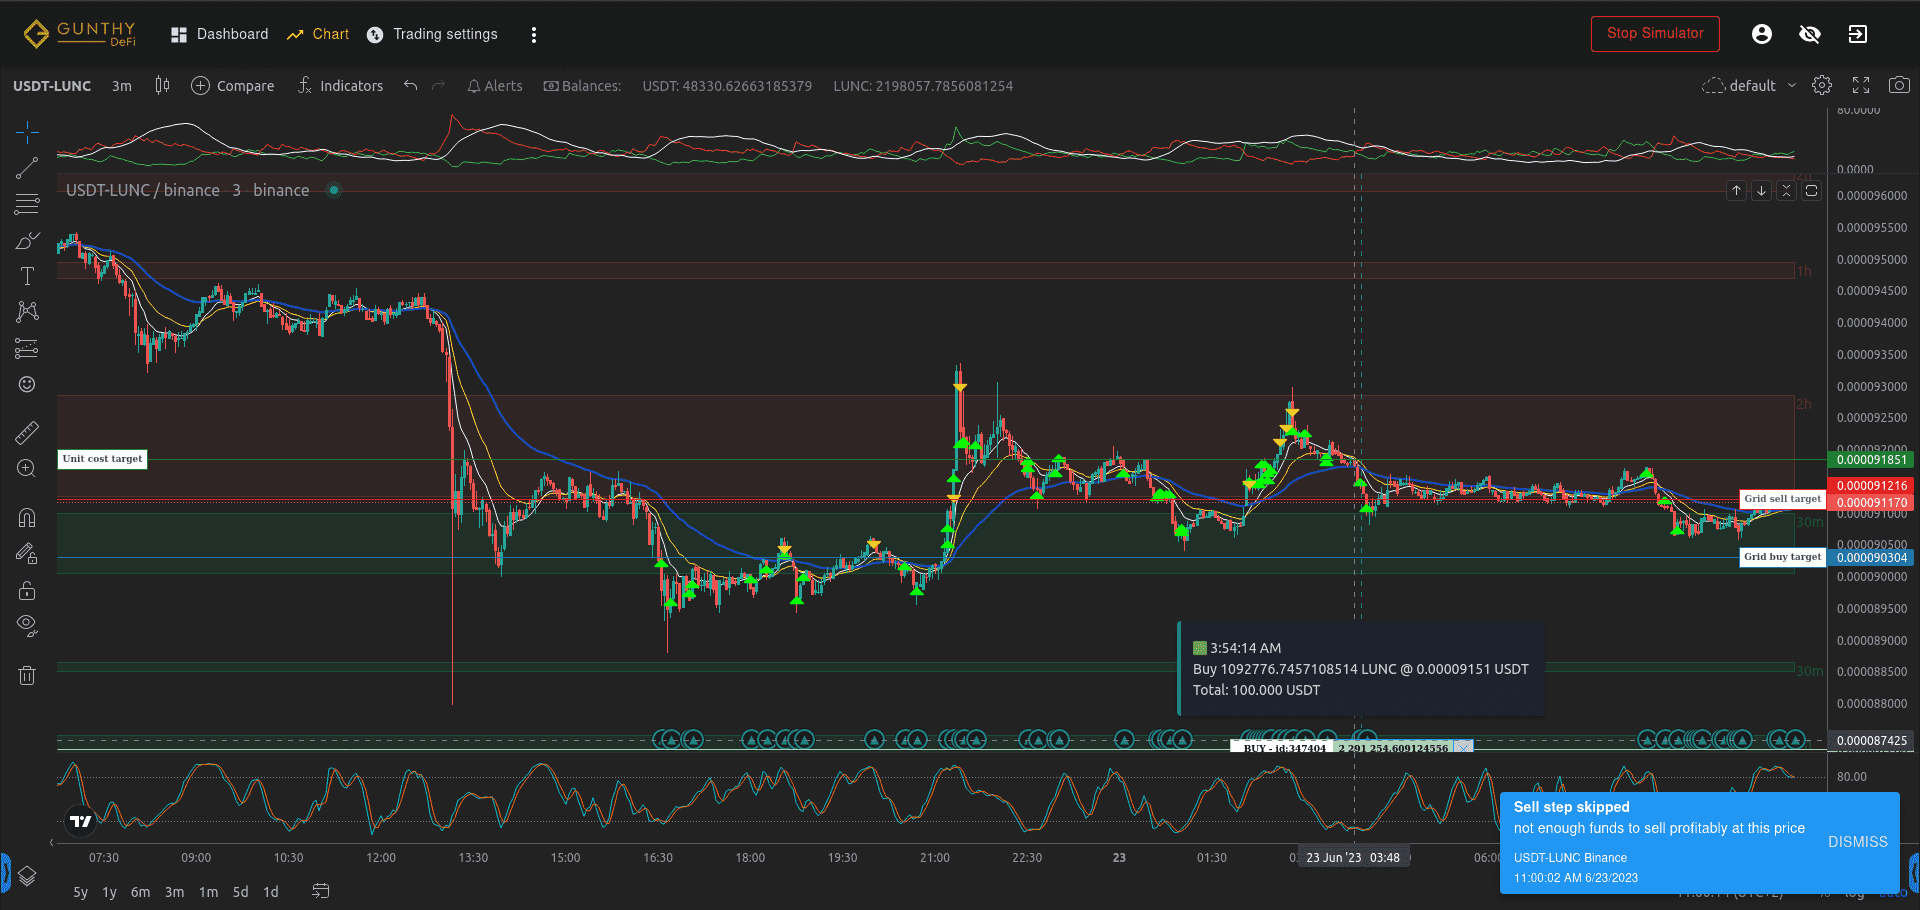
This Trading Strategy Reads the Order Book Instead of Candles
Most trading bots are chart readers. They wait for a candle to close, check a few indicators, and decide what to do based on something that already happened. Wick Magic's orderflow engine works differently, it reads the live order book and the real trade tape, and enters based on what the market is doing right now.
Wick Magic ships as two things. The first is a standard TA branch: Heikin Ashi candles, RSI, volume signals, breakout detection. Works on most pairs, easier to configure, good starting point if you just want something running.
The second is the OrderFlow engine, which is the more involved one and probably the reason you're reading this.
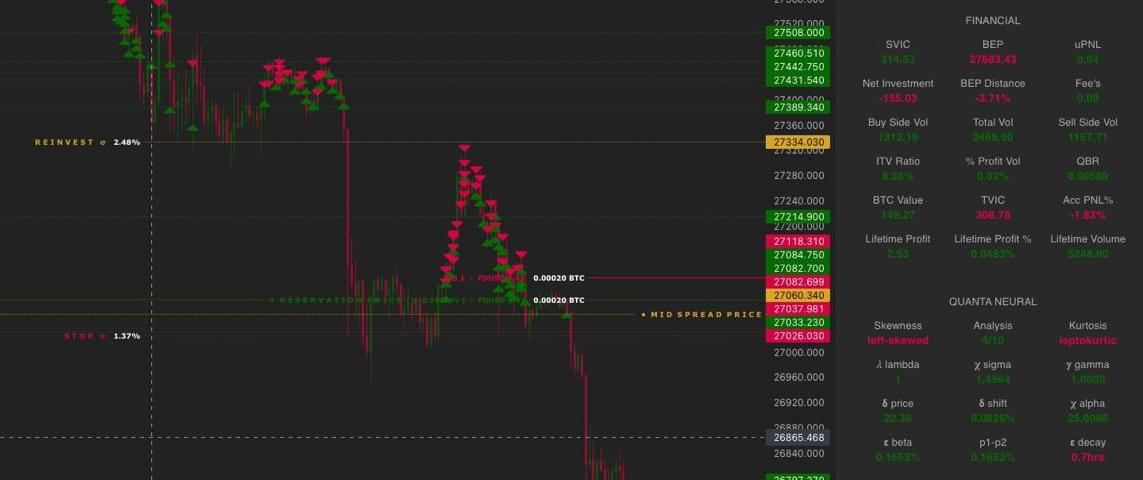
The orderflow side doesn't wait for candles. It reads two live data sources continuously: the order book (every pending buy and sell sitting on the exchange right now) and the Public Trade History, which is every order that actually executed in the last 90 seconds. From these it calculates an imbalance score from -1 to +1 representing current buying or selling pressure.
Both signals have to agree before anything happens. Order book showing strong buyer pressure and the tape confirming that buyers are the aggressive ones, actually initiating trades? Entry. Book looks bullish but the tape shows sellers driving things? The signals conflict and the bot skips it. The practical upside is that you're working off what the market is doing now rather than what it did a few candles ago.
One problem most orderflow bots don't bother solving: a fixed threshold doesn't hold up across pairs and conditions. "Buy when imbalance is above 0.35" sounds reasonable until you realise that 0.35 on BTC during London open is a completely different signal than 0.35 on an altcoin at 3 AM.
Wick Magic runs a genetic algorithm in the background that handles this. It takes the last ~1000 candles of real data on a sliding window, generates around 60 candidate threshold pairs, breeds the best performers across 220 generations, and lands on whichever combination best predicted candle direction over that sample. The GA trains purely on combined imbalance versus actual candle direction, ATR only comes in as a regime-change detector, triggering early recalibration if volatility shifts enough between the regular four-hour cycles.
In practice this means USDT-ETH might calibrate to a buy threshold of 0.52 while USDT-BTC lands at 0.38. Same bot, different markets, different numbers, worked out automatically.
On a fresh deployment the bot won't enter any orderflow trades until it's collected 200 candles to calibrate against, which is roughly 15 hours on 5-minute candles. Restarts don't reset anything, samples, thresholds, and timers all persist to disk so it picks up exactly where it left off. Re-buys on existing positions are never blocked by warmup, only fresh entries on pairs without a bag.
Even a clean orderflow signal is a lower-confidence trade if price is floating in the middle of nowhere. Wick Magic addresses this with a multi-timeframe S/R confluence engine that automatically identifies key price levels across three timeframes and looks for areas where they agree.
A 5m pivot at 2260 and a 4h pivot at 2263 sitting within 1% of each other merge into one confirmed zone. When S/R is enabled, orderflow entries are only allowed when price is within a configurable proximity of one of those zones. The practical effect is that signals which would otherwise fire randomly in open space get filtered out, and entries end up anchored to levels the market has actually respected before.
Markets fake moves. A bull trap pushes price up sharply then reverses. A bear trap dumps hard then bounces. Wick Magic cross-checks the order book shape against the trade tape to catch when a move looks suspicious, and blocks the entry or re-buy if a trap pattern is detected.
On the absorption side: when large players are defending a price level they absorb incoming sell pressure without letting price fall. High sell volume on tape, price barely moving, strong bid side holding. The strategy detects this pattern and treats it as extra confirmation, so a bearish tape signal alone isn't enough to block entry if the data suggests institutions are soaking up the selling.
Two features that do quiet but useful work. FGI Mimix Scaling adjusts position size based on the Fear & Greed Index, putting more in during fear periods and pulling back during greed. Most traders intend to do this and don't follow through, so having it run automatically removes that temptation.
Institution Hours recognises that while crypto trades 24/7, the order flow that makes book signals reliable concentrates between the London and New York sessions, roughly 7 AM to 9 PM UTC. Outside those hours you can either block new entries entirely or run in scout mode, which raises the conviction bar: the buy threshold goes up 40%, tape requirements tighten, and above-average volume is required before anything fires. Sells and partial exits are never affected regardless of which mode you're in.
There's also Compound Profits, which adjusts your trade size based on cumulative realised PnL across completed cycles. After a run of winning trades the next entries are slightly larger, after a losing one they shrink back. There's a floor at 25% of base size so it can't spiral, and the offset persists across restarts.
The classic side holds up on its own. DCA requires trend confirmation, has cooldown timers between entries, and includes a freeze zone that stops new purchases if price keeps dropping past a set level. That last part is more important than it sounds, unconstrained averaging into a falling market is how accounts quietly disappear.
You can also run both engines together: classic TA for entries with the orderflow gate handling partial exits. It's a reasonable way to test the exit engine before committing to full orderflow mode.
A Gunbot DeFi license is a prerequisite on top of the strategy cost, so factor that in. The orderflow engine works best on BTC, ETH, and SOL because those books are deep enough for the tape signal to carry real information. On thinner pairs it gets unreliable.
Configuration depth is real, genetic algorithm parameters, S/R zone sizing, iceberg detection, session gating, and more. The strategy ships with two presets though, one for fast 5m scalping and one for higher-conviction 15m entries during active sessions, and for most people those are a sensible place to start and probably fine to stay close to until you have enough context to know what you'd want to change.
Lifetime license is €275. Docs are thorough, logic is explained properly, and there's a Telegram community if you get stuck. If you're running Gunbot on liquid pairs and want to move beyond lagging indicators, this is built for that. You can get Wick Magic here
GunbotHub is a marketplace built around one job: connecting strategy leaders and copytraders so trades can be copied automatically through Gunbot.
Leaders publish strategies (with an exchange, a trading pair, and a price). Copytraders purchase one-time access and enable the strategy. From that point on, trade signals from the leader are relayed to the copytrader’s Gunbot, which executes the trades on the copytrader’s exchange account.
A few details make the whole thing click:
Leaders can generate signals using Gunbot or TradingView.
Copytraders do not manually edit configs to get started; GunbotHub writes the relevant configuration into Gunbot when a strategy is enabled.
Exchange API keys remain inside the copytrader’s Gunbot setup. GunbotHub does not take those keys.
You can also be both a leader and a copytrader under the same account, which matches how a lot of active traders actually work.
First-time setup: sign in, verify, complete your profile
GunbotHub starts with a license check for everyone.
Sign in with Google.
Enter your GUNTHY wallet address to verify your Gunbot license. This is the Ethereum address where you received GUNTHY tokens when you first purchased Gunbot.
After that, the profile setup depends on what you want to do:
Copytraders add their Gunbot URL so GunbotHub can push configuration automatically.
Leaders add payment details so earnings can be paid out.
Copying a strategy: what you do, what gets automated
In profile settings, enter the URL for your Gunbot instance.
You can enter a domain name or an IP-based URL.
If you enter an IP address, GunbotHub can automatically convert it into a subdomain under gunbot.market (for example, a URL that starts as an IP can be converted into something like gb-1-abc123.gunbot.market). This is intended to avoid Cloudflare Worker connection issues that can happen when communicating with IP addresses directly.
For the automation to work, your Gunbot needs to have the Config API running.
Enabling is a toggle. Once enabled, GunbotHub handles the setup steps that usually take the most time:
it generates a unique API key if you do not already have one
it injects that key into your Gunbot for secure communication
it writes the strategy configuration into your Gunbot config.js with the correct exchange and trading pair
it begins relaying the leader’s trade signals to your Gunbot
You can disable any purchased strategy at any time from Active Copies. Disabling stops copying new trades, but you keep lifetime access and can re-enable later.
GunbotHub can configure a strategy, but it cannot trade for you without a working Gunbot environment:
Exchange API keys must be configured in your Gunbot for the exchange the strategy uses. Without valid API credentials, signals can arrive but trades will not execute.
Gunbot needs to be running to receive and execute signals. If it is offline when a signal is sent, you miss that trade. GunbotHub can show inline error notifications when it cannot reach your Gunbot.
TradingView variables can be used in payloads (for example {{close}}, {{ticker}}, and others). If you write Pine Script strategies, TradingView can embed the webhook message inside your script using the alert_message parameter, so the script generates consistent alert payloads.
Leaders earn revenue when copytraders purchase access:
90% goes to the leader.
10% is a marketplace fee.
Payment details are added in profile settings (PayPal email address, crypto wallet addresses, bank account details, or another preferred method). Marketplace admins process payments based on the information in your profile. Sales, earnings, active copytraders, and payment status can be viewed in the My Sales tab.
How trade copying works (signal relay and execution)
Once a strategy is enabled by a copytrader, the trade flow is:
A leader executes a trade and sends a signal (via Gunbot or TradingView).
GunbotHub receives the signal, validates it, and identifies copytraders who have that strategy enabled.
GunbotHub forwards the signal to each copytrader’s Gunbot using that copytrader’s unique API key.
The copytrader’s Gunbot executes the trade on the exchange account configured in that Gunbot.
The security model is straightforward: exchange API keys stay inside the copytrader’s Gunbot. GunbotHub relays signals; Gunbot executes.
Comparing strategies: what to look at in the marketplace
GunbotHub gives copytraders a few concrete tools for comparison:
exchange and trading pair
performance information and ratings
written reviews (available after purchase)
number of active copytraders
One metric called out is DP1K (Daily Profit per 1K). DP1K is defined as the average daily profit in USD per $1000 of trading volume, intended to make strategies easier to compare when they use different capital levels.
A sensible way to use the available information:
Make sure the strategy trades on an exchange you have configured in Gunbot.
Check the trading pair matches what you actually want to trade.
Read reviews and ratings for recurring themes.
Use DP1K to compare strategies side by side, while remembering it is an indicator, not a guarantee.
On sizing, the docs note that signals include recommended position sizes, but your execution is ultimately constrained by your Gunbot configuration.
Gunbot Quant: A Standalone, Open-Source Tool for Algorithmic Traders
Most screeners are great at showing you what just moved; very few are built to help you systematically trade what matters next.
If you’re running algos, you don’t really need another page of top gainers or a rainbow of indicators for screenshot flexing. You need a way to define your ideal market conditions once, reuse them reliably, and pipe the results into batched, honest backtests without wrestling multiple tools, fragile copy-paste rituals, or “close enough” parameters that mysteriously underperform in production.
That is the core of Gunbot Quant: a standalone, open-source tool that links saved screener setups directly to batched backtesting runs. And if you use Gunbot DeFi, it can hand those exact tested configs and strategies to your live bot in one click. The trading bot integration offers a repeatable loop from “scan like an algo trader” to “prove it” to “run it,” all in one place you control.
I’ll be upfront: Gunbot Quant isn’t claiming to be the only good screener. There are excellent screeners out there, and if all you want is to eyeball opportunities, you’ll be well-served. The difference here is not a promise that these filters are magically better. The difference is architecture and intent: saved, composable scans that speak the same language as the backtester; caching and compiled computations so re-runs are fast; and reporting that answers the questions systematic traders actually ask before putting capital at risk. The screener is good, but the workflow from saved scan → batch test → live parity → monitoring, is the point.
Free and open-source
Gunbot Quant is free. There’s nothing to sell here - use it, fork it, improve it. Pull requests welcome.
Gunbot Quant is a research and deployment workflow for algorithmic traders that runs on your machine, talks to multiple data sources, and treats your trading like a reproducible experiment rather than a weekend of tab-surfing.
You define a scan once, with liquidity guardrails, a handful of momentum, volatility, and trend metrics, and any heuristics you care about. Save it with a clear name, and reuse it every time that strategy archetype comes up. When you hit “go,” the screener assembles a candidate set that fits your rules, and the backtester runs that strategy (or a portfolio of strategies) across all those candidates in one sweep. The reports give you risk-adjusted results, portfolio roll-ups, and exit-reason diagnostics so you can tell the difference between a pretty equity curve and a setup that earned its keep. You can also cross-check assumptions against the public backtesting archive.
If you run Gunbot, you can send the exact tested configuration to live trading in a click; if you don’t, you can still use everything else: the scan, the tests, the reports, as your independent research layer.
This matters because it keeps you structured. You don’t “think” you ran the same parameters live that you tested: you know you did. You don’t “hope” your live pair is still the best place to run that setup: you can benchmark it against the rest of the market and see where it stands. And you don’t rebuild your screeners from scratch every time a regime changes: you pull up the saved scan for that regime and batch test again, which means your process gets better with time instead of noisier.
The real win
Plenty of solid screeners exist. The edge here is that saved screener setups flow straight into batched backtests with the same parameters and symbol normalization. Define once, reuse often, compare over time.
Screener: a research starting point you can save and reuse
A screener for algos is less about colorful dashboards and more about not wasting your backtest compute budget.
Gunbot Quant pulls from any CCXT-compatible crypto exchange and from Yahoo Finance for equities and ETFs. It does the boring but essential work of normalizing symbols so “the thing you tested” is “the thing you can trade.” Think of the process as a funnel: start with a wide net of higher-volume assets, then apply increasingly specific filters.
You can filter by liquidity using trading volume so you don’t get lured into thin books that betray your fills. You can look at price relative to different SMAs to avoid testing trend followers in chop or mean-reverters in one-way markets. You can measure momentum with rate-of-change windows that match your timeframe. You can gate by normalized volatility with ATR percentage so you don’t hand a grid strategy a dead pair or throw a breakout strategy at a coin that whipsaws itself to pieces. Oscillators like RSI and Stoch RSI are available when your logic needs them, and there’s room for pragmatic heuristics, volatility “consistency,” recent volume concentration, and spike filters that keep obviously unsuitable candidates out of the queue.
Saving is the point. Instead of a one-off filter you forget next month, you keep a named, versionable scan like “TrendCandidates-Daily-HighADX” or “LowVol-MeanRev-4h.” When market tone shifts, you run the same scan and you get a fresh ranked list that passes the same gates as last time. That simple act is what makes a process feel systematic rather than improvised.
Symbols & exchanges
Markets naming gets messy across platforms. The app normalizes symbols so your research symbol matches the live tradable pair on your exchange.
The metrics are chosen to provide a holistic view of an asset's character, covering volume, momentum, trend, volatility, and risk.
Category
Metric
"Why" this metric is useful
Volume
avg_vol_30d_quote
Checks that the asset has sustained liquidity, which is critical for executing trades at expected prices.
rel_vol_10d_quote
Identifies assets with recent spikes in interest, which can precede significant price moves.
Momentum
roc_*p family
Measures the strength of price movement over different time horizons, important for trend-following strategies.
Trend
price_vs_sma*
Quickly determines if an asset is in a short-term or long-term uptrend or downtrend.
sma50_vs_sma200
Identifies major trend shifts (Golden/Death Crosses), a cornerstone of classical technical analysis.
adx_14p
Distinguishes between a strong trend (good for trend-following) and a ranging market (good for mean-reversion).
Volatility
atr_pct_14p
Normalizes volatility as a percentage of price, allowing for fair comparison between assets of different prices. Helps filter out assets that are too flat or too erratic.
Oscillator
rsi_14p, stochrsi_*
Identifies potential overbought or oversold conditions, forming the basis for mean-reversion strategies.
These are risk management metrics. They help filter out assets that may look good on paper but are prone to unpredictable spikes, flash crashes, or "pump and dump" volume patterns.
The backtester is where you prove ideas, and its job is to keep up with how you actually work. You can take a saved screener result, run a strategy (or a few variants) across a slate of symbols in one go, and get a report you can trust without babysitting the process. Launch runs directly from any saved scan or from an explicit symbol list; the engine keeps the plumbing aligned: timeframes, warm-ups, symbol normalization, so the numbers you compare are apples-to-apples. Each run writes out the artifact set you expect: per-trade ledger, equity and drawdown series, exit-reason attribution, and a portfolio roll-up when you test more than one market.
Speed comes from deliberate engineering. Historical data is cached locally in columnar Parquet, so repeat runs don’t waste time refetching or reparsing; indicator math is JIT-compiled with Numba so multi-symbol sweeps complete in minutes rather than afternoons; and the engine avoids recomputation when your only change is a filter or a parameter tweak. In practice, scanning ten candidates and retesting a few strategy variants becomes a rhythm you can run before coffee gets cold, not a weekend project.
Reproducibility is treated as a first-class feature. Each report records which screener produced the candidates (name, saved definition, timestamp), which strategy configuration or alias you ran, the exact parameter set, the data window, and the fee/slippage model in force. If you prefer working from the command line, scenario files let you declare a base config and then define small, explicit overrides for symbols, strategies, or params, which makes A/B (or A/B/C) testing read like a lab notebook instead of a pile of screenshots.
The engine covers two common shapes of systematic trading without forcing one into the other. For straightforward directional systems, trend followers, mean-reverters, breakouts, you run fixed historical windows and get the risk-aware picture you need: return, Sharpe/Sortino, drawdown depth and duration, hit-rate and average trade characteristics, plus the exit-reason breakdown that shows whether profits come from the logic you intended or from a stop doing too much of the work. For inventory-carrying or market-neutral styles such as grids, a continuous evaluation path tracks compounding and inventory effects explicitly.
Candle-open execution
By default, included Gunbot strategies generally enter and exit on candle open. That keeps the strategies aligned with what’s realistically executable as a backtest and avoids intra-bar fantasy fills.
Strategy library: familiar archetypes, easy to tinker
The built-in library covers the archetypes most traders actually use, so you can focus on where and how to trade rather than reinventing entry signals.
For Mean-Reversion Traders: If you believe prices revert to an average, you’ll recognize the RSI_Reversion (buys oversold, uses ATR stop), BB_Reversion (fades outer band excursions), and Stochastic_Reversion. There’s also a combo that requires oscillator agreement and exits at fixed ATR multiples for tighter risk management.
For Trend Followers: If you believe trends persist, the library offers an EMACross, a MACD_Cross, a Supertrend_Follower (where the indicator line doubles as a trailing stop), and a Heikin-Ashi approach that smooths price action to reduce noise.
For Volatility and Breakout Traders: If you trade changes in market energy, you have a classic Donchian_Breakout and a Keltner_Squeeze_Breakout to separate real expansions from random noise.
For Market-Neutral Approaches: The continuous Grid_Strategy is designed to profit from volatility regardless of direction, with its own per-pair compounding logic.
For Hybrid and Adaptive Systems: There’s a “buy the dip in an uptrend” model that gates mean-reversion entries behind a slow-MA trend filter, and the self-optimizing Dynamic_Momentum_Optimizer that retunes itself to recent conditions.
In practice, traders often keep a small roster of systems that match their personality. Gunbot Quant makes it straightforward to test a few variants of each, bump a parameter for sensitivity, tighten a stop, and see differences play out in a single report.
Strategy library scope
The included strategies are not 1:1 emulations of existing Gunbot strategies. Gunbot’s native strategies are often quite complex and combine stateful behaviors that aren’t efficient to backtest generically. The library here is a clean suite of common and less-common technical approaches (i had some fun with the dynamic optimizer strat) that are transparent, auditable, and easy to benchmark.
For strategy developers: a look inside a Gunbot Quant JS file
The strategies are written in vanilla JavaScript for compatibility with Gunbot’s custom strategy runtime. They’re designed to be self-contained and readable, which makes them good templates for customization.
Here is the annotated structure of a typical strategy, rsi_reversion.js:
/*
* Gunbot Quant Strategy: RSI_Reversion
* A brief summary of the logic and a table of configurable parameters.
* This header is read by the UI to populate help text.
*/
// Gunbot requires this to be initialized. It's a persistent, per-pair data store.
Everything above is fully useful even if you never touch Gunbot. If you do, the loop gets tight in a satisfying way: after a batch test, you can push the winning configuration directly to your Gunbot instance. The tool handles the annoying parts: mapping your research symbol to your Gunbot notation, creating the pair and strategy, and sending the exact parameters you just tested.
Once you’re live, the benchmarking tools are built to answer a simple question: is this still the best place to run this setup? You can take your live strategy and compare it against the rest of the eligible market with the same logic. If the rankings start to show a better candidate, you can rotate before lag turns into losses.
If you prefer to script your life, the command-line interface is there. You define a base configuration and then declare a list of scenarios that override only what’s different.
Example: design a CLI scenario to test two RSI_Reversion configurations against a default EMACross on BTCUSDT.
python -m gunbot_quant.cli.main run Multi_RSI_vs_EMACross_BTC
The engine will produce a single report comparing the three tests, so you can see which configuration performed best. All reports can be viewed in the GQ frontend. This explicit approach is useful for long-term, systematic research.
No tool can promise you winners. The screener will not divine tomorrow’s breakout, and the backtester is not a time machine: it’s a disciplined mirror that shows you what would have happened under the rules you gave it. Liquidity filters reduce but do not eliminate execution risk; risk-adjusted metrics illuminate quality but don’t guarantee persistence.
Backtesting history is limited by exchange candle data availability. Some exchanges are more generous than others.
:::warning Avoid overfitting by convenience
Batch testing makes it easy to try hundreds of variations. Don’t let that become parameter fishing. Lock a baseline, evaluate on multiple markets/regimes, and only promote changes that improve risk-adjusted metrics and drawdown behavior, not just headline returns.
:::
Gunbot Quant is a straightforward way to do saved, algo-first market screeners combined with batched backtests, and, if you want, to let those exact tested configurations go live in one click in Gunbot.
It runs locally, it’s open-source under the MIT license, and it’s extensible. If you’re the kind of trader who prefers a repeatable edge over a lucky screenshot, this might be useful to you.
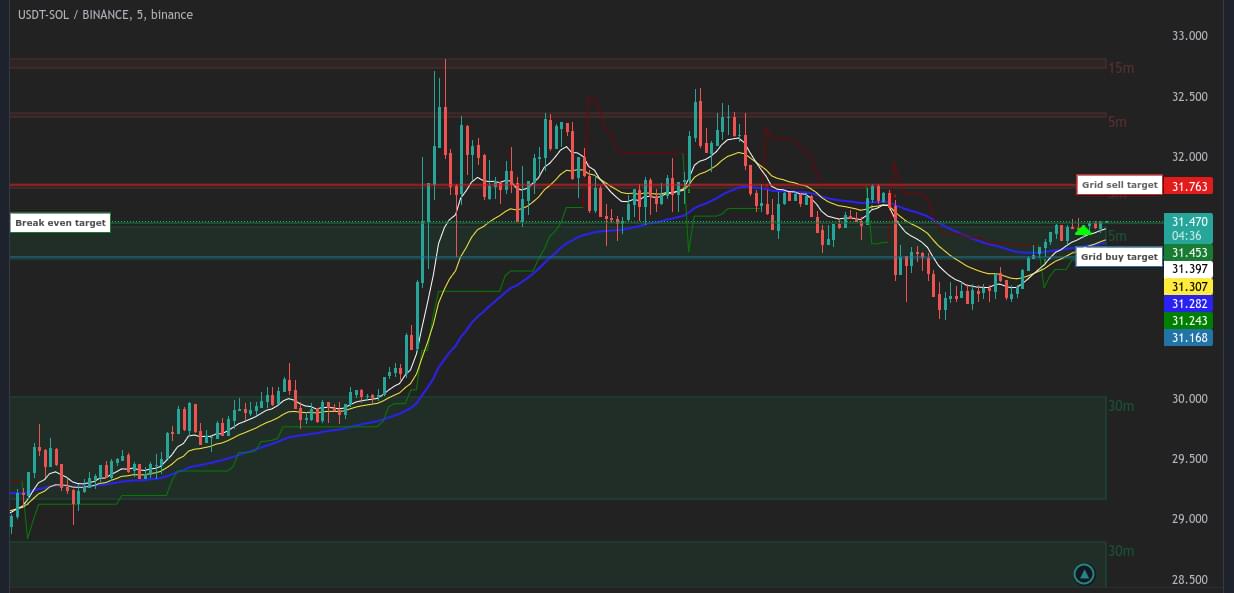
StepGridScalp takes Gunbot's classic StepGrid strategy a step further by blending disciplined grid trading with dynamic scalping and strategic support buys. This unique combination means you can efficiently trade spot markets through rapid intraday price movements as well as deeper market dips, all within one cohesive, automated strategy.
Instead of manually switching strategies or constantly adjusting settings, StepGridScalp automatically evaluates market conditions in real-time. It adjusts your position sizing, entries, and exits accordingly, helping you stay profitable while reducing the need for constant oversight usually needed in fast-moving markets.
At its heart, StepGridScalp relies on the familiar grid trading model, buying assets at set intervals as prices fall and selling them at higher intervals as prices recover. This helps trades close profitably after covering trading fees.
What makes StepGridScalp special, however, is its added scalping capability. When bullish momentum kicks in, your bot will execute quick, opportunistic trades designed to capture profits from short-term price jumps. It also places limit orders at medium- or long-term support levels identified by Gunbot’s built-in trend detection, giving you another way to manage downturns.
When Gunbot detects rising bullish momentum, StepGridScalp actively seeks scalping opportunities. These trades are smaller than typical grid trades but timed perfectly around short-term market dips, such as when prices momentarily fall beneath key indicators like EMA10.
These quick trades use ultra-tight trailing stops, protecting your profits without risking them due to market volatility. StepGridScalp continuously recalibrates these scalp trades, keeping each entry and exit aligned with current market conditions.
Alongside quick scalps, StepGridScalp strategically positions larger limit buy orders at important support levels identified through Gunbot’s trend analysis. These buys happen at points historically proven as strong support, lowering your overall average entry price.
This smart accumulation approach allows you to confidently navigate deeper corrections, turning market downturns into opportunities rather than setbacks.
StepGridScalp manages all your trades as a unified position. It calculates profitability against a common break-even point, so each trade genuinely contributes to your bottom line after accounting for fees.
The strategy automatically prevents unprofitable partial sells, so every executed trade adds positive value to your portfolio.
Despite its advanced mechanics, StepGridScalp remains easy to customize. Key parameters allow you to quickly fine-tune the strategy to your trading style and risk appetite:
Adjust your standard trade sizes easily with the Trading Limit.
Fine-tune your scalping trade size using the Scalp Trading Ratio.
Set the aggressiveness of your support buys with simple Support Buy Ratios.
Choose automatic or manual grid spacing through the Step Size parameter.
Adjusting these simple settings lets you comfortably manage risk, increase profitability, and easily adapt to changing market conditions.
To maximize your results, here are some practical suggestions:
Try starting with very low trading amounts, and using a fairly unrestricted setup. This keeps your risk super low, while you can observe the strategy behavior.
Regularly check your scalps and support buys, making slight adjustments based on your personal observations.
Keep an eye on market volatility - if it changes significantly, adjust your grid spacing accordingly to avoid unnecessary losses. Moving to higher timeframes can also be a solution to reduce activitity in uncertain market situations.
Accurately configure your exchange fees in Gunbot. This small step is essential for keeping profitability calculations accurate, especially when scalping.
Conclusion: A Complete Strategy for Diverse Markets
StepGridScalp effectively merges structured grid discipline with responsive scalping and smart support-level trading. This blend gives you a trading setup that can adapt smoothly to different market conditions.
With StepGridScalp, you can confidently participate in different market phases - slow accumulation periods, sudden bullish spikes, or sharp downturns - all managed within a single, reliable strategy.
If you want to simplify your trading approach while maximizing your returns, StepGridScalp offers the perfect combination of consistency, flexibility, and performance.
StepGrid Strategy: Fee-aware Grid Trading in Spot Markets
StepGrid: Turning Volatility Into Structured, Fee-Aware Profits
Grid bots have been around for years, but most of them share the same weakness: they buy and sell at fixed price intervals without caring about the actual cost of the position that is building underneath. When the market comes back up, a classic grid may close parts of its bag at a loss because the bot never looks at fees or at how many units remain.
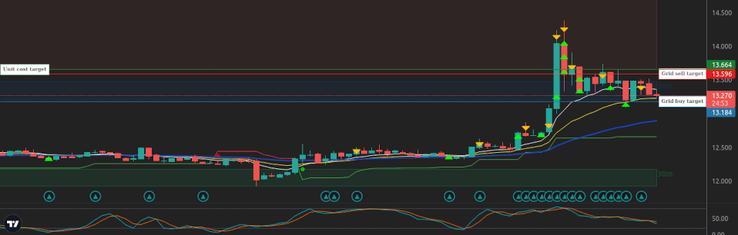
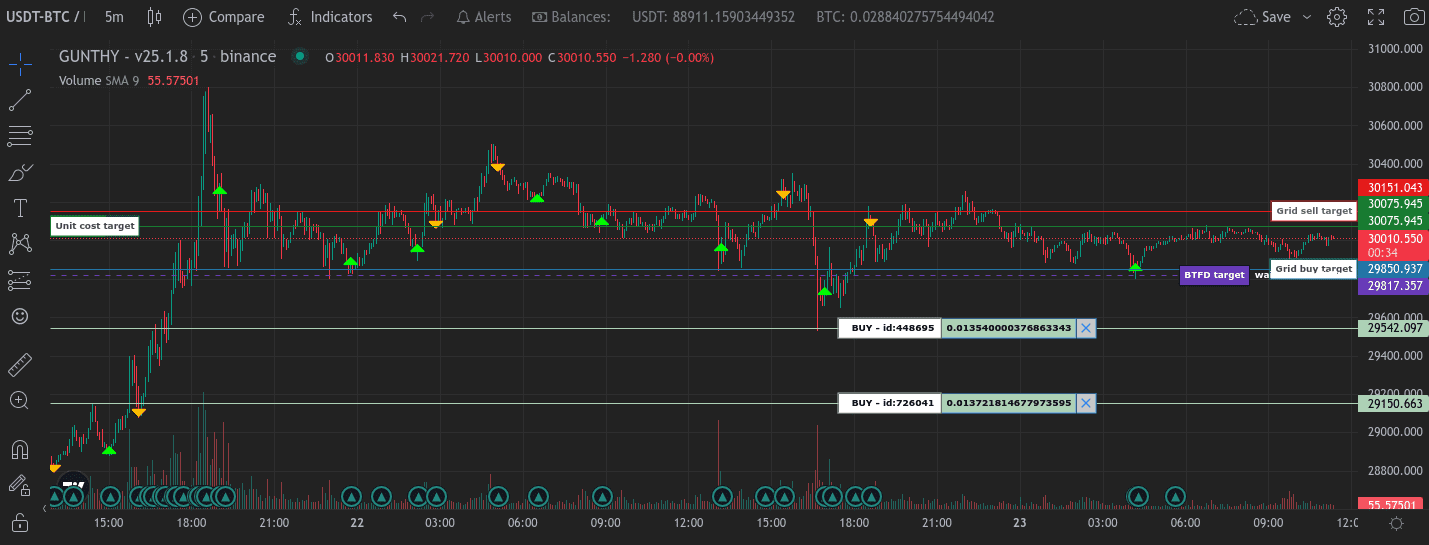
StepGrid was designed to fix that flaw. It keeps a running “unit cost” line that represents a full-position break-even, including trading fees, and it refuses to hit the market below that line unless a slice of the position can be closed at a genuine profit. In practice, this small upgrade changes the entire character of a grid. Profits are harvested earlier, losing partials disappear, and the trader gains a predictable exit, even when the grid has stacked twenty or forty buys during a deep drawdown.
The moment StepGrid fires its first buy, it stamps that execution price as a reference. From there it watches both directions:
Downward: Each time price falls by one grid step, the bot checks that it still has room under MAX_BUY_COUNT. If so, it spends another TRADING_LIMIT.
Upward: When price rises by one grid step, the bot arms a trailing sell. If the trailer finishes above the calculated unit-cost line, the bot can unload part or all of the bag.
Because unit cost is recalculated after every fill, the break-even line keeps sliding lower while the position deepens. Eventually the market will revisit that line. When it does, StepGrid has two options. If the move is sharp and a full close is cheaper than fees, it sells everything. If the move is hesitant, it can sell a fraction, provided PROTECT_PARTIAL_SELL confirms that the slice alone is green.
Most users leave AUTO_STEP_SIZE set to true. The bot then measures Average True Range over the last ATR_PERIOD candles, multiplies it by 1.5, and compares the result with two times the fee percentage. The larger of those two values becomes today’s step. The advantage is obvious: when volatility expands, StepGrid widens its ladder. When the market goes quiet, steps tighten and more trades fire.
Manual spacing still has its place. Event traders often disable auto stepping, enter a STEP_SIZE that matches the expected headline move, and turn ENFORCE_STEP on. Enforcement forces every buy and sell to respect those exact levels, which keeps position size predictable in news-driven spikes.
Grid strategies live or die on exposure management. StepGrid makes that explicit by linking three parameters:
TRADING_LIMIT – the capital per buy.
MAX_BUY_COUNT – the maximum number of buys.
KEEP_QUOTE – the amount of quote the bot must leave untouched for fees or withdrawals.
Multiply the first two and you know the worst-case bag size. That figure should sit well below your total account, ten to twenty percent is a common ceiling. Raise MAX_BUY_COUNT because you fear a long winter and you must lower TRADING_LIMIT to keep risk constant. The math never changes.
Consider a trader who runs USDT-BTC with a two-thousand-USDT account, a TRADING_LIMIT of 1000 USDT, and MAX_BUY_COUNT set to twenty.
Phase one: The market dips five percent. StepGrid logs three buys, each at a fresh low. Unit cost has moved down with the bag and now sits roughly two percent under the first order.
Phase two: Price finds a floor, drifts sideways, then rallies. As soon as it has climbed a full step, the bot arms a trailing sell. Volatility is still high, so the step is wide; the trailer finishes well above fees.
Phase three: The trailing stop hits and closes one-third of the position, an amount chosen automatically by the bot because the bag is already in profit territory.
Phase four: Unit cost recalculates. With fewer coins left, it rises a little. Price pushes higher again and this time the bot sees that a full exit at break-even plus fees is within reach. It sells the rest. The cycle ends green and resets.
During that entire sequence the trader never touched a button. The only manual decision was where to put TRADING_LIMIT and MAX_BUY_COUNT on day one.
Most StepGrid setups work out-of-the-box, but three scenarios often require tweaks:
Extremely tight spreads with maker rebates: Lower MIN_VOLUME_TO_SELL so the bot can realize tiny gains without tripping exchange minimums.
Illiquid altcoins: Turn ENFORCE_STEP on. This reduces the chance that a thin order book drags a trailer into a worse-than-step fill.
Long-term accumulation: Disable SELL_ENABLED or enable FOREVER_BAGS. StepGrid will buy dips forever and never calculate a full exit, effectively dollar-cost averaging with grid precision.
Gunbot Pro owners can replay trades with BF_SINCE and BF_UNTIL. Deep testing builds tick-level candles so StepGrid behaves as if it were live. Two passes, one in a trending month, one in a ranging month, are enough to check whether your parameters keep drawdown inside plan and still let the bot exit profitably. If the backtest shows prolonged underwater periods or too many skipped sells, the first levers to pull are wider step size and a lower maximum buy count.
StepGrid will not outperform every strategy in every market. No robot does. What it offers is transparency and predictability: you always know your worst-case size, your dynamic break-even, and the exact rules that fire each order. That clarity is rare in grid trading and it frees the operator to focus on the higher-level decision, picking the pairs and deciding how much capital to commit. Get those calls right and StepGrid will handle the rest, one step at a time.
Gunbot Python SDK \u2013 Automate Trading Logic with Simpler Code
The Gunbot Python SDK is a newly released wrapper for the Gunbot REST API. It offers a practical way to write Python scripts that automate trading tasks like placing orders, managing strategies, pulling balances - without having to deal directly with raw HTTP requests.
If you're scripting quick tasks or building out more structured bots, this SDK saves time and removes friction from common interactions with the Gunbot backend.
Using the Gunbot REST API directly in Python usually means building every request by hand. That includes forming URLs, setting headers, serializing payloads, and checking for response errors manually. It's tedious and error-prone.
This SDK takes care of the low-level plumbing so you can focus on writing your trading logic.
That’s enough to start making requests against your running Gunbot instance. If you want to review auth and endpoints first, use the Gunbot REST API intro.
Gunbot is a self hosted bot for trading automation that connects to major centralized and decentralized exchanges. It supports a range of built-in strategies (grid, DCA, scalping, etc) and includes a full REST API for users who want deeper control or custom workflows.
The Python SDK is just one way to extend Gunbot with your own code.
Gunbot offers a wide range of built-in tools for automated trading, but sometimes you might want to use an external data source. By integrating external trading signals, you can customize your bot. This article will guide you through how to incorporate external trading signals with Gunbot and help you understand the advantages of doing so.
Note: This guide assumes you already have some experience with Gunbot as a trading automation tool. If you're new to Gunbot, we recommend reading our introductory guides before continuing.
Integrating trading signals into Gunbot allows you to tap into the advanced analytics capabilities of external tools, such as TradingView. These tools offer sophisticated indicators and analysis techniques that can generate signals for precise entry and exit points, giving you an edge in the market.
To connect trading signals to Gunbot, you need an external service capable of triggering webhooks or sending signals through emails that Gunbot can process. TradingView is a popular choice for this. Here, we walk you through how to set up this integration step by step.
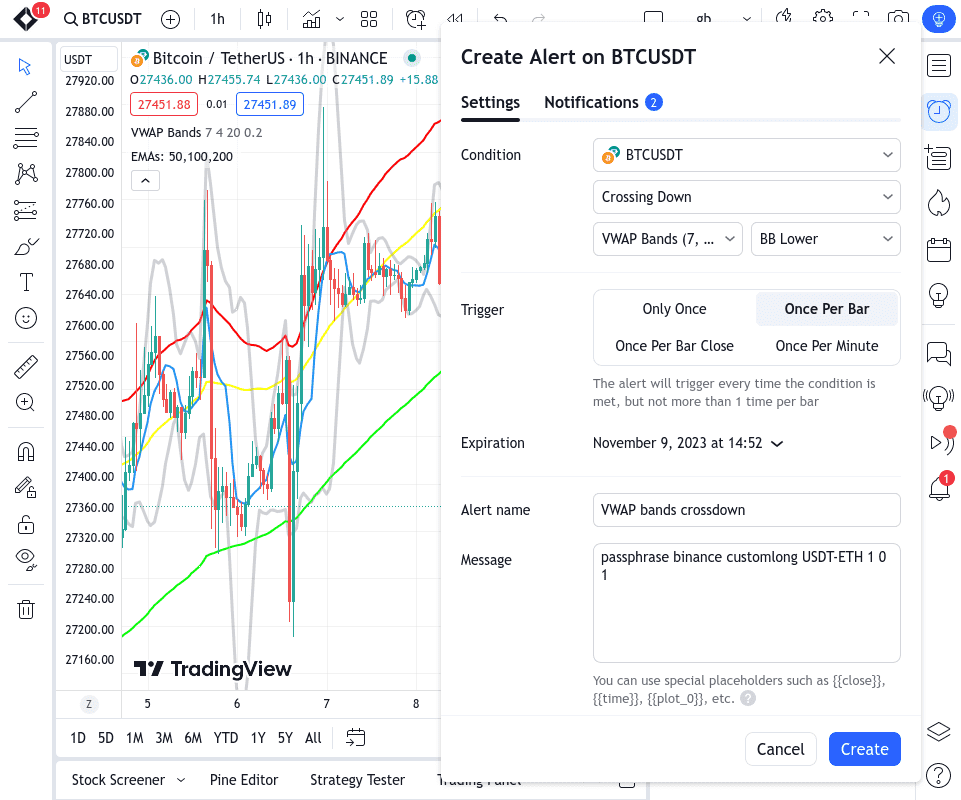
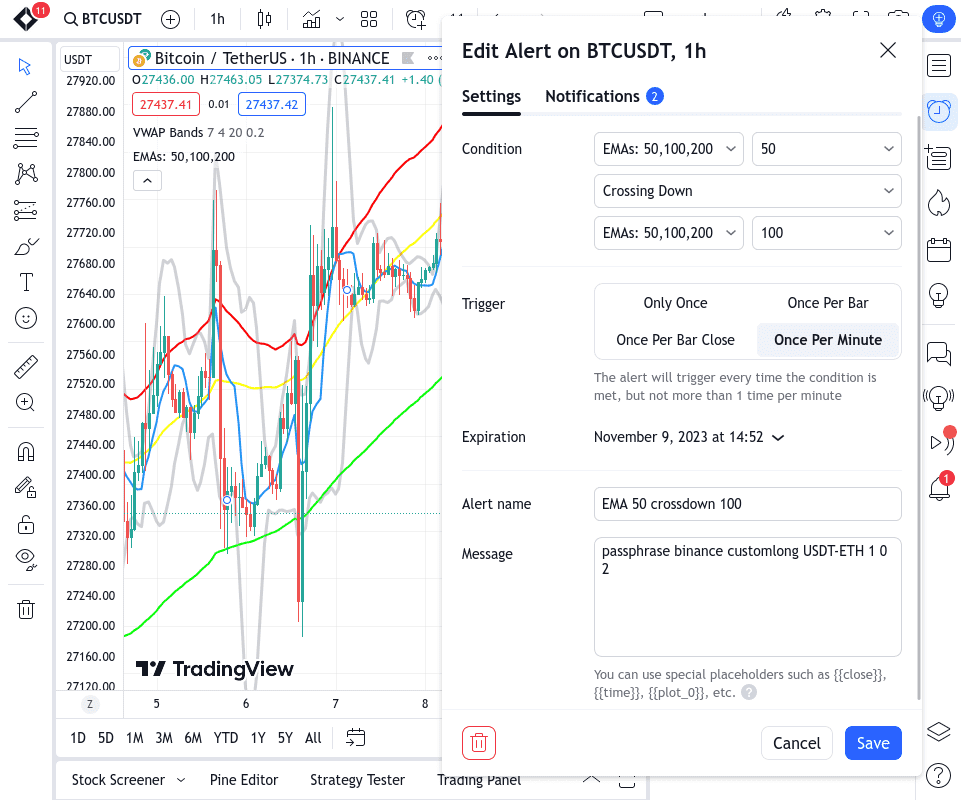
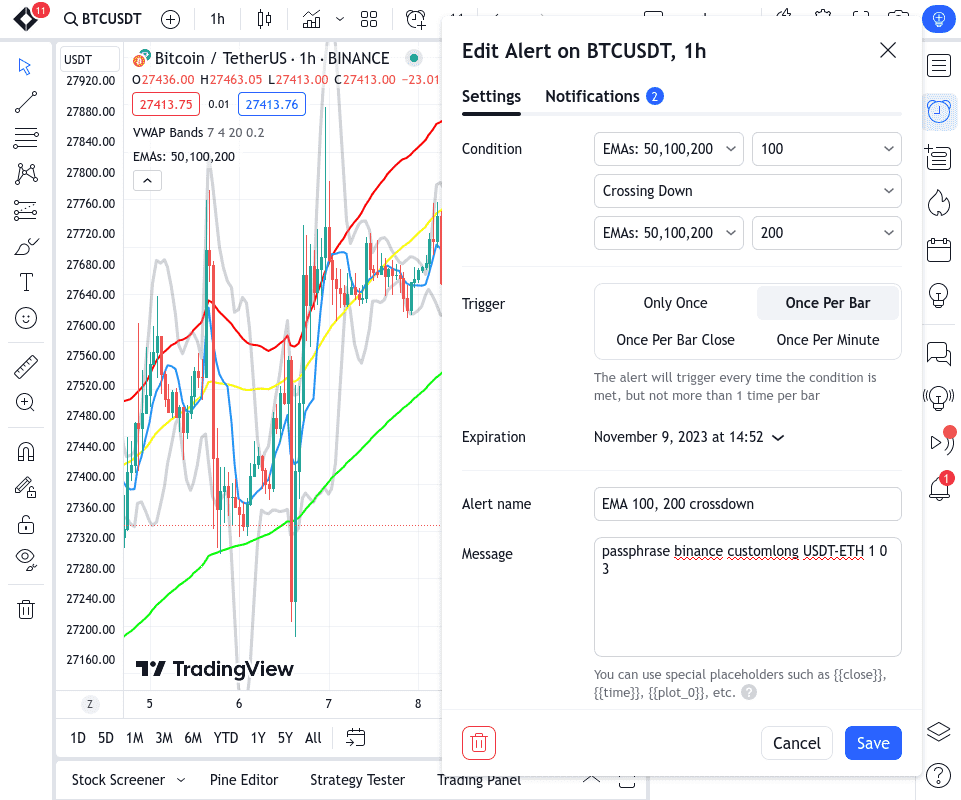
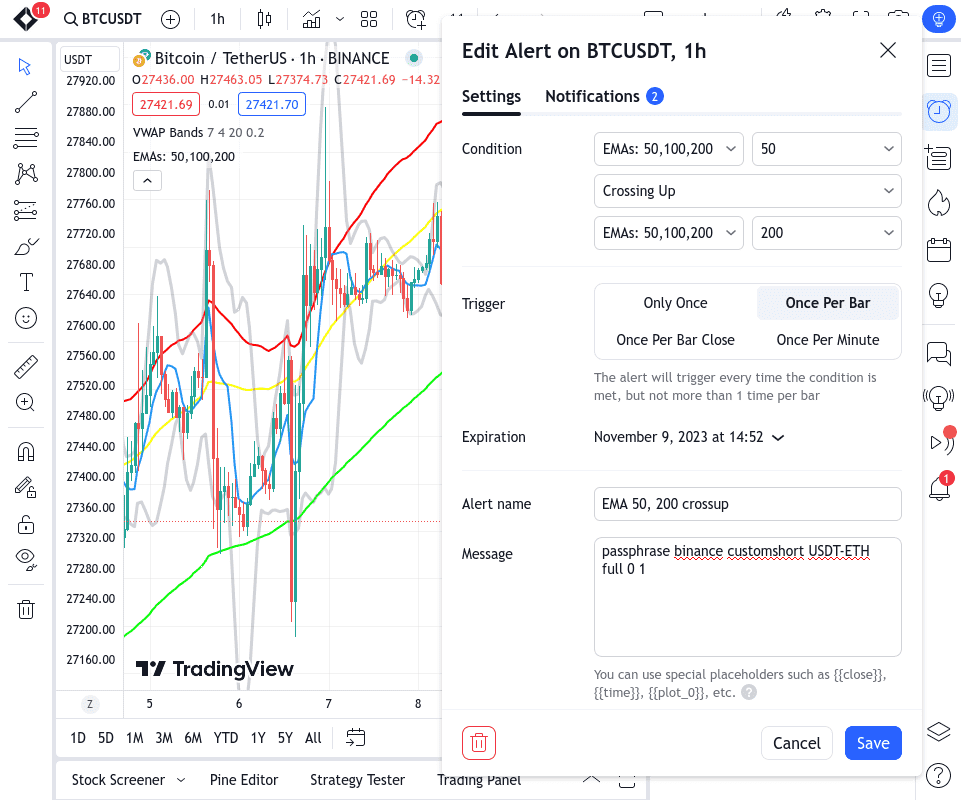
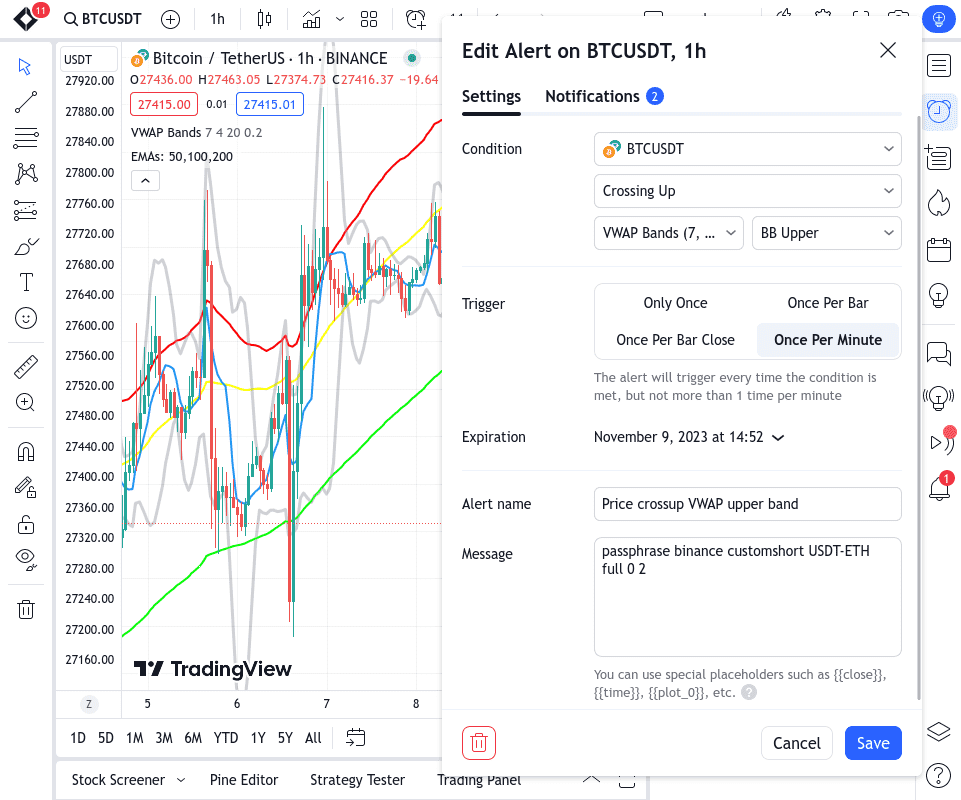
Start by setting up the alerts in TradingView. Format these alerts so Gunbot can accept them. A typical alert might look like this:
123456 binance buy USDT-BTC 0.1 42553.4
(passphrase, exchange, order type, pair, amount, price)
Passphrase: This makes it so only signals sent by you are processed. You can set up this passphrase in Gunbot's configuration settings.
Exchange, Order Type, Pair, Amount, Price: These fields provide the specifics of the trade.
Set Up Your TradingView Account
Configure the desired indicators and alerts in TradingView. Use their placeholders to dynamically fill values like the current price, allowing for a more responsive signal.
Enable Webhook Listener in Gunbot
Go to your Gunbot settings and enable the webhook listener. This will allow Gunbot to receive trading signals from external sources. You will need the IP address of your Gunbot instance to create the webhook URL.
Connect the Webhook URL in TradingView
In TradingView, set up an alert to send data to the webhook URL. Use the format Gunbot expects and check that the IP address of your Gunbot instance is correct.
Tip: Always test your integration with a small trade before relying on it in live markets. This confirms that your webhook and signal settings are working correctly.
Integrating external signals is just the beginning. Fine-tuning your overall strategy based on these signals will maximize their impact on your trades. Here are a few tips:
Use Multiple Indicators to Filter Trades
Combining several indicators can help you confirm trends and minimize false signals. For example, combining RSI, MACD, and volume indicators can help validate potential buy/sell opportunities more effectively.
Refine Your Risk Management
Automated trading is not immune to market risk. Adjust your Gunbot's risk management settings, including stop-loss thresholds and profit-taking strategies, according to your risk tolerance. External signals can help fine-tune these parameters by providing precise entry and exit points.
Monitor Performance and Adjust Regularly
Regularly evaluate the success of trades triggered by your signals. Review your strategy periodically and refine your alerts based on past performance. Market conditions can change quickly, and a strategy that worked last month may need adjustments today.
Stay Up to Date with Market Conditions
Use TradingView's extensive market analysis tools to keep up with the latest trends. Adjust your signals accordingly to keep your automated trading strategy effective as market dynamics shift.
By following these optimization steps, you can get the most out of Gunbot's automation capabilities, reducing manual intervention while still staying in control of your strategy.
Integrating external trading signals with Gunbot opens up more possibilities to personalize and improve your trading strategy. By incorporating advanced data analysis from tools like TradingView, you gain access to better market insights, enabling smarter trades and more consistent profitability. Test your setup thoroughly and continue refining your strategies as you gather more data.
For more tutorials and tips on Gunbot, be sure to check out our other articles.
Alpaca Integration: Automate Stock and ETF Trading with Gunbot
Gunbot is expanding beyond crypto. With our new integration for Alpaca, you can now automate trading strategies on U.S. stock and ETF markets, using the same tools and logic you already know from crypto trading. It’s a straightforward way to bring automated strategy execution into traditional finance, without having to learn an entirely new system.
info
This is a new integration. Some things may not work perfectly yet. We're actively tracking issues and improving stability as we go.
We integrated Alpaca because it gives us access to traditional markets in a way that aligns with how Gunbot works. It’s a clean, developer-friendly brokerage platform with a reliable API, and it supports a wide range of U.S.-listed equities and ETFs.
For us, this isn’t about features like free trades or bells and whistles, it’s about enabling strategy-based trading in new markets, with full control and minimal friction. Alpaca allows Gunbot to connect directly to your brokerage account, execute trades based on your settings, and give you the flexibility to automate strategies outside of crypto.
The Alpaca integration opens up the full range of Gunbot's automation tools for use in traditional asset markets. This includes running multiple bots simultaneously, customizing trade logic, and reacting to market movements in real time, just like you would with crypto.
You can now apply Gunbot strategies to TradFi markets like stocks and ETFs. If you're focused on large-cap stocks, sector-specific ETFs, or a mix of both, Gunbot allows you to automate your trades based on whatever logic fits your goals, trend following, DCA, rebalancing, or volatility-driven setups.
If you’ve built strategies in Gunbot that work well in crypto, many of them can be adapted for traditional markets. You can also create new ones specifically designed for equities, taking into account factors like market hours, daily price ranges, or reduced volatility.
This integration lets you diversify across asset classes while keeping your trading fully automated. It’s useful if you want to reduce dependence on a single market or build a more balanced portfolio, all without adding more manual work.
Like with other exchanges Gunbot supports, you stay in full control of your account and funds. Gunbot connects to Alpaca via API keys, executes trades based on your chosen strategy, and doesn’t hold or move your assets.
Setup is quick:
Connect your Alpaca account using API keys
Configure a strategy, choose from Gunbot’s library or build your own
Let Gunbot run the strategy and handle execution
Everything runs locally or on your server, just like with crypto, giving you the same security and transparency you’re used to.
This is a practical way to bring Gunbot into new territory. If you’ve relied on Gunbot to automate crypto trading, Alpaca offers a bridge into traditional finance, without needing a new system, new tools, or a steep learning curve.
This does not replace crypto automation. It lets you use the same automation stack in more places. If you want to trade stocks, manage long-term ETF positions, or build a mixed portfolio, Gunbot can now handle it for you, on your terms.
Hyperliquid Integration: Trade Spot and Perps with Gunbot on DeFi
We’re rolling out Gunbot support for Hyperliquid, covering both spot and perpetual swap (derivatives) trading. This is a practical step for us and for the many traders in our community who are looking to automate strategies on decentralized platforms, without giving up control of their funds or switching tools.
info
This is a new integration. Some things may not work perfectly yet. We're actively tracking issues and improving stability as we go.
When we evaluate new integrations, we look for technical reliability, a good trading experience, and real utility for Gunbot users. Hyperliquid checked those boxes. It’s a decentralized exchange with fast execution, low fees, and enough liquidity to make automation viable for both spot and perps markets. If you want the exchange-specific details, see our Hyperliquid trading bot overview.
This isn’t about chasing trends. We’re integrating Hyperliquid because it works well with the way Gunbot operates, and it opens up more flexibility for traders who want to try self-hosted DeFi trading automation without compromising on the speed or efficiency they’re used to.
Gunbot’s integration with Hyperliquid covers both market types: spot and perpetual swaps. That means you can automate trades across a wider range of strategies, all while keeping your assets in your own wallet.
You can use Gunbot to automate spot trading directly on Hyperliquid. If you're running grid bots, dollar-cost averaging (DCA), or basic market making, it works just like it does on centralized exchanges, except now, you're doing it directly from your wallet, in a fully decentralized environment.
We’ve also added full support for Hyperliquid’s perps markets. If you use leverage, hedge positions, or run volatility-based strategies, you can now automate all of that on-chain. This includes long/short setups, trailing stop strategies, or more advanced logic using Gunbot’s customizable strategy engine.
These tools can help traders manage risk and maintain consistency, especially in markets where conditions change quickly and manual trading becomes a bottleneck.
Setting up Gunbot for Hyperliquid is straightforward. There’s no deposit step, Gunbot interacts with Hyperliquid directly. This means your funds never leave your control, which is one of the core advantages of DeFi trading.
As always, Gunbot runs locally or on your own server, just like it does for any other exchange. Your data stays with you, and the bot trades according to your strategy parameters.
We’re seeing more and more traders move at least part of their activity into DeFi, looking for transparency, better security models, or just different market opportunities. By adding support for Hyperliquid, we’re giving Gunbot users the option to automate trades in this environment without switching tools or giving up functionality.
This isn’t a replacement for centralized exchanges, but an expansion. Gunbot continues to support a broad range of CEXs, and now also offers native support for trading on Hyperliquid.
If you’ve been thinking about experimenting with decentralized trading but didn’t want to manage everything manually, this makes it easier to start. You can apply the same strategies you already use, test new ones, or adapt to different market conditions, all without giving up control of your assets.
PancakeSwap Integration: Trade DeFi on BSC with Gunbot
Gunbot now supports PancakeSwap, making it easier to automate token swaps directly on Binance Smart Chain (BSC). This integration brings our trading automation toolkit to one of the most widely used decentralized exchanges, giving Gunbot users more options to run strategies in a fast, low-cost environment, without relying on centralized platforms. It is a practical extension of our DeFi trading bot automation stack.
info
This is a new integration. Some things may not work perfectly yet. We're actively tracking issues and improving stability as we go.
PancakeSwap has earned its place as a core part of the BSC ecosystem. It offers a familiar trading experience, wide token coverage, and consistently low fees, making it a practical choice for running automated strategies.
We’re not adding PancakeSwap just because it’s popular. We added it because the infrastructure works well for what Gunbot does: reliable, rules-based automation that interacts directly with DeFi protocols. With deep liquidity and an expanding set of token pairs, PancakeSwap gives traders the flexibility to deploy bots across a wide range of assets and market conditions.
With this integration, Gunbot users can now automate token swaps across BSC using the same strategies and tools already available for other platforms. Here’s what that looks like in practice:
You can run fully automated trading strategies on PancakeSwap’s swap markets, using your own wallet. If you want to scalp smaller-cap tokens, run a DCA strategy, or apply a grid system across volatile pairs, Gunbot handles execution according to your rules, no centralized custody required.
Most of Gunbot’s existing strategies can be used out of the box. This includes setups for volatility trading, rebalancing, and passive market making. You can also customize your own logic to suit the kinds of tokens and pairs you want to focus on in the BSC space.
Some PancakeSwap markets offer instruments with use-like behavior or mechanics that mimic perps-style exposure. These can also be automated using Gunbot, giving traders access to more advanced DeFi products without manual execution.
BSC continues to be a high-volume chain for retail traders, and PancakeSwap remains one of its most accessible tools. By adding PancakeSwap support, we’re opening the door for more flexible and affordable trading strategies in that environment.
If you're focused on smaller tokens, looking for faster trade execution, or just want to avoid CEX friction, this integration adds one more way to trade the way you want, with automation that runs locally and keeps your assets in your control.
Gunbot Xmas 2024 Trading Tournament \u2013 Watch Live
The Gunbot Xmas 2024 Trading Tournament is happening right now, and it’s been a blast to watch so far. Running from 27 December 2024 to 26 January 2025, this event brings together some of the most creative minds in the Gunbot community. If you love trading, bots, or just seeing clever ideas in action, this is for you.
This isn’t just a regular competition. It’s a chance for Gunbot traders to show off how they use the platform in all sorts of clever ways. We’re seeing strategies that range from straightforward builder setups to custom-coded logic that’s built from scratch. It’s good to see what people are building, and no two approaches are the same.
Here’s a quick overview of the kinds of strategies that are competing:
Builder Strategies – Using Gunbot’s built-in tools to craft smart, adaptive setups.
Native + Tweaked Logic – Taking a default strategy and supercharging it with personal touches through autoconfig.
Custom Code – Completely unique trading algorithms written specifically for this tournament.
The variety here is what makes it so cool. If you're a new trader or a seasoned dev, there’s something to learn from these setups.
The leaderboard is not based only on who makes the most money. It uses a performance metric that accounts for consistency, risk, and overall efficiency. If you’re curious about how it all works, there’s a great write-up here: Comparing Trading Bot Performance, this post got updated with the full code for the metric.
Honestly, it’s just fun to watch. The Gunbot community is a tight-knit group, and events like this are a reminder of how much creativity and innovation people bring to the table. If you're watching for inspiration or just for the drama, it’s worth checking out.
So grab a snack, drop into the livestream, and see what’s happening. Who knows? You might walk away with an idea for your next setup.
Boost Your Gunbot Setup with exoTrader: A Custom Strategy from the Community
If you've ever traded crypto, you know the markets are as unpredictable as a cat chasing a dozen laser pointers. That's where tools like Gunbot and strategies like exoTrader come in handy. Developed by @flightcommander, a fellow Gunbot enthusiast, exoTrader aims to smooth out the ups and downs of crypto trading with a smart, adaptive approach.
This isn't just another trading strategy; it's crafted by someone who's been in the trenches with the rest of us. If you're ready to see what exoTrader has to offer, keep reading for a closer look at its features, how it works, and why it might be worth adding to your setup.
info
This strategy is built by a Gunbot community member. It's an excellent showcase of how far you can take custom strategies in Gunbot.
exoTrader is a custom strategy script built by a Gunbot user who understands the challenges of crypto trading. Instead of spending hours staring at charts, exoTrader takes over, analyzing market conditions with a mix of technical indicators. It is a good example of Gunbot's custom strategy capabilities.
exoTrader is a community project created by @flightcommander and shared with Gunbot users. It reflects how Gunbot traders share tools, test ideas, and help each other avoid avoidable mistakes.
exoTrader doesn't just guess when to buy or sell. Instead, it uses multiple indicators and adaptive strategies to guide decisions. Here's the rundown:
Multi-Indicator Analysis: exoTrader relies on a combination of indicators to paint a clearer picture of market conditions. It's like getting several expert opinions before making a move.
Adaptive Behavior: This strategy isn't static. It evolves as the market shifts, essential for crypto, where things change faster than you can hit refresh.
Risk Management Tools: exoTrader isn't just about making trades, it's about protecting your capital. Break-even calculations and partial selling are part of its arsenal to minimize losses.
User-Friendly Interface: You don't need to be a tech wizard to use it. Visual cues and clear settings make it easy to understand, letting you focus on your trading goals.
Performance Metrics: Trading is all about results. exoTrader provides insights into its performance, so you can make tweaks and optimize over time.
Wave Trend measures price momentum, acting as an early warning system for trend reversals. It identifies when a trend is slowing, which often hints at an upcoming shift. It's like noticing the wind picking up right before a storm.
RSI is a classic indicator, gauging how quickly prices are moving. It helps identify overbought or oversold conditions, telling you when something might be overpriced or undervalued. If RSI signals "overbought!", it could be time to sell; if it says "oversold!", a buying opportunity might be at hand.
Bollinger Bands assess price volatility by creating a range where prices typically bounce around. If prices break out of this range, it signals potential action. Think of it like someone suddenly sprinting, worth paying attention to.
Heikin-Ashi candlesticks smooth out the noise in regular charts, making trends easier to spot. It’s like turning down the static on the radio so you can hear the song clearly, ideal for seeing if a trend is gaining or losing steam.
Once a trade is open, exoTrader actively monitors it and makes adjustments as market conditions change. No need for constant monitoring, it has your back.
A big part of exoTrader is its risk management. Break-even calculations help you set exit points to minimize losses. It also supports partial selling, letting you take some profit while keeping a position open for more gains if the market keeps moving in your favor.
Here are some reasons why exoTrader might be worth your attention:
Balanced Market Analysis: By using multiple indicators, exoTrader provides a well-rounded view of the market, giving it an edge over simpler strategies.
Adapts to Market Changes: Crypto markets can swing dramatically, and exoTrader’s adaptive approach helps keep it effective no matter what happens.
Risk Management Features: With built-in tools to protect your capital, exoTrader prioritizes long-term success, not just short-term wins.
Community Support: Created by a Gunbot community member, exoTrader is supported by other users, offering help, updates, and discussions, trading is better when you’re part of a team.
Everyone has different trading goals, so customize the settings to suit your risk tolerance and style. Experiment with trade size, order types, and indicator parameters to find what works for you.
If you're looking to automate your crypto trading with Gunbot, exoTrader is worth checking out. It uses multiple indicators, adapts to changing markets, and has risk management features to help keep your trading smooth. If you feel this strategy fits your trading style, it could be a great match.
Interested in seeing if exoTrader can make a difference for you? Check it out and join the conversation with other Gunbot users on Telegram.
Managing multiple trading bots across different servers and exchanges can be a challenge. Gunbot Monitor is built for power users who need an efficient way to centralize control, monitor performance, and streamline bot management. While Gunbot’s core interface is reliable, Gunbot Monitor provides a unified view that saves time and boosts productivity for users running many instances at once.
With Gunbot Monitor, you can oversee all your bots from one interface, no matter how many servers or exchanges you’re using. Instead of logging into each bot individually, the dashboard gives you a real-time overview of every running instance in one place. This simplicity allows you to focus more on strategy and less on repetitive tasks.
Tracking the financial performance of your bots is easy with Gunbot Monitor. You can instantly view the total profit and loss (PNL) across all your active instances, providing a quick snapshot of how your entire bot fleet is performing. No more switching between multiple screens to gather data, everything you need is right in front of you.
Gunbot Monitor doesn’t stop at basic stats. You also get advanced metrics like ROI, risk/reward ratios, and capital efficiency, all in one place. These insights help you fine-tune risk management and evaluate how effectively your capital is being used across your bots. Armed with this data, you can make better, data-driven decisions while building on the full Gunbot feature set.
Managing your bots has never been easier. With Gunbot Monitor, you can start, stop, modify, and edit each instance directly from the dashboard. There’s no need to log into each bot separately, remote access lets you make adjustments quickly, all with the same security features as Gunbot’s local interface.
Need to adjust your trading pairs? With Gunbot Monitor, you can enable, disable, or delete pairs remotely from any location. This feature makes it easy to tweak settings without logging into each instance, speeding up the process of managing multiple pairs.
If you run multiple trading pairs, Gunbot Monitor shows a detailed breakdown of how each pair performs. Expand any instance to see real-time stats for individual pairs, giving you the granular insights needed to fine-tune performance at the pair level.
Security is a priority with Gunbot Monitor. It uses password protection and two-factor authentication (2FA) for both local and remote access, keeping your bots protected. Each instance has its own authentication, keeping unauthorized users out and your trading safe.
Staying informed is critical in trading. Gunbot Monitor sends real-time notifications via email or Telegram when something needs your attention, such as when a bot goes offline or a software update is available. This helps you react quickly and keep your bots running smoothly.
Gunbot Monitor is available for a one-time purchase of $59. Once you have it, all future updates are included. Simplify your bot management and take control of your trading with Gunbot Monitor.
Gunbot Monitor is designed for power users who need detailed control over many Gunbot instances. From advanced performance tracking to remote management capabilities, this tool centralizes the controls you need to optimize your trading strategies. If you're managing bots across different exchanges or tweaking individual pairs, Gunbot Monitor streamlines the entire process, letting you focus on making smarter trading decisions.
Comparing Trading Bot performance with the 'Daily Realized PnL per $1k' Metric
For everyone using a trading bot, the ability to optimize strategies and fine-tune their trading approach is important. One of the metrics that can help with this is Daily Realized PnL per $1k. If you've checked out the 'Compare Pairs' table on the main dashboard on one of the latest Gunbot alpha builds, you've probably noticed this new metric already. But what does it mean, and why is it useful?
In this post, we'll look at how this metric works, why it's useful for comparing different trading pairs and strategies, and how you can use it for better trading decisions. Let’s go straight to the math that makes this metric useful.
Daily Realized PnL per $1k tells you how much profit or loss you're making each day for every $1,000 of capital invested in a specific trading strategy or pair. Unlike abstract metrics like percentages or cumulative profit and loss, this value gives you a tangible dollar value that makes comparing different pairs and strategies much easier.
The goal here is to provide a standardized view of your trading performance. By converting performance into a common measure based on a $1,000 capital base, this metric allows traders to get a clear, apples-to-apples comparison between different pairs and strategies, helping you understand what's really working and what isn't.
Daily Realized PnL: The profit or loss made on trades that have already been closed, calculated daily. The "realized" part means that it only includes the profit or loss from trades that are completed, not the potential value from open trades. This gives you a realistic snapshot of your trading performance based on actual outcomes.
Per $1,000: This means we normalize the results to represent the profit or loss for every $1,000 invested. This normalization allows for easy comparisons, even if different trading strategies have varying capital allocations or operate with different base amounts. It’s an effective way to get to the core of how well your capital is working for you.
With Daily Realized PnL per $1k, you get a value that can be easily compared across different trading strategies, irrespective of the initial investment amount or market volatility. This makes it a handy metric for evaluating efficiency and performance without getting bogged down by the complexities of various capital inputs.
The calculation is based on multiple formulas that standardize the performance:
Average Capital Utilized:
Average Capital Utilized = Total Weighted Capital Utilized / Total Duration
Effective Capital Utilized:
Effective Capital Utilized = (Average Capital Utilized + Maximum Capital Utilized) / 2
Total Duration in Days:
Total Duration in Days = Total Duration from first to last trade.
This value is capped to use full days only, no fractional values are used.
Adjusted Daily Net Profit:
Adjusted Daily Net Profit = Total Net Profit / Total Duration in Days
Adjusted Daily Net Profit per $1,000:
Daily Realized PnL per $1k = (Adjusted Daily Net Profit / Effective Capital Utilized) * 1000
Where:
Total Weighted Capital Utilized: The cumulative amount of capital utilized during trading, weighted by the time it was held.
Total Duration: The total time period of trading activities, in days.
Daily Net Profit: The sum of profits from closed trades over the day. This value only includes realized gains and losses, providing an accurate picture of true profitability.
Effective Capital Utilized: This represents the average amount of capital actively used during trading and takes into account both the average and maximum capital that was utilized throughout the trading period. By using this figure, we account for capital fluctuations and provide a balanced view of efficiency.
This set of formulas allows you to get a consistent dollar value for your performance, making it easy to compare the efficiency of different trading strategies, even if the actual capital involved varies.
Let’s walk through a quick example to make it clearer. Suppose your Daily Net Profit from closed trades is $50, and during the day, your Effective Capital Utilized is $5,000. Plugging in these numbers:
This means you’re making $10 per $1,000 of capital used, per day. This straightforward calculation makes it easy to see how well your strategy is performing, without dealing with abstract percentages or complex ratios.
If you're trading multiple pairs or running different strategies, they can have widely varying performance metrics. For instance, trading a highly volatile pair like BTC/USDT might yield different returns compared to a less volatile pair like LTC/USDT. But the question is, how can you compare them effectively?
That’s where Daily Realized PnL per $1k becomes useful. It standardizes performance into a common unit that is relatable. Instead of comparing abstract performance percentages, you can see how much profit or loss each strategy would have generated if you had invested $1,000. This standardization is important when you want to choose the best-performing pair or strategy without being confused by differences in investment amounts, risk profiles, or market volatility.
Many traders find it hard to wrap their heads around percentages or highly abstract metrics - they don’t always feel real. However, when you see a value like “$8 per day per $1,000,” it’s a lot more intuitive. It lets you understand the performance of a strategy in a practical, tangible way. You can immediately gauge how well a strategy might scale with more capital or whether it’s underperforming compared to others.
For example, if Strategy A yields $15/day per $1k and Strategy B yields $8/day per $1k, it’s easy to see which one is more efficient in generating profits. This helps make faster decisions when adjusting your trading approach.
One key insight offered by this metric is understanding how effectively your capital is being used. The function that calculates Daily Realized PnL per $1k takes into account both the average capital utilized and the maximum capital utilized throughout your trading period. This means the metric shows how much profit you made and how efficiently you used the available capital to make it.
For example, if you’re using $10,000 but only making a small profit each day, your Daily Realized PnL per $1k will reflect that inefficiency. On the other hand, if you’re making high returns on smaller capital allocations, this metric will highlight that strength.
This efficiency measure is important when you’re balancing your risk-reward ratio. For instance, if you find that Strategy C has a high daily PnL per $1k but consistently ties up a significant amount of capital, you may want to reconsider if it's the best use of your funds or if other strategies could offer better capital efficiency. It helps you decide whether reallocating your capital might yield better results overall.
Let’s walk through an example. Imagine you’re comparing two trading strategies:
Strategy A:
Average capital utilized: $5,000
Daily net profit: $50
Strategy B:
Average capital utilized: $2,000
Daily net profit: $25
Without standardization, it looks like Strategy A is more profitable. But let's use Daily Realized PnL per $1k to really see the difference:
Strategy A: (50 / 5000) * 1000 = 10 per day per $1k
Strategy B: (25 / 2000) * 1000 = 12.50 per day per $1k
In this case, Strategy B is more efficient at generating profit relative to the capital invested, despite having a lower absolute profit. By using this metric, you can immediately see which strategy is giving you better returns on a per-$1,000 basis, helping you make better decisions on where to allocate your funds.
Another scenario might involve different timeframes or trading styles, such as swing trading versus day trading. This metric is still valuable for comparing these differing styles on a level playing field. For example, even if a swing trade takes longer, you can normalize the profit generated to see how it measures up against quicker, higher-frequency trades in terms of profitability per $1,000 of capital utilized.
Where to Find "Daily Realized PnL per $1k" in Gunbot
You can find the Daily Realized PnL per $1k metric in the 'Compare Pairs' table on the main dashboard of the Gunbot interface. This table helps you evaluate how your different trading pairs perform in real time.
When you look at the 'Compare Pairs' table, you’ll see a breakdown of all your active pairs along with various performance indicators. The Daily Realized PnL / $1k column provides that tangible dollar-value perspective, allowing you to see which pairs are most effectively generating profits relative to their allocated capital. It takes away the guesswork and lets you make evidence-based decisions that are rooted in actual performance metrics. You can also compare real Gunbot performance against live shared runs.
How to Use This Metric for Better Decision-Making
Identify Strong Performers: Use Daily Realized PnL per $1k to highlight which trading pairs or strategies are making the most profit on a standardized capital basis. This makes it easy to spot which strategies are outperforming the rest.
Reallocate Capital: Consider shifting your capital towards strategies that show consistently high Daily Realized PnL per $1k. This helps keep your money working as efficiently as possible. Reallocating to strong performers means maximizing your portfolio's potential.
Track Over Time: Pay attention to how the Daily Realized PnL per $1k changes over time. Sudden drops might indicate a strategy that needs attention or adjustments. It also provides a way to evaluate changes you make to a strategy and their impact over time.
For instance, if you notice that your Daily Realized PnL per $1k has been decreasing for a particular trading pair, this could indicate a shift in market conditions, inefficiency in your current approach, or the need to reconfigure your trading settings. By tracking these changes, you gain insights that help you adapt and stay ahead.
Common Challenges with Traditional Trading Metrics
If you've spent any time trading or looking at crypto trading bots, you know that the metrics people use to measure success aren’t always as straightforward as they seem. We’ve got staples like Return on Investment (ROI), Sharpe Ratio, Max Drawdown, Win Rate, and Profit Factor. Sure, they provide insight, but they can also be pretty confusing. Often, these metrics don’t tell the whole story, and if you're not careful, you might end up making decisions based on half the picture. Let’s break down some of these metrics and see why the Daily Realized PnL per $1k might be a more user-friendly option.
Time Frame Confusion: ROI gives you a percentage return, but it doesn’t tell you over what period that return happened. So, if you see a 10% ROI, was that from a single month or a whole year? Without a timeline, it’s hard to gauge how fast or slow things are really moving.
Capital Efficiency Ambiguity: ROI doesn’t say much about how well the capital was used during that time. For example, did the strategy tie up a ton of capital for a small return? When using crypto trading bots, this could mean missing out on more efficient opportunities.
Example:
Imagine Trader A and Trader B both report a 15% ROI. Trader A achieved this in six months, while Trader B took two years. On the surface, they look the same, but with the time frame in mind, Trader A is clearly more efficient. It’s these kinds of details that get lost with ROI.
Complex Calculations: The Sharpe Ratio gets a bit math-heavy, and for most of us, understanding the deeper statistical stuff isn’t exactly easy. Especially if you're juggling multiple automated trading strategies, it can get overwhelming.
Volatility Misinterpretation: A lower Sharpe Ratio might make you think a strategy’s risky, even if it’s actually right in line with your own risk tolerance. This number alone doesn’t really tell the whole story.
Example:
Say you’re comparing two strategies with Sharpe Ratios of 1.2 and 0.8. It seems like 1.2 is better, but without knowing the details, like what kind of volatility you’re looking at, it’s hard to decide which is actually the right fit for you.
Overemphasis on Worst Cases: Max Drawdown tells you the worst loss from a peak, which can be intimidating. Sometimes, it’s just a blip on the radar, but this number can scare traders away from potentially solid strategies.
Lack of Frequency Insight: Max Drawdown doesn’t tell you how often these big drops happen. So, a strategy could have one bad moment or it could have them all the time, but you won’t know from this number alone.
Example:
Take a strategy with a max drawdown of 20%. That sounds risky, right? But what if this drawdown happened only once in five years and the strategy recovered quickly? You might miss out on a strong performer if you just look at this metric without more context.
False Sense of Security: High win rates can be deceiving. Just because a strategy wins often doesn’t mean it’s profitable. Big losses can easily wipe out those small wins.
Neglecting Profit-Loss Ratio: The size of wins versus losses matters, but win rate alone doesn’t give you that context. You could have a high win rate but still end up losing money if your losses are big enough.
Example:
A strategy with a 70% win rate might sound like a dream, but if the average loss is three times the average win, you’re in trouble. It’s easy to focus on the win rate and forget about the bigger picture.
Abstract Ratio: Profit Factor is the ratio of gross profits to gross losses. For people wanting concrete answers, this can feel a bit too abstract and not immediately useful.
Impact of Outliers: Sometimes, one big win or loss can skew this number. Without understanding what’s behind it, users might get the wrong impression of how stable a strategy is.
Example:
A Profit Factor of 1.5 suggests profitability, but if it’s based on just one big win, it might not reflect the strategy’s typical performance. It’s these outliers that can really distort things.
Why "Daily Realized PnL per $1k" Is Easier to Work With
It’s more down-to-earth, and provides comparable data after a relatively short time of running a strategy. Do note that results get more realistic once a trading pair has seen some serious moves downwards, and significant capital got invested - because this allows the metric to factor in a more realistic use of capital.
Straightforward Measurement:
It’s in dollars, per $1,000 invested daily. Simple. You know exactly how much you’re making or losing each day, without any complicated math.
Time Frame Clarity:
By reporting daily, there’s no guessing about the time frame. You can see how fast the strategy’s moving and get a real sense of its performance.
Capital Efficiency Visibility:
This metric standardizes performance per $1,000, so you can compare strategies without worrying about the total capital involved. It makes things more apples-to-apples.
Focus on Realized Gains:
Only closed trades are considered, so you’re looking at actual profits or losses. This avoids the ups and downs of unrealized positions, giving you a clear picture.
Updated to support futures short positions. Handles negative order amounts, uses signed position size, absolute exposure deltas for capital utilization, and always accrues realized PnL.
functionreturnOnThousand(orders){
if(!Array.isArray(orders)|| orders.length===0){
return0
}
// Sort orders by time to ensure chronological order
orders.sort((a, b)=> a.time- b.time);
// Initialize variables
let positionSize =0;// signed: long > 0, short < 0
let capitalUtilized =0;// notional exposure tied up in open positions
let totalNetProfit =0;// realized PnL
let totalWeightedCapitalUtilized =0;// Sum of (Capital Utilized * Duration)
let totalDuration =0;// Total time in milliseconds
let previousTime = orders[0].time;// Time of the first order
let maxCapitalUtilized =0;// Maximum capital utilized
The Daily Realized PnL per $1k metric helps you make sense of trading bot results, especially when you work with multiple pairs and strategies. By converting abstract performance into a concrete dollar value, it makes comparisons much clearer, helps identify more efficient strategies, and ultimately allows you to make smarter trading decisions.
It also helps you track capital efficiency, so you can see whether profits are coming from efficient capital use or from tying up too much money. It’s about maximizing returns while keeping your capital working effectively.
Next time you’re in the Gunbot dashboard, take a closer look at the 'Compare Pairs' table. Use the Daily Realized PnL / $1k column to optimize your strategies and check that you’re getting strong returns from your capital. New or experienced, you can use this metric to make more informed decisions. When you are ready to scale from testing to production, compare Gunbot plans and pick what fits your setup.
Visual Studio Code extension for custom strategy devs
We've built a new Gunbot Custom Trading Strategy Snippets extension for Visual Studio Code. It provides a collection of pre-built snippets to make coding your trading strategies smoother and easier, minimizing the need to repeatedly check documentation for how methods work and which data is available. This extension helps you quickly access methods and data points that Gunbot supports.
The Gunbot Custom Trading Strategy Snippets extension includes a variety of ready-made JavaScript snippets specifically designed for Gunbot strategy development. Here’s what it offers:
Immediate access to Gunbot methods: Save time and avoid manual lookups by inserting common trading commands like buyMarket() or sellLimit() directly from the snippet library.
Snippets for technical indicators: Easily include popular technical indicators, such as Moving Averages or RSI, into your strategy without needing to write the logic from scratch.
Integration with live data points: Snippets are designed to work with live data points supported by Gunbot, which can simplify integrating real-time market data into your strategies.
Snippet sidebar for easy browsing: A dedicated sidebar in VS Code helps you quickly locate and insert the right snippets for your strategy.
For developers working on custom Gunbot strategies, this thing is a timesaver, but above all it reduces the hassle of having to frequently reference documentation to remember method names or how to call certain data points. With the snippets readily available, you can avoid interruptions to your workflow and focus on fine-tuning your strategy's logic.
Streamlined Prototyping: The snippets library allows you to rapidly set up key parts of a strategy. Instead of writing common methods manually, you can insert a snippet, make small customizations, and move forward faster.
Reducing Documentation Overhead: One of the main advantages of the extension is that it reduces the need to look up method documentation frequently, which can help developers stay focused on their code.
Let’s look at an example. Suppose you want to place a limit sell within your Gunbot strategy and do so using a promise chain. Normally, you'd need to reference the method name and its parameters in the documentation, and remember how to do the .then chain. With the extension, you just type the prefix sellLimit, select the then variant and move on.
// Example of placing a limit buy order in Gunbot, in this case with a chained .then and .catch
This extension is open source, and contributions are welcome! If you have your own snippets that could benefit other Gunbot developers, consider sharing them with the community. Here's how you can contribute:
The Gunbot Custom Trading Strategy Snippets extension is a useful tool for any developer working with Gunbot custom strategies. With instant access to key methods, technical indicators, and live data points, it helps simplify the trading strategy development process and reduces the need to constantly reference external documentation. If you're developing Gunbot strategies, this extension is a great addition to your toolkit.
Meet Gunbot Guru: Your AI Assistant for All Things Gunbot
Gunbot Guru is designed to help users navigate the complexities of Gunbot, if you are a beginner trying to understand the basics or an experienced trader looking to automate and customize your strategies.
With access to all documentation and definitions for creating valid autoconfig jobs and custom strategies, Gunbot Guru is here to improve your trading experience by providing instant, detailed assistance.
Link to Gunbot Guru, on ChatGPT (accessible with free account)
Gunbot Guru exists to bridge the gap between complex crypto trading bot configurations and user accessibility. While Gunbot offers a reliable suite of tools and features for cryptocurrency trading, understanding and using these features can be difficult, especially for new users. Gunbot Guru simplifies this process by providing clear, concise answers and step-by-step guidance. If you need a full product map while using it, browse the full feature overview.
This is not a human support replacement. We hope it mainly improves the experience of interacting with documentation.
Recently, OpenAI opened up access to custom GPTs for their free users, making it easier for everyone to create and use specialized AI assistants like Gunbot Guru. Using the latest GPT-4o architecture, Gunbot Guru is designed to provide accurate and detailed responses based on the most current data available. However, as with any AI, it is experimental, and we cannot guarantee that it always provides correct information. Always double-check critical details and consult official documentation or support channels when needed.
The capabilities of Gunbot Guru are made possible by recent advancements in AI technology. Just a year ago, creating a custom AI that could understand and interact with users on such a detailed level was not feasible. With the latest GPT-4o architecture, OpenAI has enabled us to develop specialized assistants that can provide custom support and information. This is an experimental GPT, and while it strives to provide accurate information, it's important to double-check critical details and consult official documentation or support channels when needed.
If you're new to Gunbot, Gunbot Guru can help clear up any doubts you have. Here’s an example of a step-by-step guide on how to set up your first trading pair using Gunbot Guru:
Question: "How do I set up my first trading pair on Gunbot?"
Answer:
To set up your first trading pair on Gunbot, follow these steps:
Select Market Type: Choose 'spot' as your market type in the Gunbot wizard. This can be changed later if needed.
Connect to an Exchange:
Select your exchange from the list.
Enter your API credentials (API key and secret).
Click 'update exchange settings' to save your input.
Add a Trading Pair:
In the Gunbot interface, select the 'add pair' button.
Choose your preferred trading pair from the list. For example, you can select USDT-BTC.
Configure the Trading Pair:
Choose the 'stepgrid' strategy for both buying and selling. This strategy is suitable for frequent, smaller trades.
Set the trading limit. For example, if you have 2500 USDT and want to distribute it over 50 buy orders, set the trading limit to 50 (2500 / 50 = 50 USDT per trade).
Restrict the maximum investment to 2500 USDT to make sure the crypto trading bot does not exceed this limit.
Optional: Activate Telegram Notifications:
You can activate Telegram notifications to get immediate updates on your trades. This step is optional and can be done later.
Select Interface Mode:
Gunbot offers two interface modes: Basic Interface and Advanced Interface. Choose the mode that best fits your experience level. The Basic Interface is recommended for new users.
Start Trading:
Once your pair is set up, click the 'start bot' button to begin trading.
Monitor Trades:
Use the Gunbot interface to monitor your trades in real-time. The interface provides essential information such as break-even points and target goals.
For more detailed guidance, refer to the Gunbot documentation and support pages.
For more examples and detailed explanations, refer to the Gunbot documentation here.
Example Interaction: Resolving Common AutoConfig Job Issues
Question: "What are common issues with AutoConfig jobs and how can I resolve them?"
Answer:
Here are some common issues with AutoConfig jobs in Gunbot and how you can resolve them:
Jobs Not Running
Check that AutoConfig is enabled in your Gunbot setup. You can enable it through the browser interface on the AutoConfig page.
Check that each job you want to run is enabled. Each job has an option to enable or disable it.
Verify the schedule format of the job. AutoConfig jobs use a cron-like schedule format. If the schedule is not correctly formatted, the job will not run. Use tools like crontab-generator.org to generate the correct schedule format.
Configuration Conflicts
When scheduling multiple jobs, avoid conflicts from simultaneous configuration changes. Only the first job to finish will apply its changes if they run concurrently. The others will wait for another chance.
Undefined Data Errors
Use filters to check if the data exists before using it in an expression. For example, add a filter that checks if the data has a value greater than 0 before using it in a calculation.
Manual Changes During Fast Schedules
Avoid making manual setting changes through the browser while AutoConfig jobs are running, especially when using very fast schedules. This keeps the trading bot configuration consistent.
High API Usage
Limit the duration and frequency of ticker data collection jobs. Do not permanently run ticker collection jobs while running other AutoConfig jobs. High API usage can slow down Gunbot performance.
Incorrect Pair Data
Check that the pair data you are referencing exists and is correctly formatted. Check the JSON file and check that the data points you want to use are available and have the correct data type. Prefer number and boolean types over arrays.
Gunbot Guru is an AI assistant that can improve your Gunbot workflow. New and experienced users can use it for basic setup help, advanced coding, and anything in between.
Gunbot has come a long way from offering preset trading bots to becoming a flexible platform that lets developers create their own custom trading strategies and automation setups. This shift has helped create a small and enthusiastic community of developers who are now offering their custom setups to Gunbot users. We're happy to announce the first three community-developed offers, with more to come.
With or without extensions made by community devs, Gunbot remains the most versatile crypto trading bot on the market. Offering a wide range of built-in strategies that are ready to use right out of the box. If you use these community-developed setups or stick with the built-in options, Gunbot provides a reliable trading solution for all users.
The Broxynet-V1 strategy suite, as described by its developer @Steven0_0Smith, includes multiple trading modes, Accumulator, Gribz, Calm, Normal, and Aggressive, catering to both novice traders and seasoned Gunbot users.
Accumulator: Reinvest profits to buy and hold your favorite cryptocurrencies.
Gribz Mode: A grid-style trading approach with dual sell levels.
Calm, Normal, and Aggressive Modes: Customizable settings to protect against market downtrends.
Broxynet-V1's active Trading Panel provides real-time data on buy and sell triggers, current pair state, and trading mode.
ChannelMaestro, described by its developer @boekenbox, is an all-around trading strategy designed for simplicity and effectiveness. With minimal settings required, it can be deployed in under 10 seconds.
Simple Configuration: Easy to start trading with just a few settings.
Single Setting Funds Management: Integrated stop losses and automatic trade size adjustments.
Multi-Timeframe Analysis: Analyzes different timeframes to make informed trading decisions.
ChannelMaestro is said to be perfect for traders who prefer a straightforward approach without the need for extensive configuration.
The Gunbot community is growing, thanks to the creativity and hard work of our developers. Setups like Broxynet-V1, Quanta exoTrader, and ChannelMaestro give users more choices for their trading strategies. These first community-developed setups are available for purchase, with the developers getting the proceeds. More community strategies and extensions are on the way, providing even more ways to customize your Gunbot experience.
If you use these community setups or stick with Gunbot's built-in strategies, you have a solid tool for your trading needs. The future of Gunbot trading is looking better than ever with help from our dedicated community.
Beyond Basic Crypto Trading Bots: Using AutoConfig for Custom Automation
As a bot trader, you need to adapt strategies quickly when market conditions change. Manually managing trading bots can give you precision, but it’s a constant grind that leaves you vulnerable to missed opportunities.
That’s where Gunbot's AutoConfig comes in, a feature built for advanced automation and real-time optimization. AutoConfig fine-tunes strategies, responding to market shifts, and lets you create advanced trading routines that would otherwise require intensive manual oversight.
AutoConfig allows you to automate these processes, handling pair management, strategy settings, and more in real time and in a rules based manner. By setting up AutoConfig, you can keep your bot aligned with your trading objectives without having to watch over every detail.
To help traders with automating their repetitive (and often slow) manual bot management, AutoConfig offers a suite of tools to help automating various aspects of running a crypto trading bot.
Beyond simple pair addition and removal, AutoConfig can evaluate pairs based on more complex indicators such as historical performance, correlation with other assets, allowing for a highly optimized and strategic portfolio composition.
AutoConfig supports deeper strategy customization with conditional logic and multi-variable scenarios. It can automatically adjust strategies based on market conditions, performance metrics, and predefined goals.
AutoConfig can orchestrate detailed trading workflows, offering a reliable framework for setting pre-trade conditions and post-trade actions that streamline trading strategies and improve decision-making:
Before executing trades, AutoConfig can assess a variety of market indicators and internal parameters to confirm that all conditions align with strategic requirements. This includes checking for price stability, market sentiment analysis, or even external economic events that could impact price movements. By setting such pre-trade conditions, traders can fine-tune when and how their trading strategies are deployed, reducing the risk of entering or exiting positions under unfavorable conditions.
After a trade is executed, AutoConfig could orchestrate a series of post-trade actions that are important for maintaining strategy efficacy and preparing for future trades. This includes adjusting future trading parameters based on the outcome of the trade, rebalancing the portfolio to maintain risk levels, or even triggering conditional orders based on new market conditions. These actions keep the trading strategy dynamic so it can adapt based on previous outcomes and evolving market insights.
Dynamic Risk Management: AutoConfig can adjust risk exposure based on volatility, scaling back in high-risk environments or increasing positions during stable periods.
Custom Strategy Adjustments: Use JavaScript or other scripting to fine-tune strategies in real-time, based on performance data.
Market Sentiment-Based Adjustments: Integrate external data sources to monitor sentiment shifts and adjust trading strategies accordingly.
Setting up AutoConfig requires a detailed configuration that matches your specific trading strategies and goals. To get started or improve their current setups, we provide detailed guides that walk you through the necessary steps:
For details on how to control pair settings and optimize your trading strategies using AutoConfig, visit the Control Pair Settings Guide.
To learn how to dynamically add or remove trading pairs based on real-time market conditions, refer to our Guide on Adding and Removing Pairs.
These resources will help you script conditions, define action triggers, and set performance metrics for evaluating the effectiveness of your strategies.
Gunbot's AutoConfig goes beyond standard bot capabilities, enabling traders to design, automate, and refine strategies on their own terms. It’s not a one-size-fits-all tool; it’s a flexible platform for building and customizing trading automation that aligns with your specific goals.
AutoConfig offers tools to control every aspect of your trading automation, letting you actively shape your trading environment in real-time. If you're aiming for efficiency, adaptability, or deeper control, AutoConfig equips you to stay responsive to market conditions and build a more effective trading system.
Display Custom Metrics in Gunbot with AutoConfig Hack (UPDATED, NO LONGER A HACK)
This guide shows how to use AutoConfig to display custom metrics next to your trading chart. Although displaying custom metrics is usually reserved for custom strategies, we will use a simple AutoConfig setup to place custom metrics right next to your trading chart.
Update
The feedback on this article has been overwhelmingly positive, and we've taken note of the technical challenges some of you faced with setting custom metrics for strategies like stepgridhybrid.
Thanks to your input, starting from version 28.5.6_beta, we are officially supporting this feature in AutoConfig, allowing for the customization of metrics in the strategy stats sidebar.
AutoConfig is primarily used for configuration automation, but we'll demonstrate how to use it for improving the Gunbot frontend too. By creating an AutoConfig job that alters nothing in the Gunbot config, you can have it write data to the internal memory of the bot and display custom metrics in the right sidebar, next to the chart. These metrics can include a title, value, and tooltip text.
Note: This article assumes you are familiar with your bot and basic steps like enabling AutoConfig itself.
Let's examine an example of how to display the time since last buy and sell for the USDT-BTC pair. This complex example iterates over order data to calculate the final values. Keep in mind that the JavaScript code must be on a single line, within double quotes, and have a leading space to be evaluated.
"setMetrics":" (function setMetrics(data) {const orders = data.pair.orders; const lastBuyTime = orders.filter(order => order.type === 'buy').map(order => Date.now() - order.time).sort((a, b) => b - a)[0];const timeSinceLastBuy = new Date(lastBuyTime).toISOString().substr(11, 8);const lastSellTime = orders.filter(order => order.type === 'sell').map(order => Date.now() - order.time).sort((a, b) => b - a)[0];const timeSinceLastSell = new Date(lastSellTime).toISOString().substr(11, 8);data.pair.sidebarExtras = [{label: 'Time since last sell (hh:mm:ss)', value: timeSinceLastSell, tooltip: 'lolol'}, {label: 'Time since last buy (hh:mm:ss)', value: timeSinceLastBuy, tooltip: 'lolol'}]; return true;})(this)"
},
"clearOverrides":false,
"schedule":"*/15 * * * * *",
"type":"manageOverrides",
"debug":true,
"enabled":true
}
}
Pairs Section: This section specifies the target pair for the job. In this case, it is set to "USDT-BTC" on the "binance" exchange. Alternatively you can set the value for include to -to match all pairs on an exchange, or USDT- to match all USDT pairs.
Filters Section: The "alwaysPasses" filter is defined as a custom filter that will always evaluate to true. This lets the job continue to the next step, regardless of the input.
Overrides Section: This section is empty in the provided configuration. It can be used to override certain settings or parameters on the pair level if needed.
setPairVariable Section: This section contains a JavaScript code snippet wrapped in a self-invoking function. It sets the custom metrics for the pair. The code extracts information from the "data" object, specifically the "orders" property of the pair. It calculates the time since the last buy and sell orders for the pair and formats them as "hh:mm:ss" (hours:minutes:seconds). The results are then assigned to the "sidebarExtras" property of the pair, which includes an array of objects with labels, values, and tooltips. Finally, it returns true to indicate that the execution was successful.
Your new metrics show on the sidebar next to the chart.
Tip: don't bother manually typing JS code that is minified to fit on a single line. Just search for an online tool to minify your code, so you can write it without formatting concerns. ChatGPT is also good at minifying code to match the formatting requirements to place it in the autoconfig.json file.
Let's look at some simpler job examples that display the last stochRSI value (data.pair.STOCHRSI), ATR value (data.pair.atr), with an empty element between the other metrics for formatting purposes.
This would result in the following custom metrics display:
StochRSI
Empty Space
ATR
Breaking Down the Metrics Calculation and Setting 🔍
The key to understanding and customizing your metrics lies in dissecting the parts that calculate and set the values. This will be different for every metric that you want to implement.
In our complex example,
We begin by filtering orders and calculating the time difference between now and each order's timestamp.
We sort the resulting array in descending order based on the calculated time difference.
The first element of the sorted array represents the most recent order, and we extract its time using new Date(lastBuyTime).toISOString().substr(11, 8).
Tip: you can use JavaScript to modify your data. For example add .toFixed(2) to change a floating point number with many decimal points to a string with just two decimals.
By understanding how metrics are calculated and set, you can customize your dashboard with informative data points matched to your trading needs.
Inside the Gunbot Community Cup 2024, where Gunbot community members showcase their trading strategies. This time, the challenge is set on the volatile waves of USDT-SOL, offering a fresh battleground away from the usual crypto giants like Bitcoin and Ethereum. It's a brave choice, especially in what some may dub the "BTC season," but it's all in good spirit and creativity.
Join us live on YouTube to witness the developers in action. Daily streams will bring you every strategic move, win, and learning moment. It's a unique opportunity to see the strategies unfold in real-time.
The competition is on, leading up to a grand finale at midnight on June 8, 2024. And if you're craving more, a second round later in the year gives developers another chance to test strategies.
Participants compete with the USDT-SOL pair, aiming for the highest Return on Investment (ROI). The ROI calculation is central to the competition. It compares profit or loss to the initial investment and gives a clear percentage-based measure of performance, which keeps the ranking fair and easy to follow.
Return on Investment, or ROI, is the measure we use to evaluate the effectiveness of each trading strategy. In simpler terms, it's like looking at what you've gained or lost compared to what you've initially put in. Here's how we calculate it: We sum up all the costs from the 'buy' orders to understand our total investment. Then, we tally the profit (or loss) from the 'sell' orders to see what we've earned back. The formula then divides the total profit by the total cost and multiplies by 100 to give us a percentage. This percentage tells us how much we've made (or lost) in relation to our initial investment. It's a straightforward way to see which strategies are actually winning.
GTrend: Equally adept in bull and bear markets, this strategy doesn't miss a beat.
MachineGun 5.0: Offers something for everyone, blending simplicity with the option for in-depth customization.
Watch Live on YouTube
Understanding the full depth of these strategies or scripts in plain language can be challenging. We invite everyone to experience the bots' behavior firsthand during our live streams. Join us on YouTube to see the action unfold!
The Gunbot community funds their favorite devs competition wallet. Success in the competition is gauged by ROI, with the top performers earning resources to further their strategy development. Those not in the top tier will still receive support to refine and improve their approaches. A final face-off at year's end will crown the ultimate Gunbot Community Strategy of 2024.
The Gunbot Community Cup is more than a contest; it's a platform for innovation and a showcase for the talented developers within our community. The selection of USDT-SOL as the trading pair adds an element of surprise and tests the adaptability of each strategy.
The Gunbot Community Cup 2024 is an invitation to test new strategies, support your favorite developers, and be part of a community that values progress and creativity. If you're here for the competition or the camaraderie, there's a place for you in the Gunbot community.
Maximize Your Trading Efficiency During Bitcoin Halving Season
As we approach the Bitcoin halving season, characterized by its significant impact on market dynamics, Gunbot is extending our popular promotion of offering an additional exchange API slot with each lifetime plan. This period, known for its increased market volatility, offers strong opportunities for traders. To support our users in maximizing these opportunities, we are extending the availability of this special offer.
Read more to see all the promotion details
The Significance of Bitcoin Halving and Its Impact on Market Volatility
The Bitcoin halving event, which halves the reward for mined blocks, historically triggers a ripple of volatility across the cryptocurrency market, presenting traders with opportunities to capitalize on fluctuating prices. This event makes reliable, adaptive trading tools more important.
To align with this event, Gunbot is extending our offer of a free additional exchange slot with every new lifetime plan purchase or upgrade for existing users. This offer lets you broaden your trading setup across multiple accounts on the same exchange, a flexibility that is especially valuable during the heightened trading activity expected during the halving season.
Improved Trading Flexibility: Use the additional exchange slot to diversify your trading strategies or to manage additional accounts, thereby maximizing your potential during the volatile halving season.
Increased Cost Efficiency: This offer eliminates the need for an additional license to trade on multiple accounts, providing significant savings.
Gunbot is engineered to assist traders in navigating the volatile waters of the halving season. Offering a suite of advanced features that enable strategic trading decisions, Gunbot is an indispensable tool for traders aiming to use the anticipated market movements.
With the Bitcoin halving season on the horizon, now is the opportune moment to extend your trading capabilities with Gunbot. Our promotion, now extended, is designed to position you advantageously for the expected market shifts. Embrace this opportunity to improve your trading strategies and operational efficiency with Gunbot.
Valentine's Day 2024 Special: Double the Love, Double the Trading
Valentine's Day is a celebration of love and a good time for sharing. For 2024, Gunbot is offering a promotion built around that idea. This Valentine's, we're gifting a free additional exchange slot to every lifetime plan and Gunbot upgrade.
We understand the joy and the challenges of trading together. That's why, this Valentine's, we're gifting a free additional exchange slot to every new lifetime plan and Gunbot upgrade. Now, you can run Gunbot on two accounts of the same exchange without the need for a second license - a deal we usually offer for $99.
Expand Your Trading Horizons: With an additional exchange slot, you and your significant other can manage separate accounts on the same exchange, doubling your trading opportunities.
Save on Costs: No need to purchase a separate license to trade on multiple accounts. We've got you covered.
How to Get Gunbot with an Additional Exchange Slot
Gunbot in 2024: Why Our Core Values Still Matter. A Lot.
Gunbot started as a small, community-focused project, deeply rooted in the values of reliability, customization, and security. As we've grown into a major trading bot platform in 2024, these core principles have remained at the heart of our expansion. They still shape how we build and maintain the product.
Local by Design: Unlike cloud-based alternatives, Gunbot operates directly on your hardware, offering improved security and peace of mind. By minimizing potential attack vectors, your trading strategy stays private and secure. With over six years of security history without major incidents, we think we made a good design choice by keeping this software local.
Beyond Basic Strategies: At the heart of Gunbot's design is the belief that one size does not fit all. From strategies with just three settings for beginners to intricate setups with over 150 parameters for veterans, Gunbot offers strong customization. This means every aspect of your trading can be fine-tuned to match your exact specifications.
Dynamic Multi-Pair Management: Beyond individual strategy customization, Gunbot stands out with its ability to automate changes across multiple pairs. This adaptability, coupled with all configuration data being transparently stored in accessible JSON files, keeps you in control. There's no hidden data; everything Gunbot stores is an open book to you.
Harmonious with Manual Trading: Gunbot respects your trading intuition. Manual trades don't throw off Gunbot’s strategies; instead, they smoothly integrate, allowing for a harmonious blend of automated precision and human insight.
Portability for True Trading Freedom: Gunbot's architecture is built for the modern trader’s lifestyle. Contained within a single portable folder, Gunbot can run anywhere - from docker containers on tech-savvy appliances to virtual servers strategically placed near exchanges. If you want to run Gunbot on your smart fridge or prefer the conventional setup on a laptop or cloud server, the choice is yours. This level of portability lets Gunbot adapt to your trading environment, not the other way around.
Feedback-Fueled Development: Gunbot stands out for its commitment to incorporating user feedback into its development process. This collaborative approach has cultivated a suite of features that cater to both novice and experienced traders, keeping the latest trading improvements accessible.
User-First Philosophy: Our allegiance is to you - the trader. Unlike others, Gunbot’s features and strategies are developed with a clear focus on improving your trading outcomes, free from any external exchange volume commitments.
Choosing Gunbot means using a trading tool that values security, respects your preferences, and listens to user feedback. It is also backed by a community that keeps improving the product.
Understanding the Quanta G-Type Strategy for Effective Market Making
Gunbot offers a range of custom strategies designed for diverse trading styles and market conditions. Among these, the Quanta G-Type strategy stands out for its unique approach to market making. This guide explains how Quanta G-Type works and where it fits in market making.
This guide looks at the key features of the Quanta G-Type strategy
Quanta G-Type is a geometric market maker hybrid strategy built by a Gunbot community member. It's built as a 'custom strategy', meaning it is available to Gunbot Ultimate users who can run custom coded strategies. It is designed to adapt to large market price movements, which makes it useful if you focus on market making. The strategy effectively handles different market scenarios, including sideward movements, price pumps, and dumps.
Quanta G-Type is built for longer-term market engagement. It works best if you are comfortable managing inventory over time and tuning a strategy with several moving parts. Track its performance over time before you rely on it in live market conditions. If you want alternatives to benchmark against, compare more trading strategies.
The strategy generates profits through spread profits, accumulation of spread derivative, and inventory swing. However, it is important to select a viable long-term coin, as the strategy's success is closely tied to the coin's longevity and market performance.
Quanta G-Type includes features such as auto compounding and advanced inventory management. It supports different trading modes, each matched to specific market conditions. The auto-setup process is streamlined, but users must be mindful of key operational considerations.
Starting with the Quanta G-Type strategy involves a series of steps, including setting up the strategy parameters and optionally running simulation tests. These simulation runs are important to understand the strategy's dynamics before implementing it in live trading scenarios. Do read the strategy documentation when setting it up.
The strategy offers a range of customization options through basic and advanced overrides. Key parameters like BUY_INTERVAL, SELL_INTERVAL, and ORDER_DEPTH can be adjusted to suit individual trading preferences and goals.
The Quanta G-Type strategy is a reliable solution for market makers in the cryptocurrency domain. It offers a balanced approach to handling different market conditions, focusing on long-term asset management.
Visualize Your Strategy: Gunbot's Chart Drawing Tools
Visualizing a trading strategy helps you debug it and explain it. Gunbot gives you chart drawing tools that support strategy development and make the data easier to read for casual traders. Let's look at how you can use these tools in your custom strategies.
This guide looks at how to make use of programmatic chart drawings for realtime strategy visualization.
1. Visualizing Support and Resistance with Labeled Rectangles
When you're looking to mark out support and resistance channels, labeled rectangles can be incredibly useful. Here's how you can create them:
Gunbot allows developers to create their own metrics and display them next to the chart, providing a more detailed picture of the strategy's performance.
// Initialize an array to store metrics
let newChartMetrics =[]
// Define your custom metrics
const metrics =[
{
label:`Metric name`,
value:'110',
tooltip:'Display this text as a tooltip for this custom metric.'
},
// Add more metrics as needed
]
// Add the metrics to the array
newChartMetrics =[...newChartMetrics, metrics]
// Update the chart sidebar with the new metrics
gb.data.pairData.sidebarExtras= newChartMetrics
By adding custom metrics, you can track specific aspects of your strategy directly on the chart, making it easier to make informed decisions.
These are just some highlights of the drawing tools for custom strategies. There is plenty more to discover.
Gunbot's chart drawing tools give you a practical way to visualize trading strategies. If you're a developer debugging algorithms or a trader checking strategy execution, these tools make the chart easier to read. A clear chart makes strategy behavior easier to debug, explain, and trust.
Feature highlight: automate TradingView alert scenarios, even complex ones
This feature highlight shows how you can turn Gunbot into a TradingView alert bot. You'll use TradingView webhook alerts to automate trading decisions, including complex scenarios with multiple indicators.
Let's consider a scenario where you want to receive alerts based on varying indicators, in any order of time. The end goal? You receive timely alerts for your chosen indicators, and Gunbot does the heavy lifting by placing trades once all conditions are met.
note
This guide assumes that your webhook connectivity is already configured. If you need help with this, please refer to the webhook alerts documentation. Our support team is also on hand if you have any issues.
First things first, identify the number of buy and sell conditions necessary for your strategy. Be as specific as possible here; the more refined your conditions, the more custom your trading approach will be.
Next, head to Gunbot and add a pair with an alert strategy. Set the desired alert count and investment amount (see image below). Copy all the alerts which should look something like this:
Buy alerts:
passphrase binance customlong USDT-ETH 1 0 1
passphrase binance customlong USDT-ETH 1 0 2
passphrase binance customlong USDT-ETH 1 0 3
Sell alerts:
passphrase binance customshort USDT-ETH full 0 1
passphrase binance customshort USDT-ETH full 0 2
When creating the alerts on TradingView, these alert texts are what you should enter in the message field. One for each alert you'll create.
This example uses market orders, it's also possible to use limit orders with the target price added in the alert message by using a placeholder like {{close}} (as provided by TradingView). The passphrase part of the webhook alert message refers to a passphrase you'd setup yourself in Gunbot, so that it only accepts alerts that use the expected passphrase.
In TradingView, set up your buy alerts (see images below). For this example, we'll use VWAP bands and EMA crosses as our conditions - executing trades when both shorter-term EMAs cross below the longer-term EMA and the price drops below the lower VWAP band.
Similarly, create sell alerts for each of your conditions in TradingView (see images below). In our example, we'd set up sell orders when a short-term EMA crosses above the long-term EMA, and the price exceeds the upper VWAP band.
Finally, save all your alerts and hit the 'Start Trading' button in Gunbot. The trading bot will now execute your trading scenario whenever all of these conditions are met! It does not matter in which sequence the alerts arrive, whenever all criteria for a buy order are fulfilled, the bot will place the buy order. (and vice versa for selling)
Gunbot's TradingView webhook integration extends your trading strategies. You can run complex scenarios with multiple indicators without writing code.
In essence, Gunbot makes it possible for traders to capitalize on their strategic insights without needing to code or continually monitor market conditions. 😎
With some initial setup, your trades can execute automatically based on your preferred indicators and conditions. It's never been easier to start making the most out of your trading opportunities!
Gunbot v26 adds new tools for strategy prototyping, faster development, charting, AI support, and webhook workflows. Here is what changed in this stable channel update.
Image shows new charting capabilities for custom strategies in Gunbot v26.
Good trading often depends on reading market data clearly and acting on it. Gunbot v26 improves charting and lets you create custom strategies with multi-point shape drawing on charts. You can mark support zones, add annotations, and make the chart reflect how you plan trades.
Possibly the most significant addition to this version is the inclusion of Gunbot AI. With the integration of the GPT engine, Gunbot AI can generate custom strategy code based purely on description text. This new feature effectively bridges the gap between your trading ideas and their execution. Got a trading idea? Prototype it in seconds.
Staying true to our commitment of keeping Gunbot universally applicable, we have added support for MEXC v3 API and Bybit's v5 API in this version. These additions widen the horizons of trading platforms that Gunbot can smoothly integrate with, further improving user flexibility and market reach.
With the new webhook alert options, Gunbot eliminates any need for coding in Pinescript. You can now create alerts based on indicators right from your TradingView chart, improving the crypto bot's user-friendliness significantly.
If you're a trader who relies on external alerts, life just got easier.
To help you keep track of important information, we've introduced an option to save text notes per pair/exchange. These notes can be viewed on the chart sidebar or a dedicated page, serving as handy reminders.
Gunbot v26 introduces a referral program with individual referral links. Alongside this, we've added several new options to the setup page, including the ability to hide open order lines on the chart and skip API key validation, making the Gunbot experience even more user-centric and intuitive.
Sghedge and Sgsfutures strategies have been improved to offer separate settings for the short side and a max loss stop-loss option. These improvements make these strategies more flexible and effective.
To top it all, numerous bug fixes and performance improvements have been implemented, contributing to an overall smoother and more stable user experience.
These are some of the features and improvements introduced in Gunbot v26. For a complete overview of changes, we recommend visiting the official release notes.
Gunbot Adds Support for Bybit's Unified Trading Account (UTA)
We're delighted to share that Gunbot now supports Unified Trading Account (UTA) on Bybit. As we continue to innovate and keep pace with the latest trading technologies, this new compatibility offers our users strong trading possibilities! 🚀
Bybit's UTA is an all-in-one account mode. You can adjust your trading setup, manage risk, and handle funds without switching between different instrument accounts.
info
This feature is currently available in preview releases (v25) and will be included in our next stable Gunbot release.
One-Click Access: Engage in Spot Trading, Margin Trading, USDT Perpetual, USDC Perpetual, USDC Options, and USDC Futures conveniently.
Improved Capital Efficiency: Use up to 10x for Margin Trading on Spot and an interest-free loan quota of up to 70,000 USDT on your UTA.
Improved Portfolio Management: Protect trading positions and minimize losses in uncertain markets with Hedge Mode, and offset profit and loss across different product positions.
Custom Position Modes: Choose from Isolated Margin (for beginners), Cross Margin (for experienced traders), and Portfolio Margin (for professional traders).
For more details on Bybit's UTA, check out their official page.
For Gunbot users with existing 'normal' accounts on Bybit, nothing changes. Users with a Bybit Unified Trading Account can now fully use it with Gunbot.
Although we remain neutral about how traders can use this new feature, the integration of Bybit's UTA into Gunbot offers the potential for expanded capabilities and personalized trading strategies.
Importantly, this is not an endorsement of any particular strategy or feature offered by Bybit's UTA. As always, we urge you to research thoroughly, consider your own needs and trading strategies, and make informed decisions.
Stay tuned for more improvements as we continue to innovate and evolve!
Have you ever wondered about the differences between break even and unit cost metrics in Gunbot? This article will clear up any confusion and help you make an informed decision on which metric to choose when using strategies like stepgridscalp. Let's get into it.
Tip: Understanding these metrics will enable you to make better decisions when configuring your Gunbot trading strategies.
Both break even and unit cost metrics share a common goal: to analyze spot order history and determine at which price it becomes profitable to start selling. They both account for trading fees as configured in Gunbot's exchange settings. However, there are some key differences:
Unit Cost: Represents the average cost of remaining balance that can be sold, considering even partial sell orders. Selling above the unit cost guarantees a profit on every single sell order.
Break Even: Represents the price at which the remaining balance can be sold for the entire order group (since opening the position) to be profitable. This means that some individual sell orders might report a loss, but the total group of orders should be profitable.
Choosing between break even and unit cost is a matter of personal preference, but unit cost is generally considered the safer choice.
Note: Market orders may lead to slippage and cause losses if an order fills at a much worse rate than the minimum target.
The strategy gain target is set as a percentage above the unit cost or break even, with the option to use 'dynamic exit logic' to automatically switch between break even and unit cost based on market data.
Imagine you bought several items at different prices and now want to sell them for profit:
Unit Cost: You calculate the average cost of all unsold items and set your selling price above that number. This way, each sale guarantees a profit.
Break Even: Your goal is to cover the total cost of all items, including previous sales, fees, and profits. You don't mind selling some items at a loss as long as the entire group of transactions is profitable.
In Unit Cost mode, you'll only see positive profitable orders whereas in Break Even mode, you may see notifications of sells done at a loss (as it's working on the entire position).
Both break even and unit cost have their advantages and disadvantages, so choose the metric that best aligns with your trading goals and risk tolerance.
Get Your Trading Potential: Introducing Custom Strategy Development for Gunbot Users
If you have a trading strategy idea but do not want to implement it yourself, Gunbot developers can help turn it into working code. The service covers new strategies and adjustments to existing ones.
If you have an idea for a trading strategy or want to modify an existing one, our developers can work with you to define the logic and create a private, customized strategy for your setup.
💡 Remember: With this service, you'll receive a fully personalized trading strategy that only you can execute using Gunbot.
Are you feeling generous and want to share your custom strategy with fellow Gunbot users? No problem! We can make your project available to the entire Gunbot community, so everyone can benefit from your creative approach. It's a fantastic way to contribute to the growth and success of other traders.
Beyond Strategies: Turn Ideas Into Working Code 🌟
Our development team can also help with integrations, features, and other Gunbot customizations. Send us the details and we will evaluate the request. Once we have a clear understanding of your proposal, our team will prepare a quote based on its complexity and requirements.
Having a clear overview of your Gunbot strategies' performance is essential for continuous improvement. The better you understand what is happening, the better you will be able to improve what the trading bot is doing for you. we'll introduce you to some of the tools and techniques that can help you monitor and track your trading performance effectively.
A picture is worth a thousand words, and that's especially true when it comes to analyzing trading data. Gunbot allows you to visualize all trades directly on the trading chart. This makes it easy to spot trends, entry and exit points, and overall strategy performance at a glance. Use these visual cues to assess your trading decisions and make necessary adjustments along the way.
tip
By closely examining the trading chart, you can quickly identify patterns and trends in your trading performance.
One key metric to keep an eye on is the Return on Equity (ROE) percentage, which represents your unrealized Profit and Loss (PNL) for open positions. Gunbot provides this feature so you can easily track how your current trades are performing. A positive ROE % indicates a profitable position, while a negative value suggests a loss. Pay attention to this metric as you make future trading decisions.
tip
Because most trading strategies sell when a position is in profit, it is common to see mostly negative ROE values in the overview for active trading pairs. Pairs spend a lot of time in the red, until they are green and sell.
Gunbot's dashboard offers detailed historical statistics such as cumulative PNL, the number of trades executed, and other valuable metrics. Use these stats to gain insights into long-term trends and the overall success of your trading strategies. Regularly review these numbers to stay informed and make data-driven adjustments to your approach.
info
Your dashboard holds the key to understanding your trading performance. Analyze the provided data to uncover hidden gems of information that can strengthen your strategies.
Improve Performance Through Systematic Analysis 🧠
Now that you have the tools to monitor and track your Gunbot trading performance, it's time to put them into action. Use the provided statistics and ROE % to identify areas of improvement in your strategy. Experiment with different parameters and settings in Gunbot to see how they impact your performance.
When making adjustments, consider these steps:
Identify patterns and trends in your trading data (e.g., recurring losses or profits).
Determine potential causes for these trends by analyzing trade entries, exits, and other factors.
Implement changes to your strategy based on your findings.
Track the results of your changes over time and make further adjustments as needed.
It's important to remember that trading is a dynamic process, so be prepared to adapt and refine your strategies continuously.
Mastering your Gunbot strategies requires ongoing monitoring and tracking of your trading performance. By using the trading chart, ROE %, and dashboard statistics, you can see what is working, spot weak areas, and adjust your setup with evidence instead of guesses.
To kick off your crypto bot trading automation, simply assign a strategy to a trading pair. A trading pair is a combination of two cryptocurrencies, such as Bitcoin and Ethereum. This gives Gunbot the green light to begin executing trades on your behalf.
💡 Pro tip: Strategies are important for enabling Gunbot to make informed trading decisions.
Strategies are sets of rules that dictate how Gunbot should trade. Each strategy comes with configurable parameters, allowing you to tweak and optimize them according to your preferences or market conditions.
Once you've modified a strategy's settings, you can save it as a 'preset.' This lets you quickly assign your customized settings to other trading pairs in the future, streamlining your workflow.
With Gunbot, you can run multiple trading pairs across several exchanges simultaneously. You can choose to use different settings for each pair or apply the same settings to all of them - the choice is yours!
📣 Note: "bot" refers to the software as a whole, not a specific pair or strategy.
If you're after something truly unique, you can create a 'custom strategy' by coding it in JavaScript. This allows you to design a strategy matched to your exact needs and preferences.
Gunbot's 'autoconfig' system automates settings changes based on predefined conditions. Think of it as a cron-like system that allows you to adapt your trading strategy according to market fluctuations.
Instances: Multiply Your Crypto Trading Bot Capacity 💪
An 'instance' refers to one Gunbot installation. You can run multiple instances of the software using a single license, which is useful for spreading risk across multiple servers or improving processing speed by limiting the number of pairs per instance.
In summary, understanding Gunbot's conventions and basic concepts is important for maximizing your automated trading experience. Assign strategies to trading pairs, customize them with presets, manage multiple pairs and exchanges, create custom strategies, use autoconfig, and use multiple instances to make better use of Gunbot. 🚀
Gunbot's chart interface can be fine-tuned to suit your needs. To save your preferred chart layout, click on the cloud save icon in the chart top bar. You can save as many layouts as you need. Load chart layouts by selecting the Load Chart Layout option.
Trade notifications appear in Gunbot's GUI whenever trades are made. Some users may find them distracting or unnecessary. If you prefer not to receive these notifications, you can disable them on the profile page. Simply navigate to the profile page and toggle off the trade notifications option.
Chart timescale marks offer valuable information about past events in your trading strategy. They help you understand the historical performance of specific strategies. However, if you don't want timescale marks cluttering your chart, disable them on the profile page.
If you're using a custom strategy, you can draw custom elements on the chart to better visualize your approach. This makes it easier to analyze and refine your trading strategy over time. For detailed instructions on visualizing strategy targets, check out Gunbot's documentation.
tip
Efficiently tailor Gunbot by personalizing the interface, managing notifications, using chart timescale marks, and visualizing your custom strategy.
Customizing Gunbot can make your trading workflow smoother and easier to manage. Try different personalization options to find the combination that works for you. The goal is to create an environment that fits your trading preferences and supports your decision-making process.


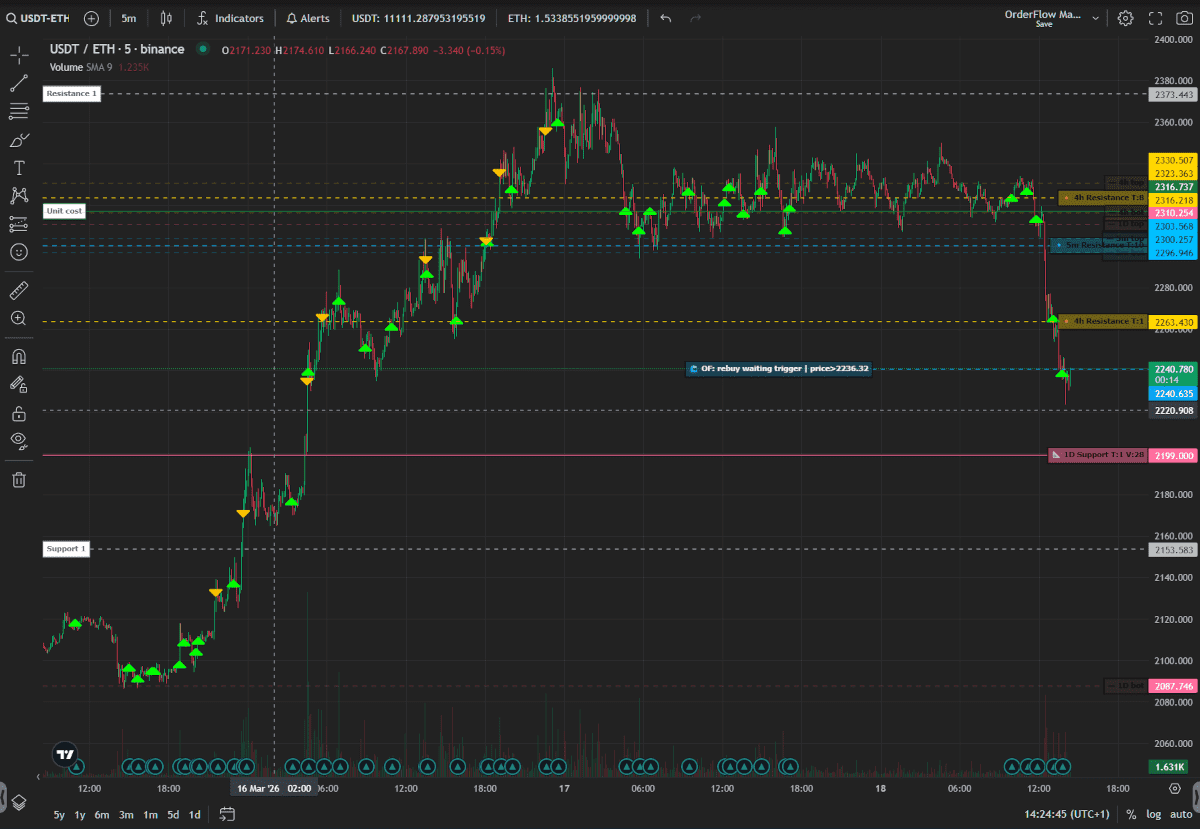
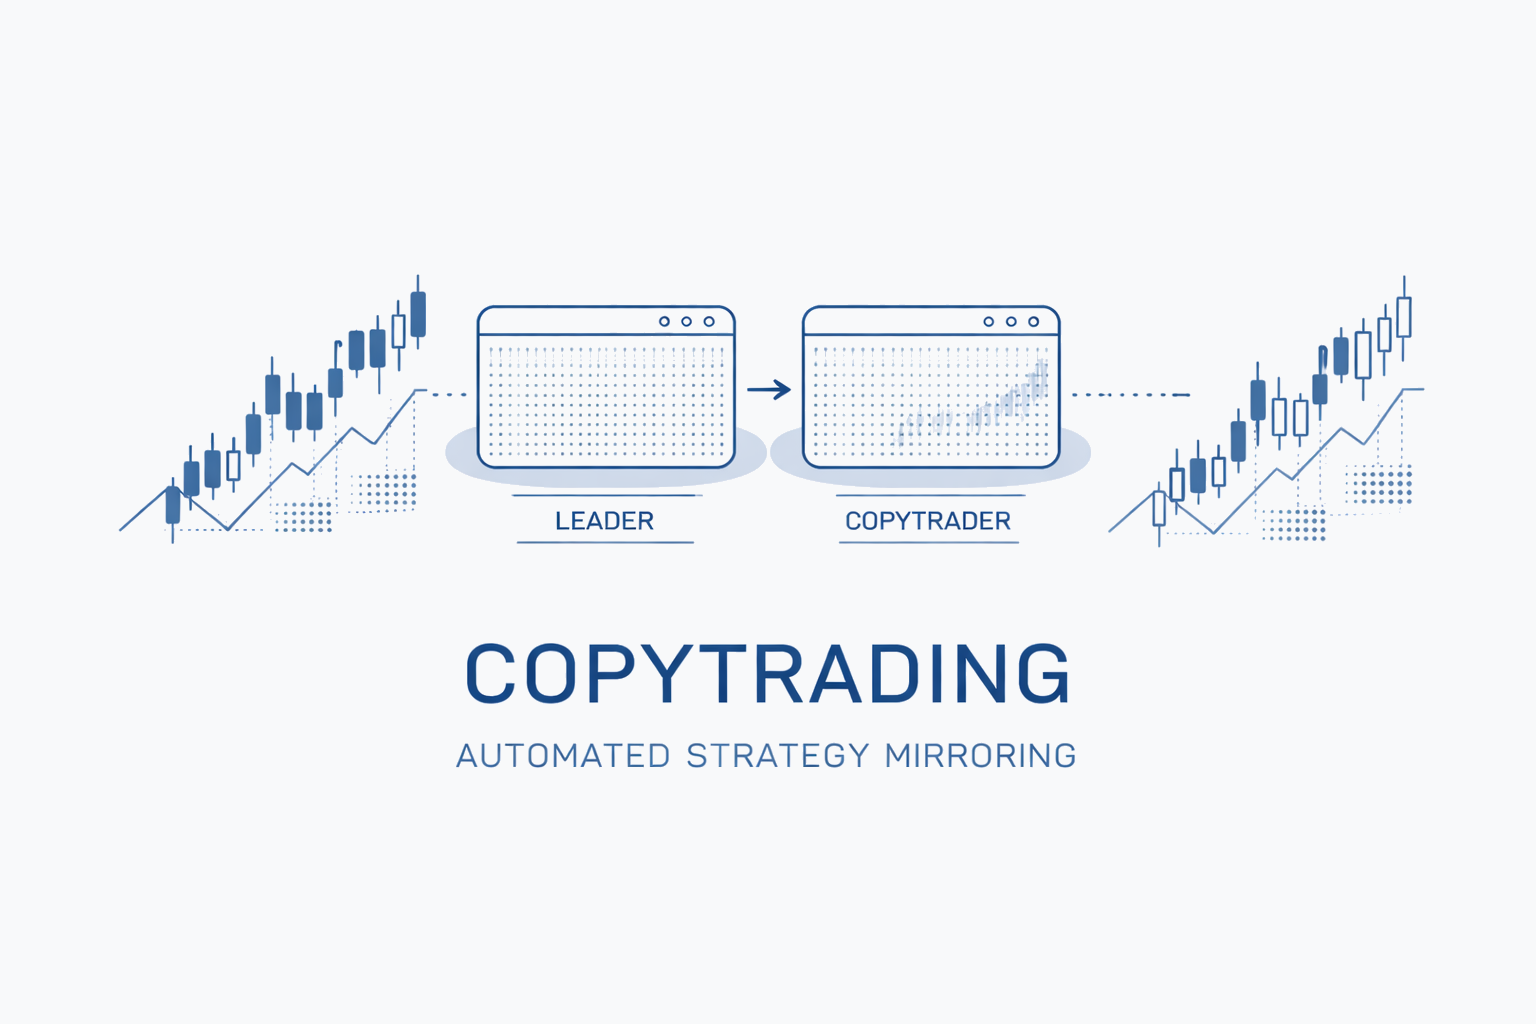

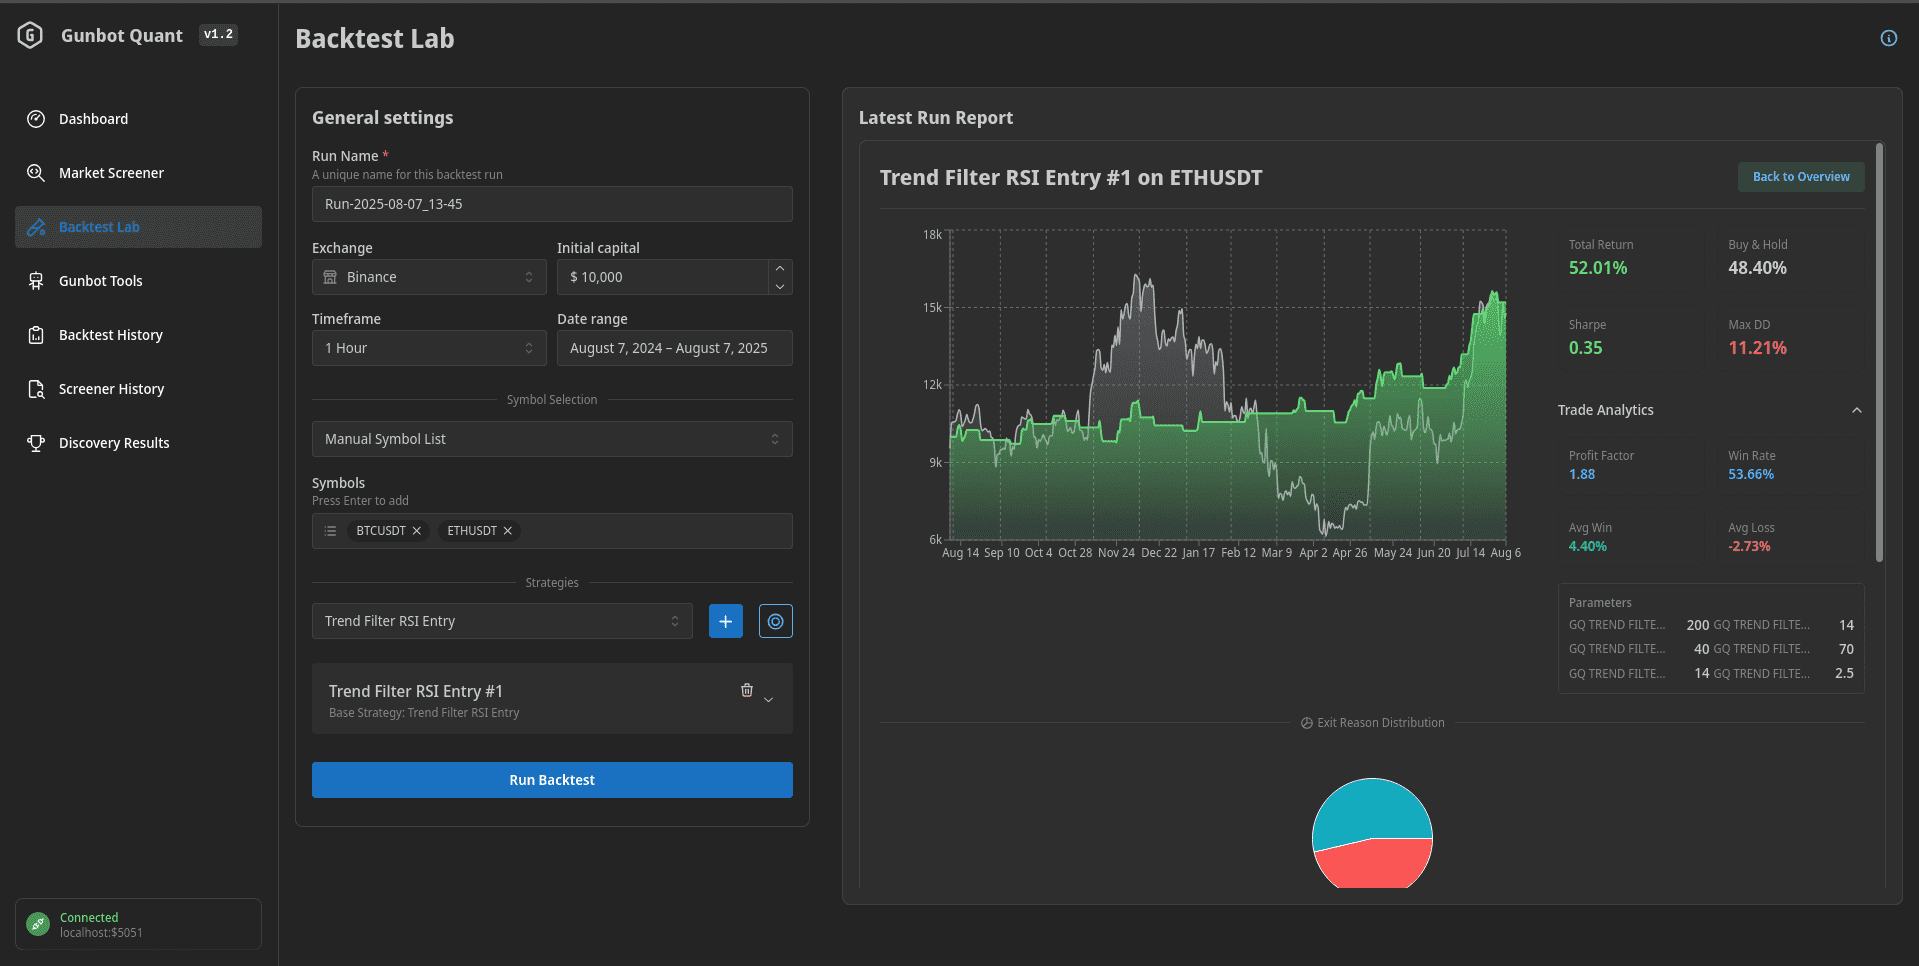
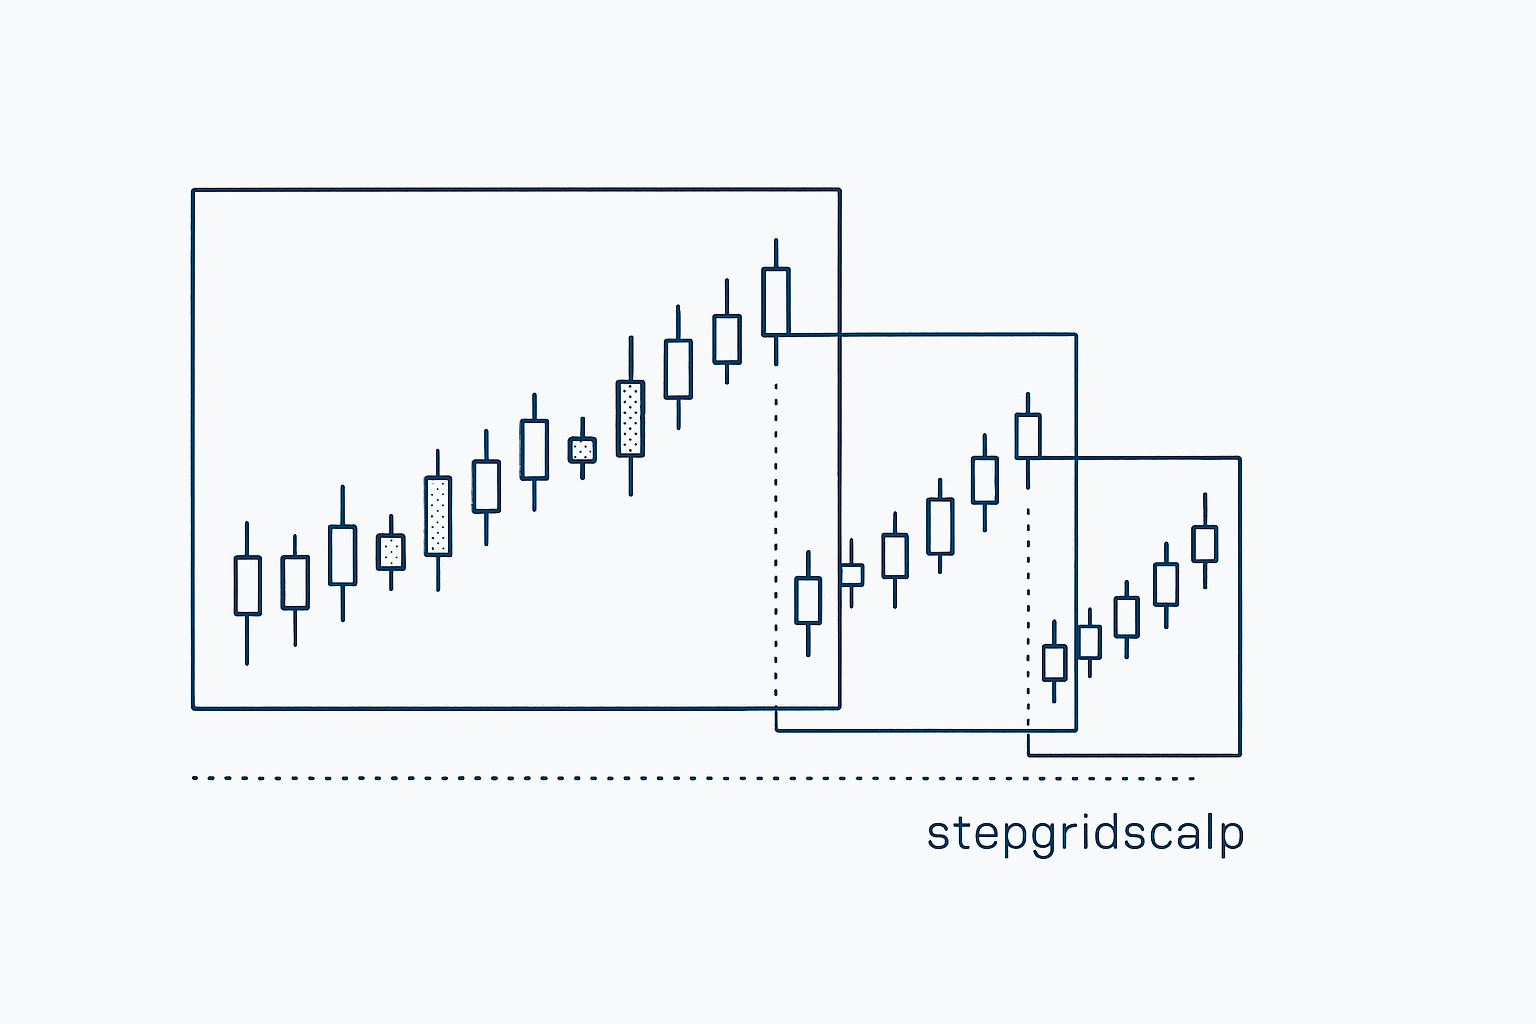


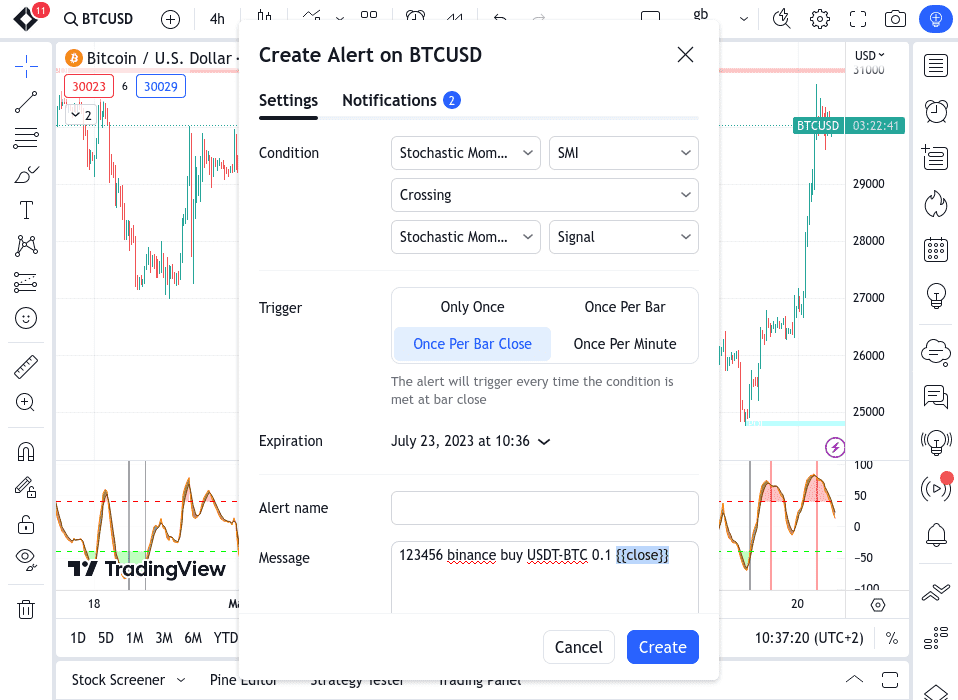

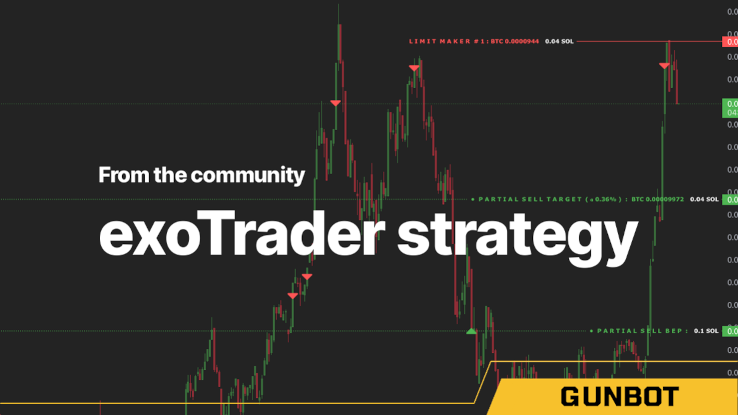
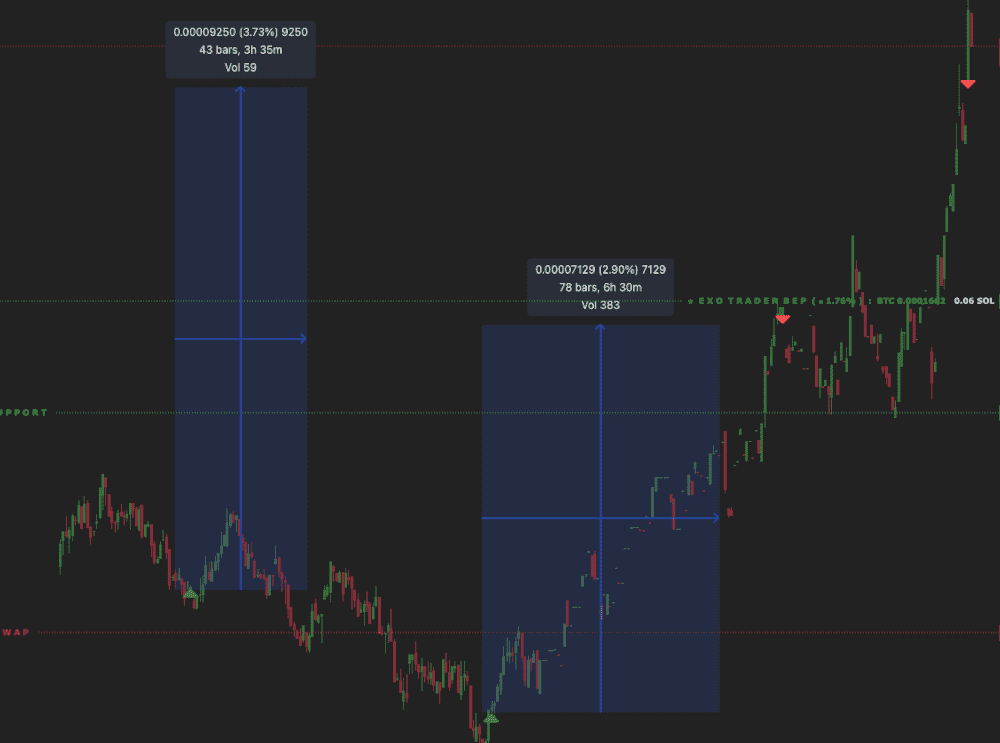
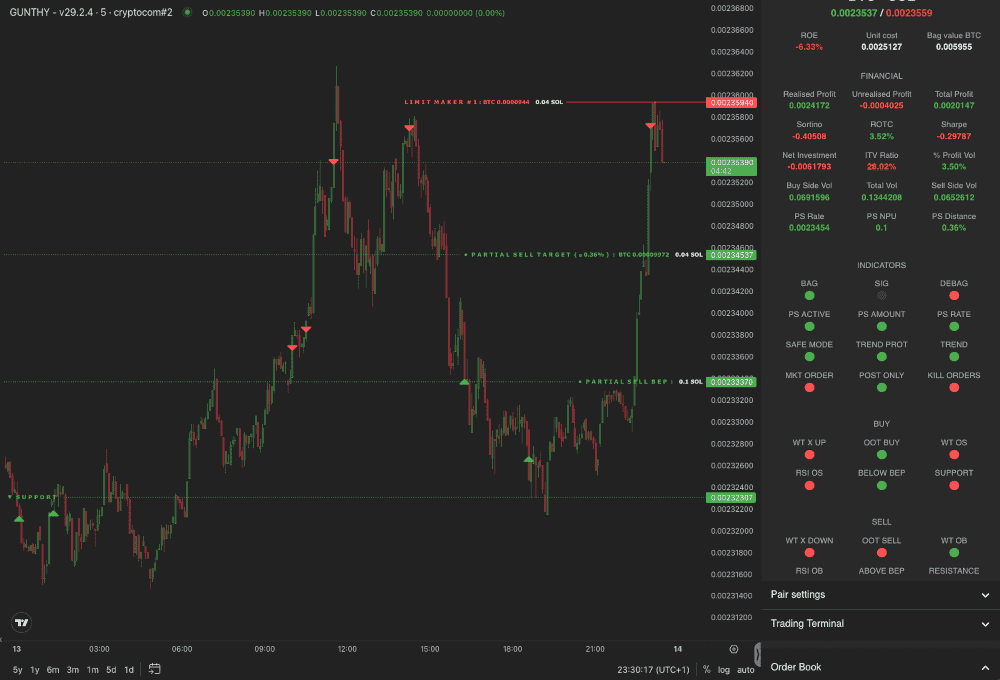
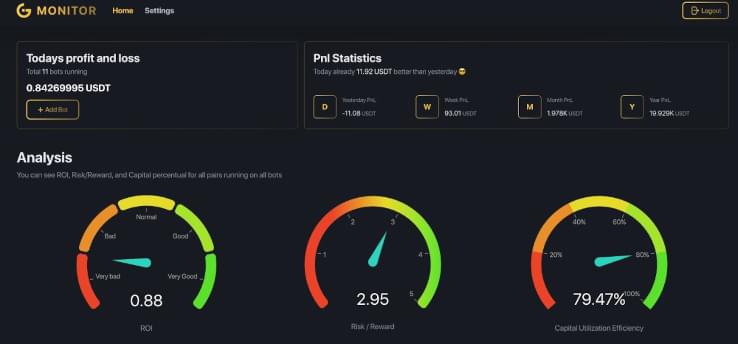
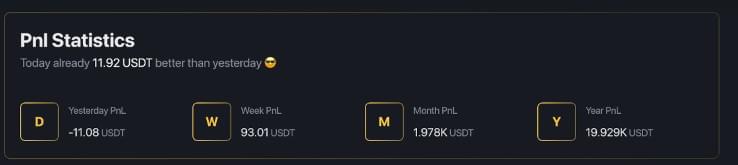
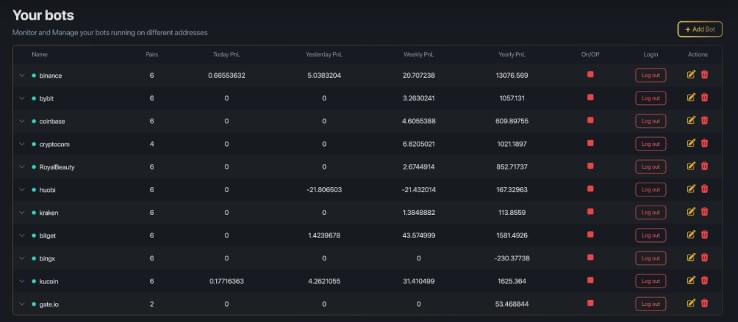
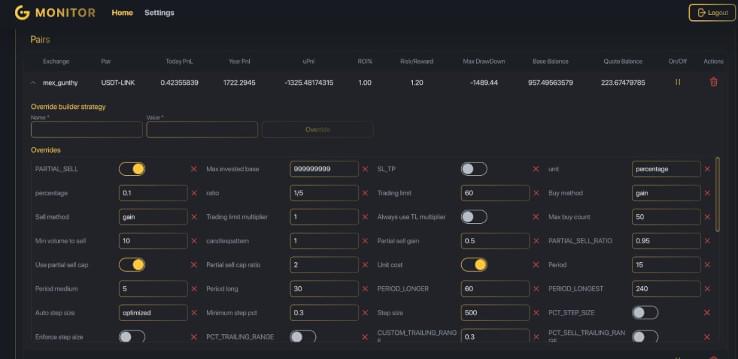
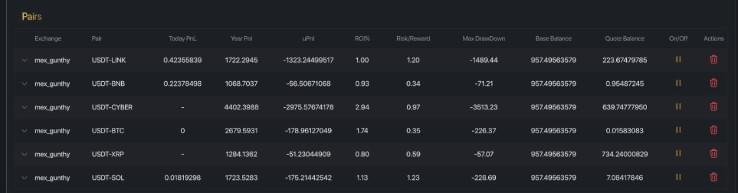
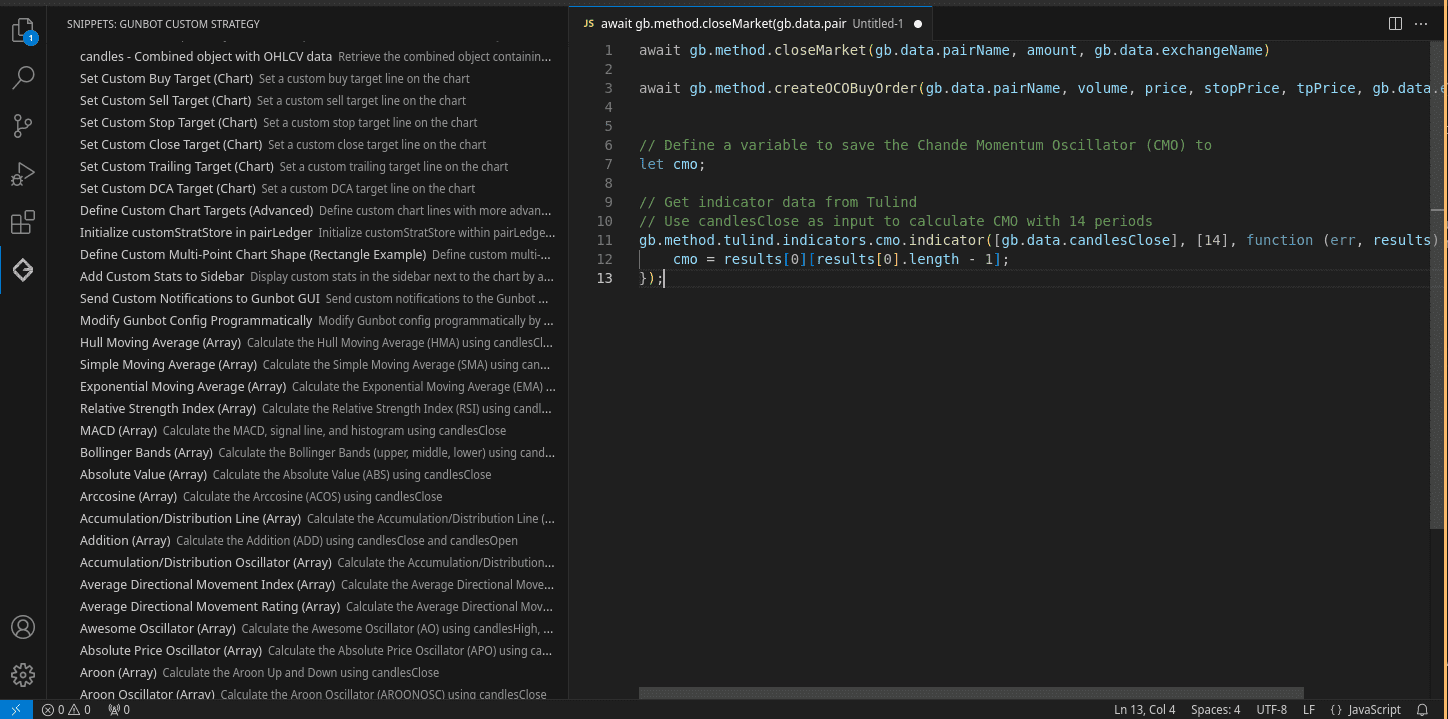


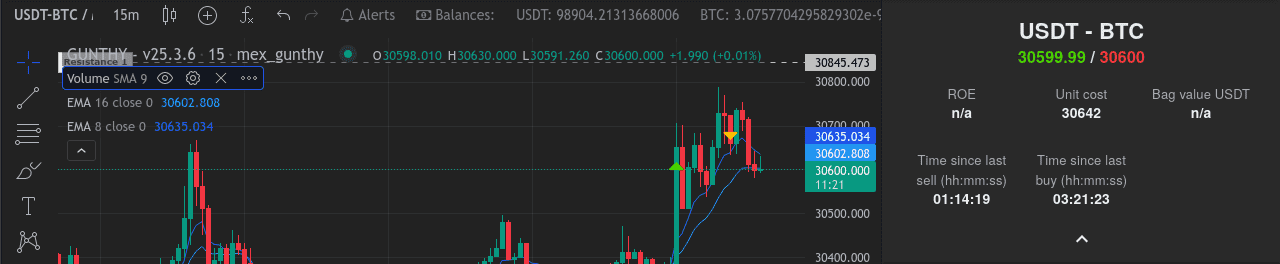 Your new metrics show on the sidebar next to the chart.