How to Create a Hyperliquid API Key for Your Bot
Set up API access for Hyperliquid, a decentralized exchange, by creating and funding a protocol wallet before configuring your trading bot.
For Gunbot, this setup creates Hyperliquid API keys for a Hyperliquid API trading bot. Keep the Hyperliquid private key and API wallet details private, because they control what the bot can do on your account.
Info
An API (Application Programming Interface) key for a decentralized exchange (DEX) like Hyperliquid lets your trading bot interact with the protocol. Unlike centralized exchanges, this often involves authorizing actions through your connected wallet.
Funding the Wallet
The steps below cover connecting an EVM wallet such as MetaMask. You can fund your Hyperliquid account with USDC on Arbitrum One, or deposit assets such as ETH on Ethereum or BTC on Bitcoin. Each route has its own accepted asset and transfer steps; the USDC walkthrough below applies to Arbitrum One.
For the USDC route, have USDC and enough ETH for the deposit transaction's gas fee in your wallet on Arbitrum. If you log in with email or choose another route, check Hyperliquid's current onboarding instructions for your login method and selected asset/network.
Before using Hyperliquid with Gunbot, connect your wallet and fund your Hyperliquid account:
- Visit the Hyperliquid portfolio page.
- Click the Connect button in the center of the page, or use the Connect option in the top menu bar.
- Select your wallet (e.g., MetaMask or any other supported wallet).
- Approve the connection in your wallet popup.
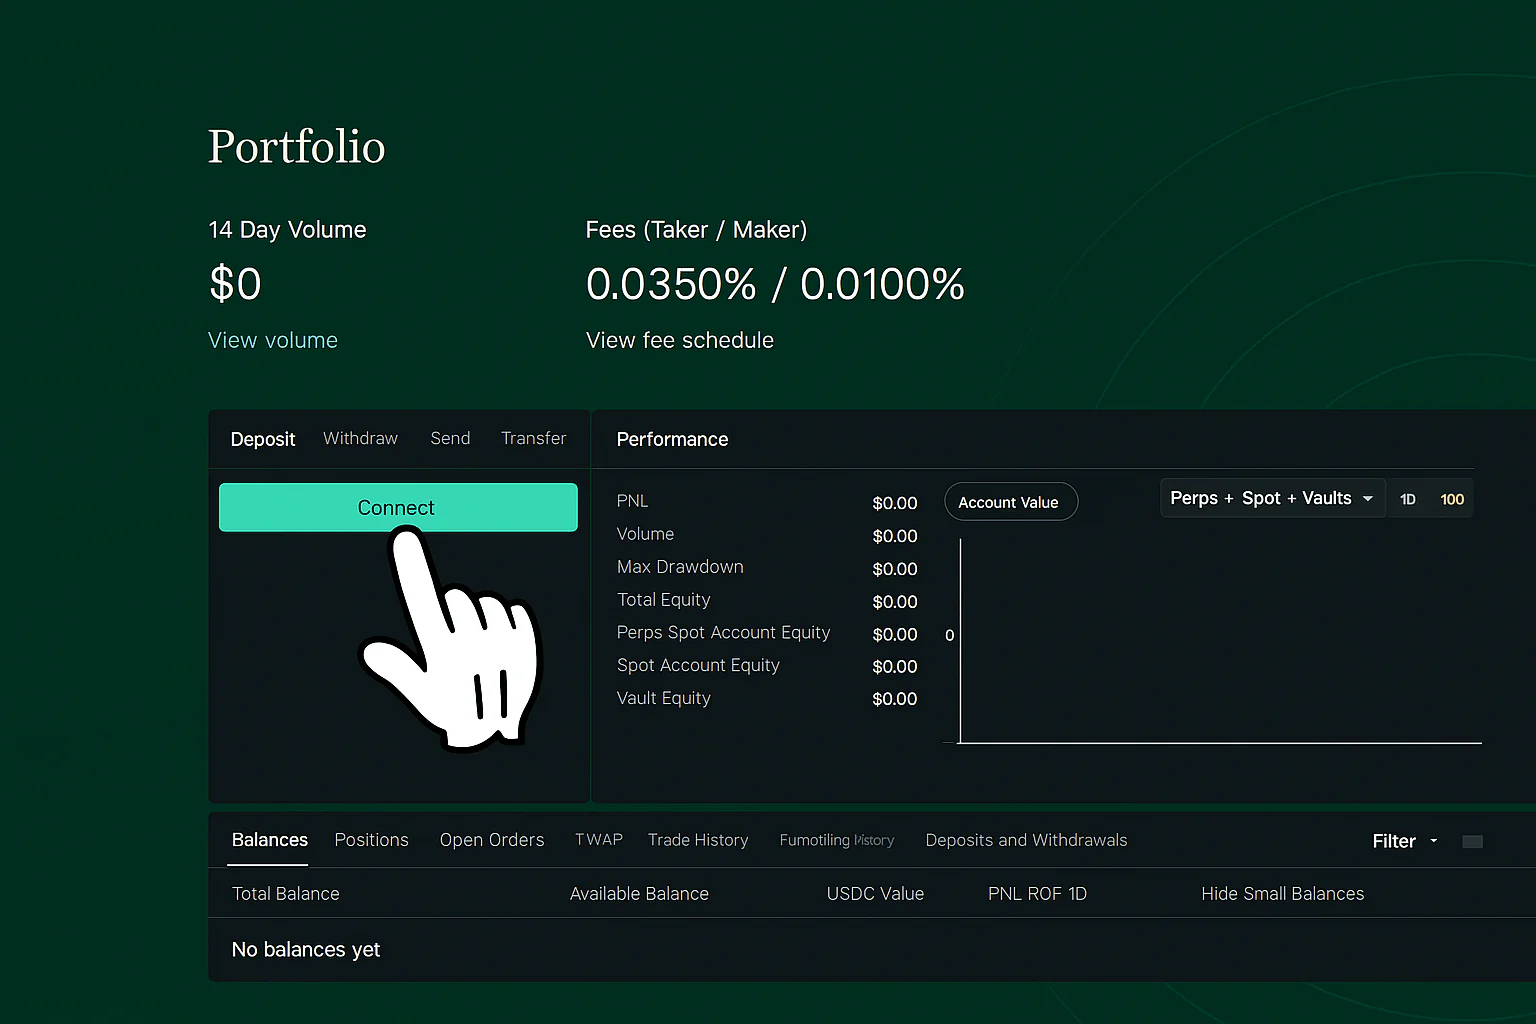
- In the Deposit tab:
- Choose Arbitrum One as the deposit chain for this USDC route.
- Select USDC as the deposit token.
- Enter the target amount.
- Verify the asset, network, and any deposit requirements shown in Hyperliquid before authorizing the transfer. Other routes may accept different assets; do not assume USDC is accepted on every listed network.
- Click the Deposit button.
- Confirm the transaction in your wallet.
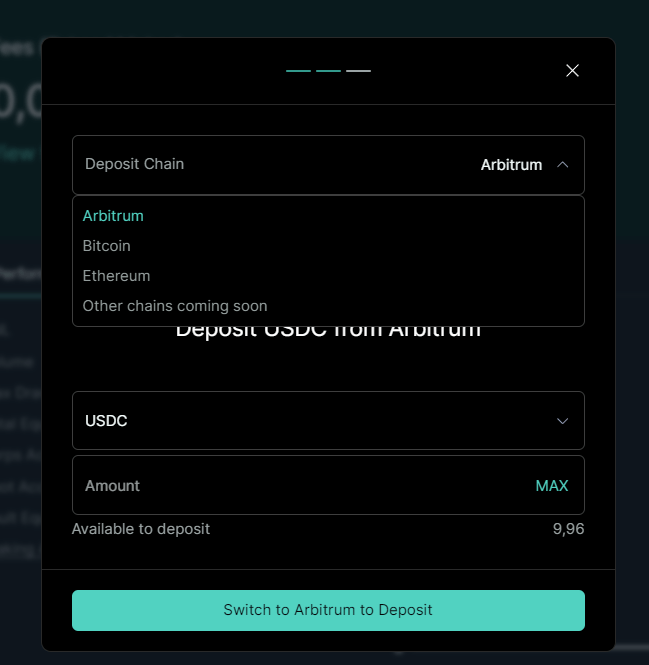
Alternative: Deposit ETH or BTC
For the connected-wallet flow, Hyperliquid also supports these deposit routes:
- Ethereum — ETH: Select the Ethereum/ETH deposit option and send ETH on Ethereum to the destination address shown by Hyperliquid.
- Bitcoin — BTC: Select the Bitcoin/BTC deposit option and send BTC on Bitcoin to the destination address shown by Hyperliquid.
Check the asset, network, destination address, and deposit requirements in the current deposit window before sending. These routes deposit the selected spot asset; they do not automatically turn it into USDC. If your intended market requires USDC or another quote asset, sell the deposited asset for that quote asset on Hyperliquid before trading. The official onboarding instructions linked above cover these routes and other supported options.
Once funds are deposited, you're ready to generate your API credentials.
Creating Hyperliquid API Credentials
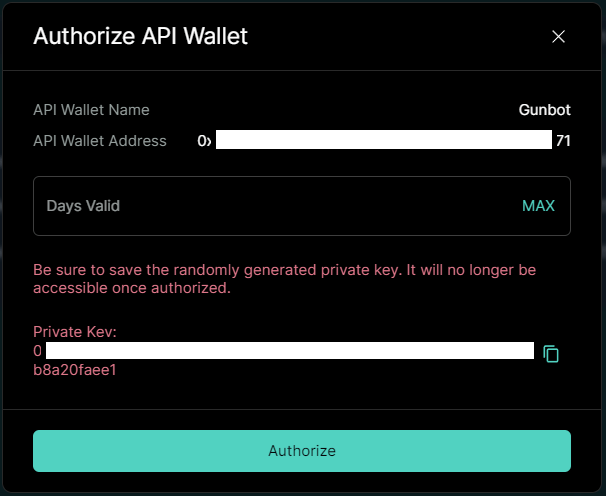
Hyperliquid calls an API wallet an agent wallet: it signs authorized actions on behalf of your main (master) account or a subaccount. The API wallet's address is distinct from the account address holding the balance. Account-data requests use the actual master or subaccount address, not the API-wallet signer address. See Hyperliquid's API-wallet explanation. This distinction explains the wallet roles; use the Gunbot credential fields as described below.
- In the top menu, go to More > API.
- Enter a name for your key (e.g.,
Gunbot). - Paste your wallet address.
- Click Generate, then Authorize API Wallet.
- Save your public API key and secret securely.
Important
Never share your secret key with anyone.
Configuring Your Trading Bot
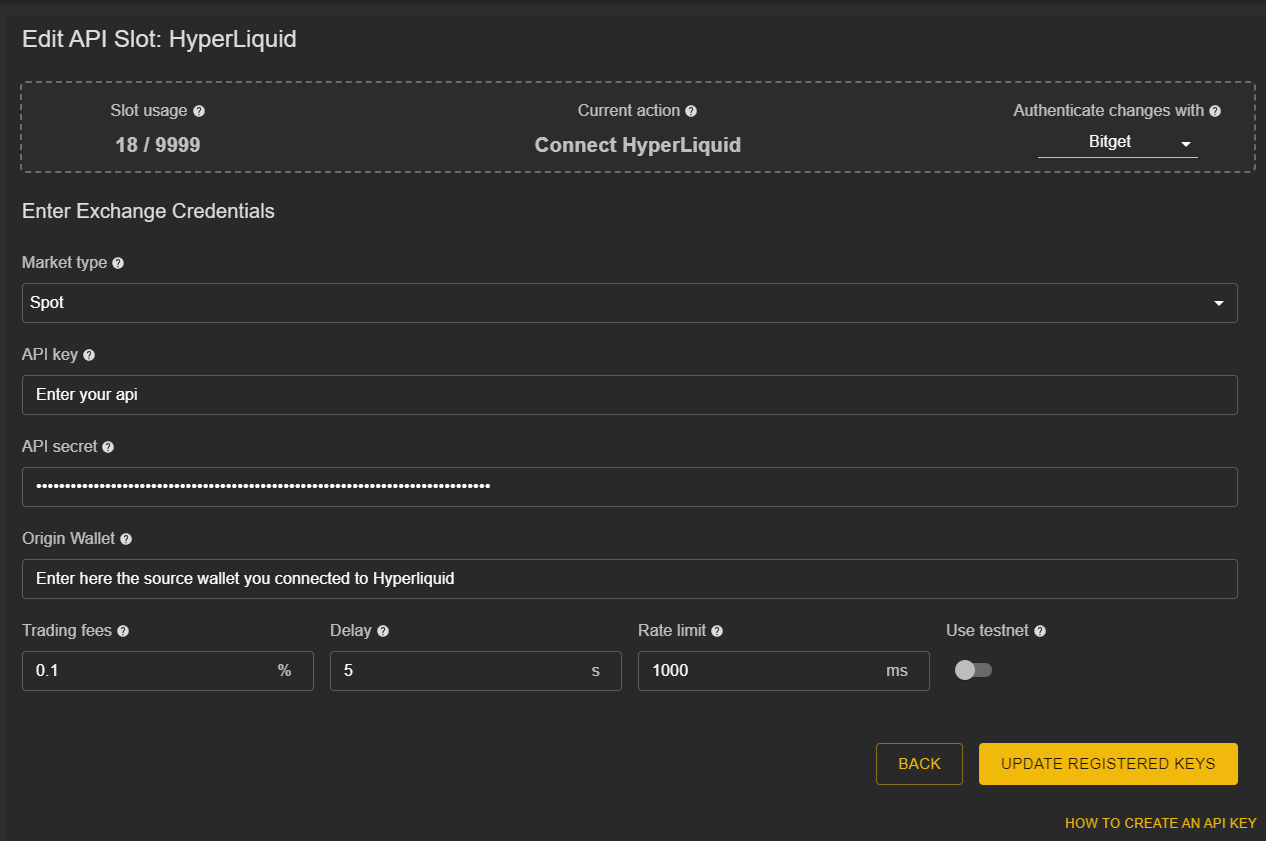
Set up your bot in the GUI using your Hyperliquid credentials:
- Access Settings: Open the bot's Exchange configuration section.
- Select Market Type: Choose
"spot"or"swap"depending on whether you want to do Spot or Futures trading.Info
Select this market type first; it usually remains unchanged once set.
- Enter Credentials:
- API Key: Your Hyperliquid public API key.
- API Secret: Your generated secret key.
- Origin Wallet: The wallet address you connected to Hyperliquid.
- Verify all details carefully.
- Save Exchange: Confirm your exchange setup and proceed to Trading Settings.
Verification Steps
Complete these final checks:
- Save Configuration:
- Verify all API settings.
- Confirm credentials are saved.
- Test Connection:
- Add a trading pair.
- Check for data updates.
- Verify your account balance.
- Monitor initial operations.
A properly configured API supports reliable automated trading. Review API settings regularly, never share credentials, and use secure channels when setting up your HyperLiquid trading bot.