Gunbot Unlimited quickstart
Use this quickstart for a new Gunbot Unlimited installation. By the end, Gunbot is registered, connected to Gunbot Live, and ready to use the first exchange account.
Have these ready:
- your Gunbot order number
- the public API key and secret for the first exchange account
- a computer or server where Gunbot can stay running
If you still need to create an exchange API key, use the exchange API-key setup guides.
1. Download and start Gunbot
Download the Full install for your operating system from gunbot.com/downloads, extract it, and start Gunbot.
Use the operating-system guide if you need the exact startup steps:
Keep Gunbot running while you finish setup.
If you chose a fully local setup, Gunbot Live is already included in this download. You do not need another download for Gunbot Live.
2. Open localhost and set the Gunbot password
On the same machine where Gunbot is running, open:
http://localhost:3001
If you changed the GUI port, use that port instead.
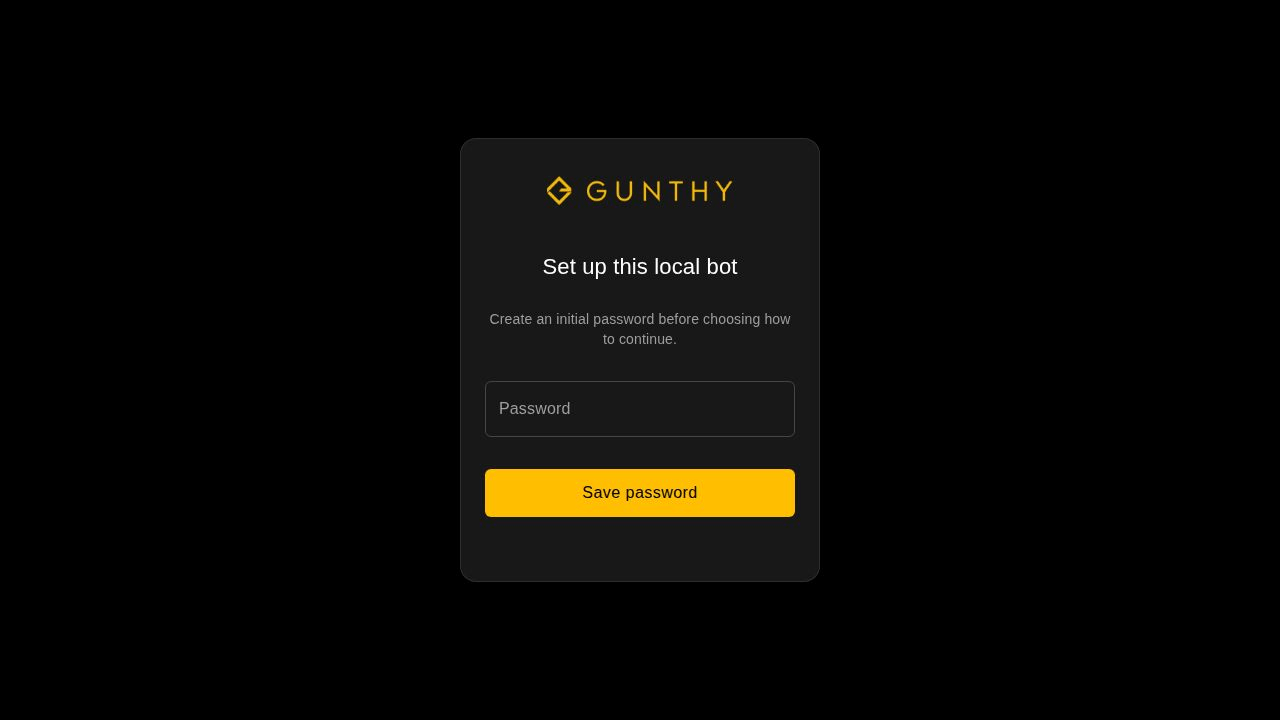
The first-run page asks you to create the local Gunbot password. Save it. You will use this password to connect Gunbot Live to this installation.
3. Complete the connectivity check
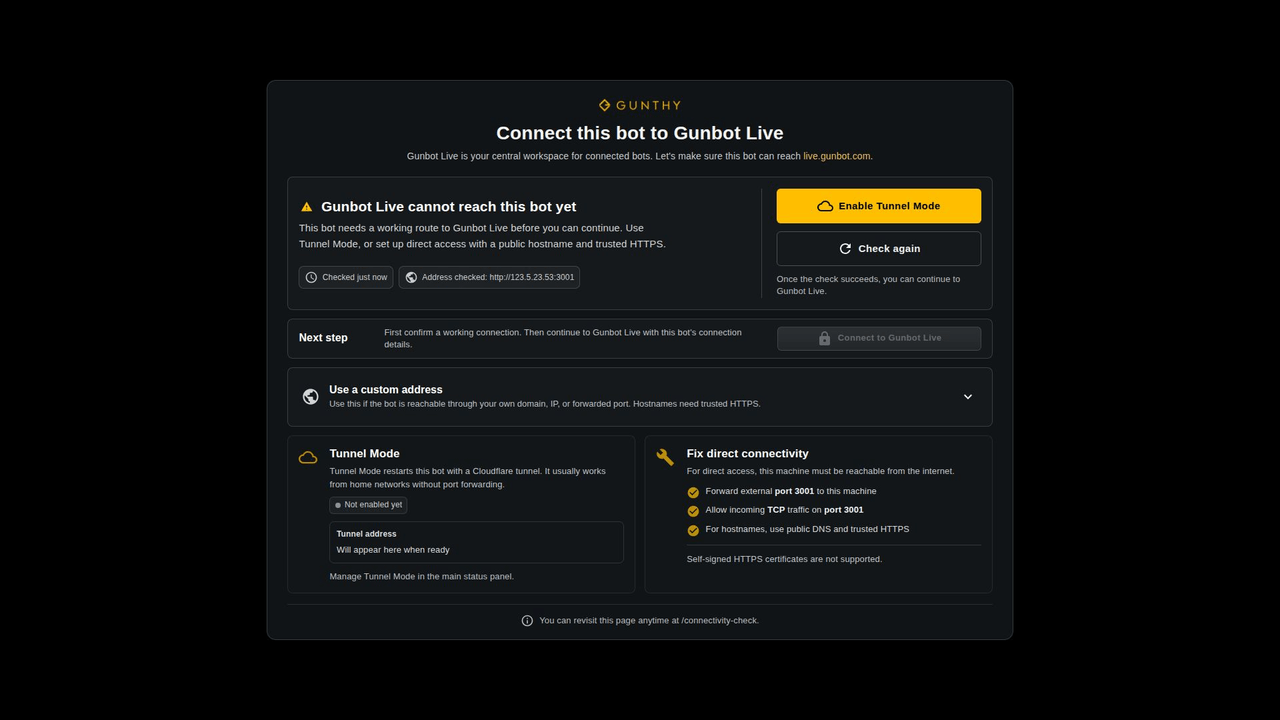
After saving the password, continue to the connectivity check.
For the hosted workspace at live.gunbot.com, Tunnel Mode is usually the easiest option. It lets Gunbot Live reach this Gunbot installation without requiring you to set up remote access yourself.
If you already have an address you use to reach Gunbot remotely, you can use that instead. For a fully local setup, continue with the Gunbot Live interface included with Gunbot.
4. Connect Gunbot Live
Open live.gunbot.com for the hosted workspace and sign in if needed. For a fully local setup, continue in the Gunbot Live interface opened from your Gunbot installation.
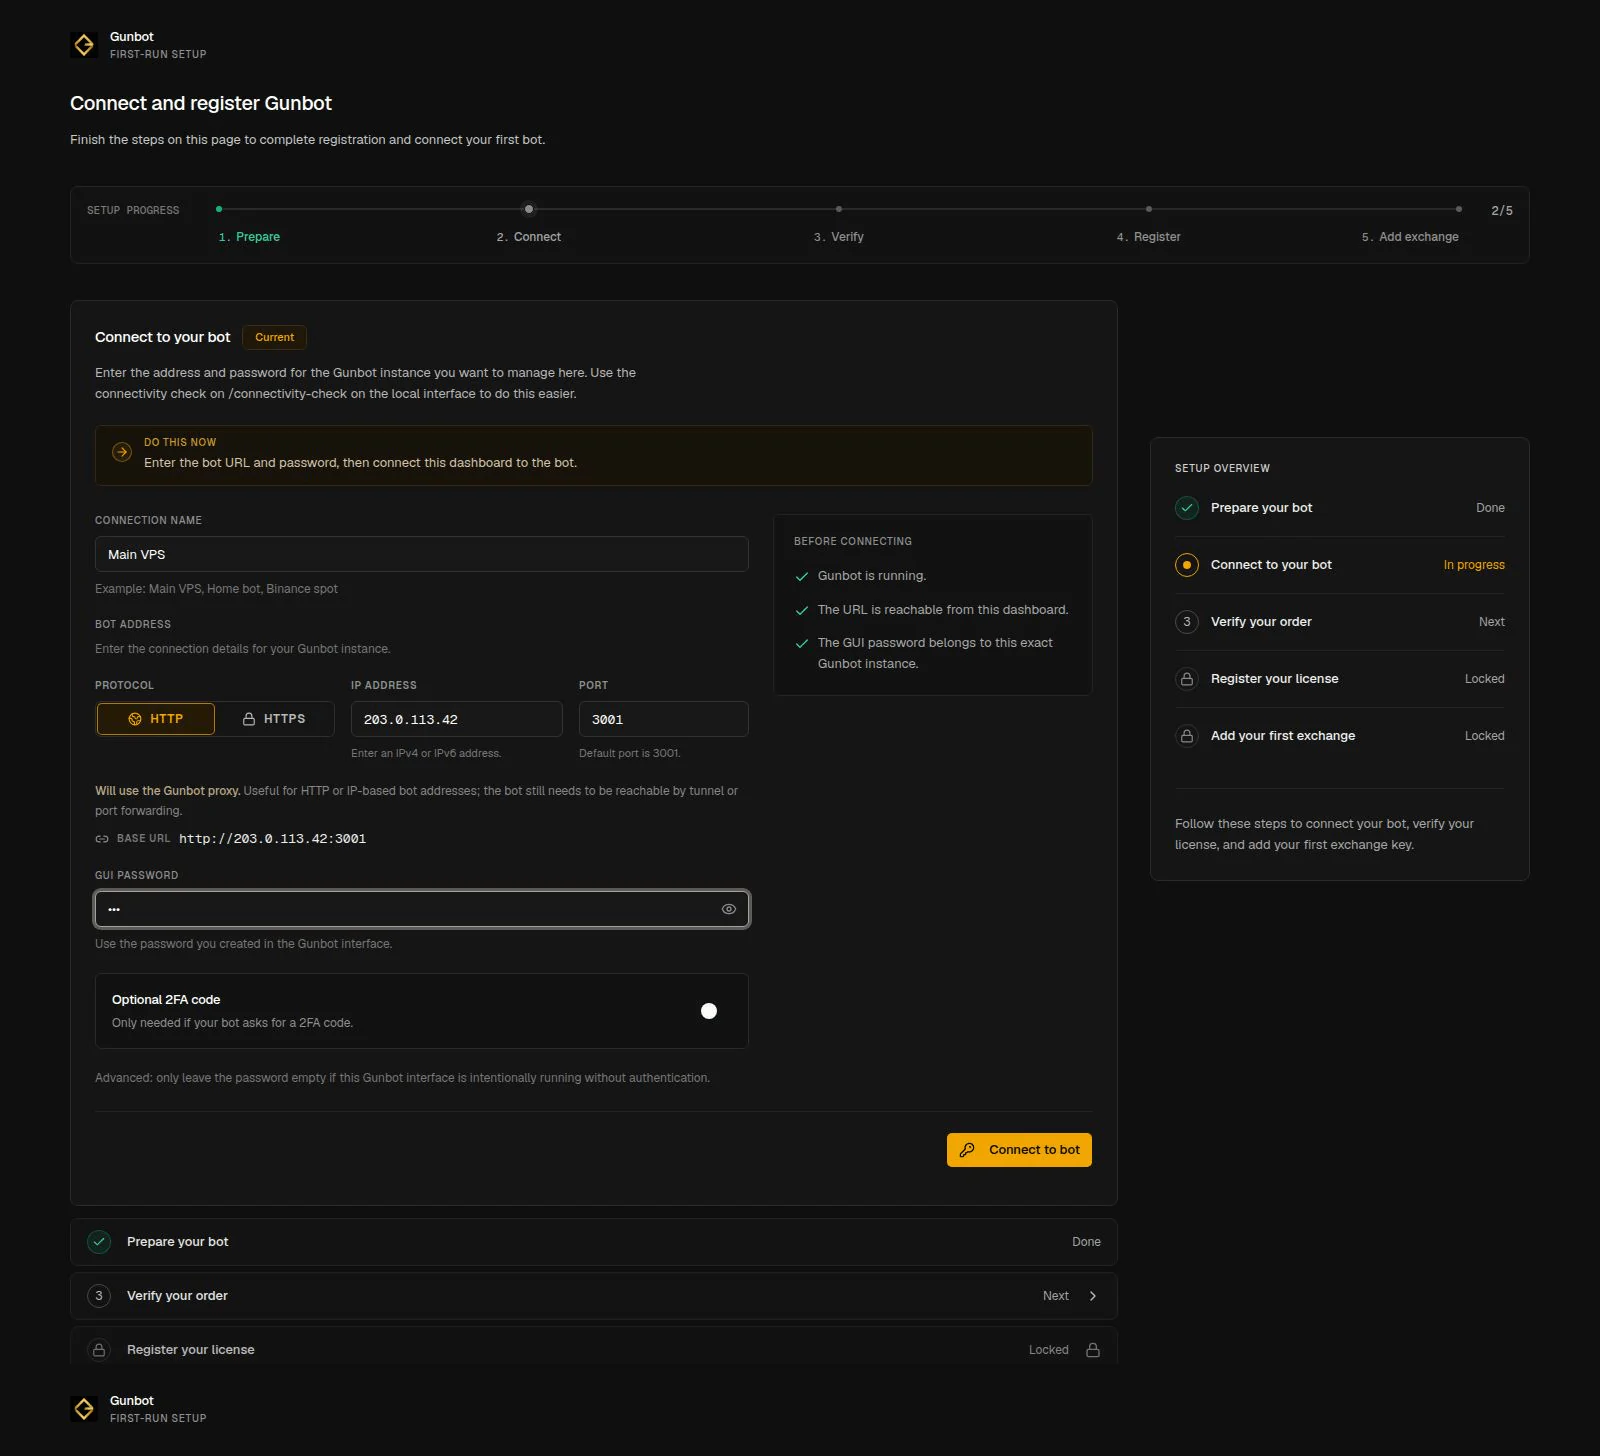
On the Connect step, enter:
- a recognizable name, such as
Main trading - the Gunbot address from the connectivity step
- the local Gunbot password
- a current two-factor authentication code only if you enabled 2FA on this Gunbot installation
Select Connect to bot.
5. Verify your order
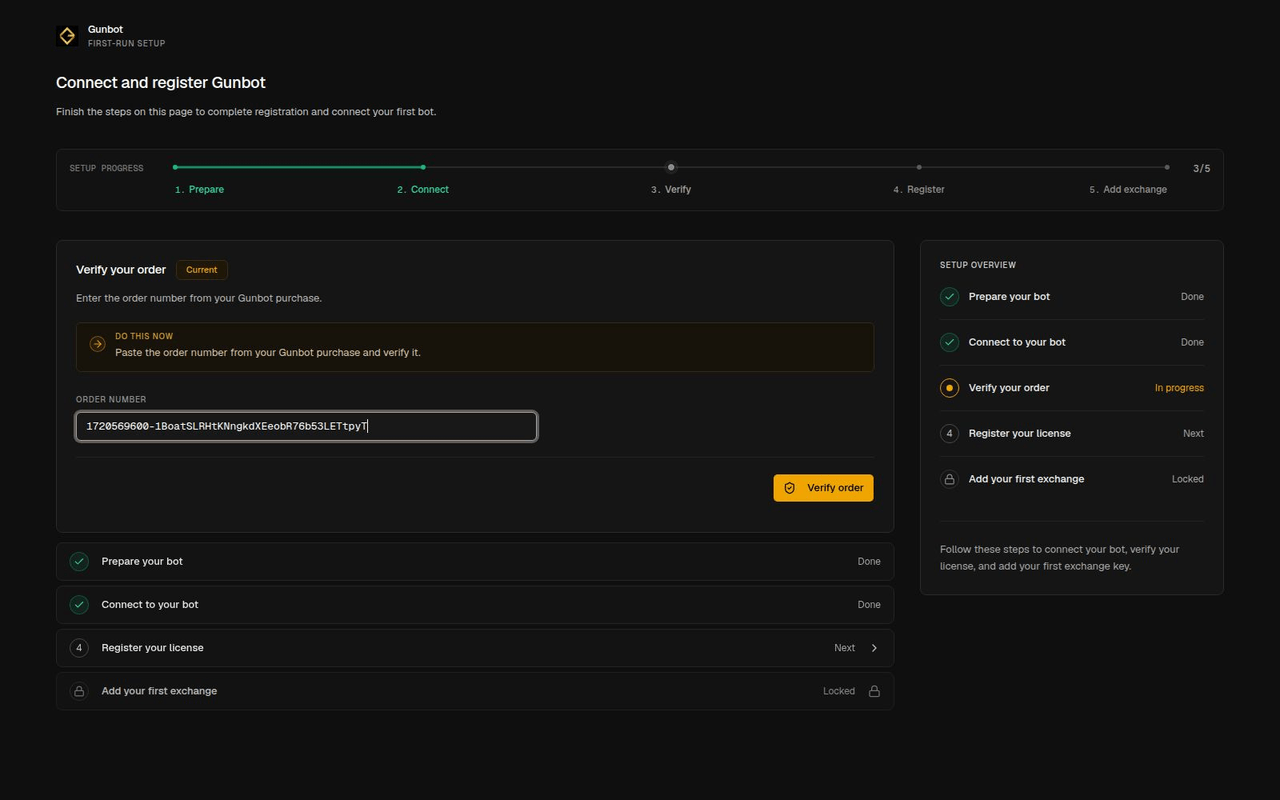
The startup wizard asks for the order number from your Gunbot purchase. Enter it and select Verify order.
6. Register the license wallet
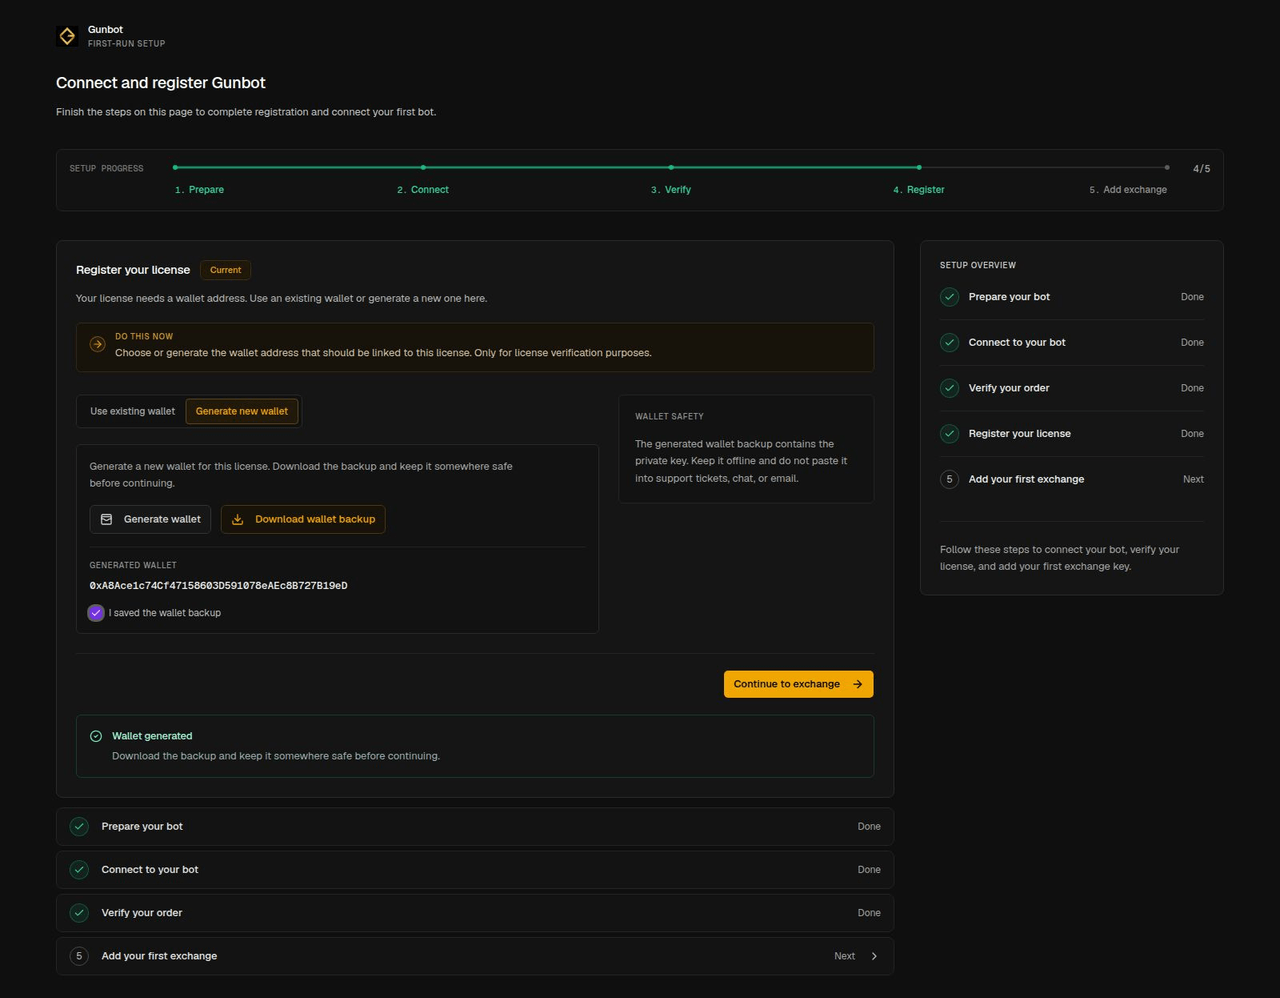
Enter an existing compatible wallet address or generate a new wallet in the startup wizard.
If you generate a wallet, download the backup and store it somewhere private before continuing. The private key in that backup controls the wallet. Gunbot license registration only needs the public wallet address.
7. Register the first exchange API key
Choose the first exchange and enter its public API key.
The wizard registers the public key to your Unlimited license. All Gunbot installations using the same Unlimited license wallet can use registered keys. Add the secret separately on each installation that uses the exchange account.
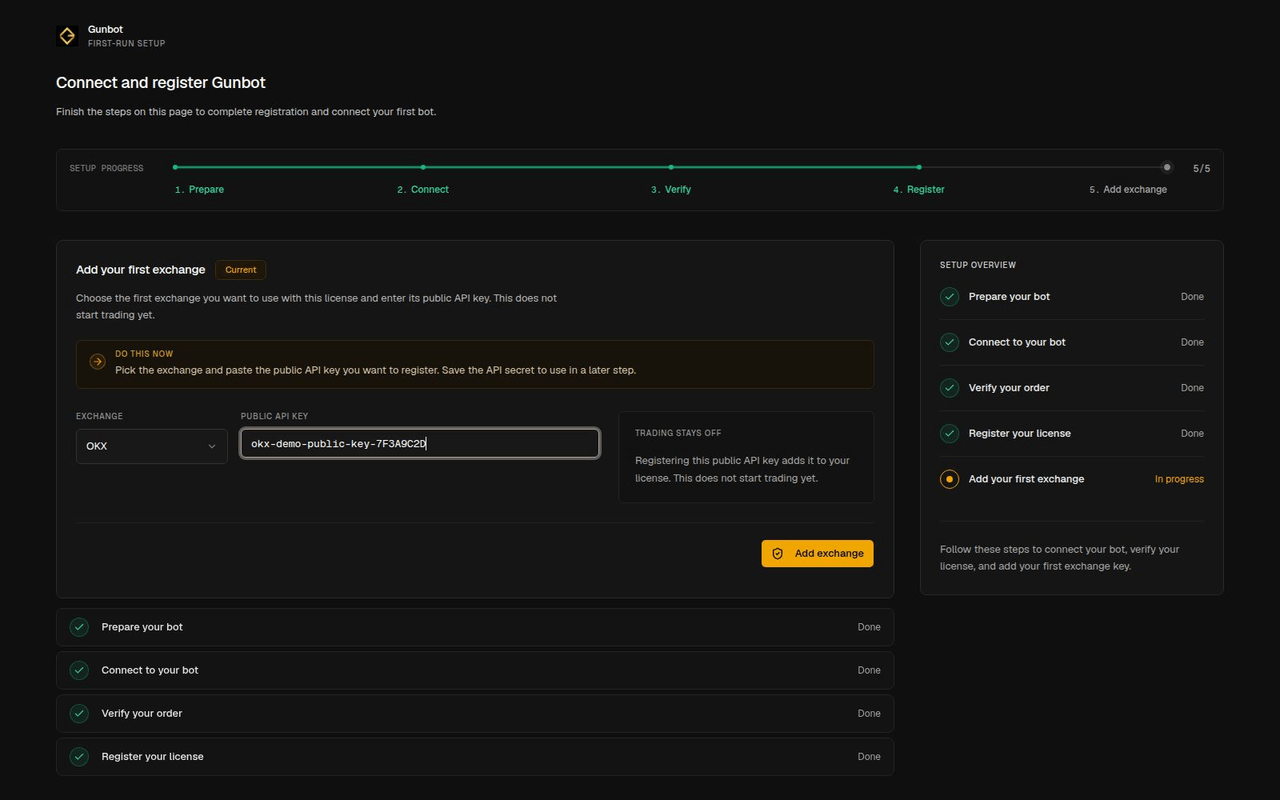
After registration succeeds, continue to the exchange connection.
8. Add the exchange secret
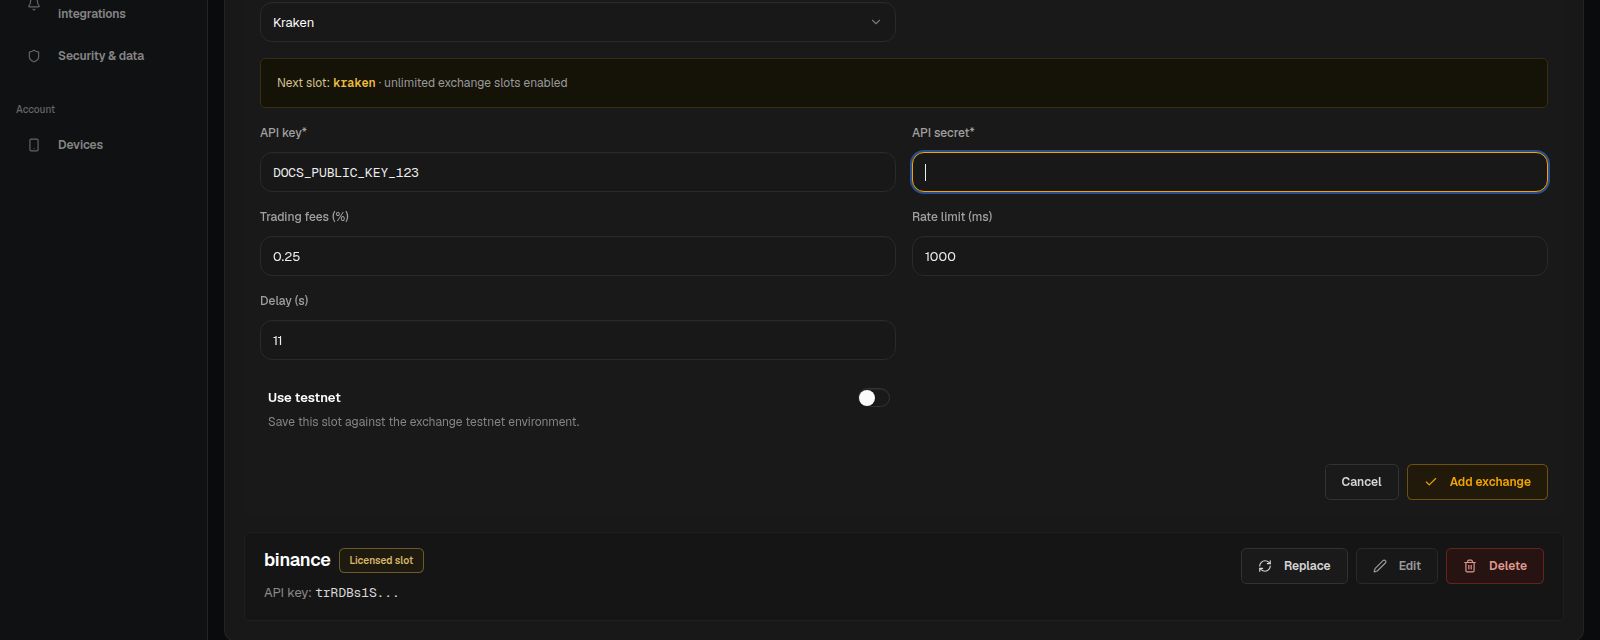
Open Settings > License and find the exchange key you just registered.
Enter its API secret and any additional credentials the exchange requires, such as a passphrase or account identifier, then save the connection.
9. Confirm the connection
Setup is complete when:
- the Gunbot connection appears in the top-bar selector
- its status shows Running or Stopped
- the exchange connection is saved in Settings > License
- Trading settings > Add pairs can load markets for that exchange account
The bot can stay stopped until you are ready to configure trading.
Continue with Choose a strategy and Build your first trading setup.