Webhook alerts
Webhooks let TradingView.com alerts reach a Gunbot instance directly. Gunbot must be publicly accessible on port 443.
Webhook URL: https://[Your_Gunbot_IP]:443
Initial setup for TradingView Bot
Before setting up alerts to create a TradingView Bot, you need to:
- Make sure your system has LibreSSL installed to generate the needed certificate.
- Make sure your device is publicly accessible on port 443 (the only port allowed by TradingView).
- Enable webhooks support in Gunbot on the TradingView settings page and set a passphrase for alerts to confirm the sender.
- As with TradingView alerts in email mode, add one valid pair in Gunbot for each exchange you'll receive alerts on. This pair will not trade unless you send alerts for it.
Use with or without pair cycling
If you want Gunbot to only execute incoming webhook alerts, disable TV_GB and ensure alerts include the required price/amount info to place the intended orders.
If you want to use Gunbot data (for example, to protect profits using TV_PROTECTION), enable TV_GB and add all pairs in your Gunbot config for which you expect alerts.
Easy way to generate valid alerts
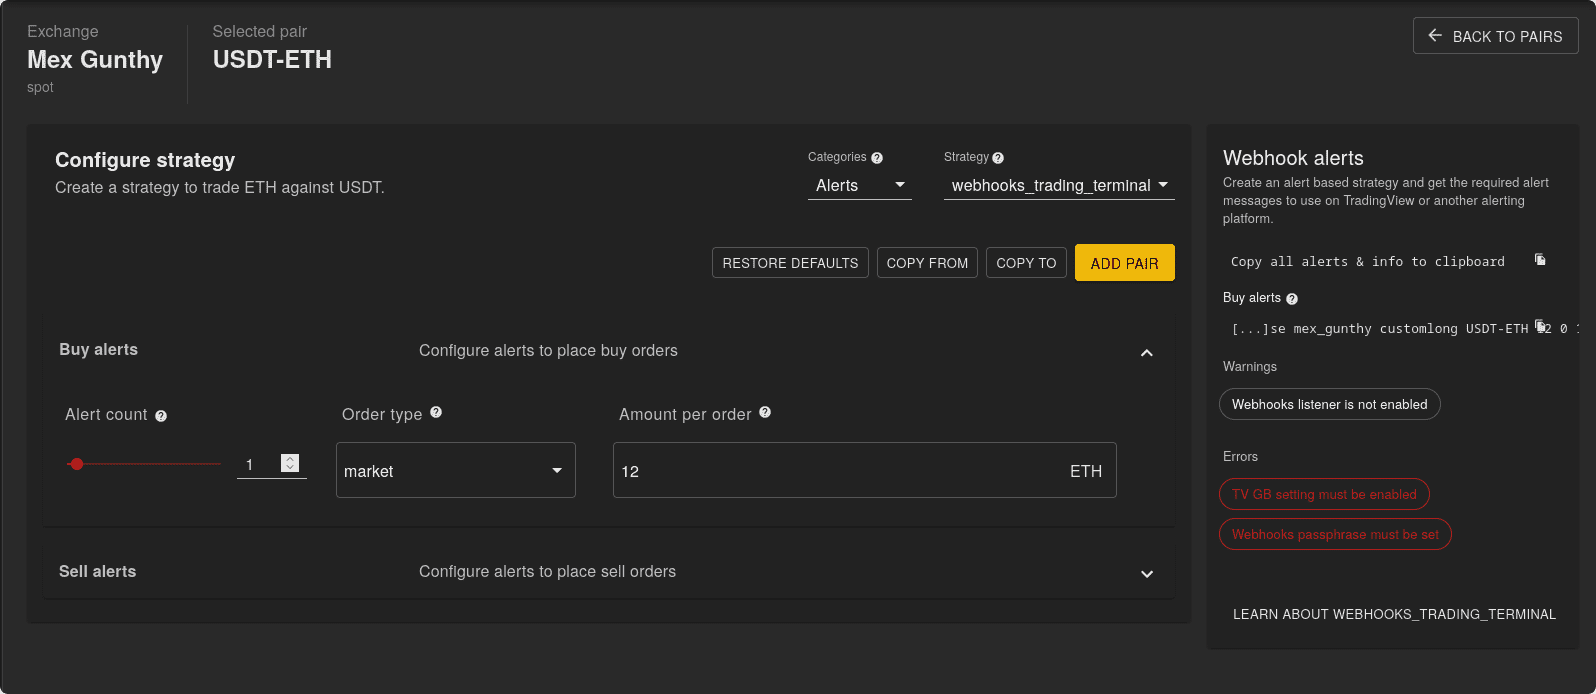
The trading settings page includes a configurator to create alert scenarios; it is easiest to use the alerts it generates.

These generated alerts contain the following elements:
- Password: Used for authentication so only authorized users or systems can trigger actions.
- Exchange: Exchange where the action occurs.
- Alert Type: Identifies the alert type so you can differentiate events.
- Pair: Target trading pair.
- Amount: Quantity or size of the order to execute.
- Price: Set a specific price or a placeholder like {{close}}. A specified price places a limit order; a price of 0 places a market order.
- Current Alert Number: Tracks the number of alerts triggered for the same alert type.
By configuring multiple alerts before taking action, you can create multi-condition strategies without relying on alert order. For example, you might link alerts to EMA (Exponential Moving Average), RSI (Relative Strength Index), and supertrend conditions; they can trigger independently and in any order.
Your strategy is not restricted to generated alerts. You can add additional alerts, such as ones with different order amounts.
For more on alert variables such as {{close}}, refer to the TradingView documentation.
Example of generated spot alerts
Buy alerts:
123456asdfsaf mex_gunthy customlong BTC-ETH 2 0 1
123456asdfsaf mex_gunthy customlong BTC-ETH 2 0 2

// configured to require 2 alerts before buy is placed, market buys 2 ETH at a time

Sell alert:
123456asdfsaf mex_gunthy customshort BTC-ETH full 0 1

// configured to require 1 alerts for selling, market sells full ETH amount

When using generated alerts, ensure you also use the strategy settings saved to config.js in the webhooks editor. Several settings are required to handle the expected number of alerts of the same type.
Alert message contents
Alternatively, you can create alerts using this format:
passphrase exchange order_type pair amount price
Alerts follow the same standardized pair syntax as normal Gunbot usage; the alert text must be in the subject line of an email. This format requires no special strategy settings.
Limit order alert examples
spot:
123456 binance buy USDT-BTC 0.1 42553.4
123456 binance sell USDT-BTC 0.1 42553.4

futures:
123456 binanceFutures long USDT-BTC 0.1 42553.4
123456 binanceFutures short USDT-BTC -0.1 42553.4
123456 binanceFutures close USDT-BTC 0.1 42553.4
123456 binanceFutures close USDT-BTC -0.1 42553.4
Market order alert examples
spot:
123456 binance buy USDT-BTC 0.1 0
123456 binance sell USDT-BTC 0.1 0

futures:
123456 binanceFutures long USDT-BTC 0.1 0
123456 binanceFutures short USDT-BTC -0.1 0
123456 binanceFutures close USDT-BTC 0.1 0
123456 binanceFutures close USDT-BTC -0.1 0
Change strategy alert
format:
passphrase exchange strat pair name_of_strategy_here 0

example:
123456 okgunbot strat ETH-AVAX superCoolDCA 0
Other settings
Currently, only a subset of the email alert settings are available for webhooks:
- TV_GB
- TV_PROTECTION
Installing LibreSSL on Windows
If you get certificate-related errors when enabling the webhook listener on a Windows server, the following steps should resolve it.
Open PowerShell and run the following command:
Set-ExecutionPolicy Bypass -Scope Process
Still in PowerShell, run the following command:
Set-ExecutionPolicy Bypass -Scope Process -Force; [System.Net.ServicePointManager]::SecurityProtocol = [System.Net.ServicePointManager]::SecurityProtocol -bor 3072; iex ((New-Object System.Net.WebClient).DownloadString('https://community.chocolatey.org/install.ps1'))
Open a cmd terminal and run this command to install LibreSSL:
choco install -confirm libressl
If errors persist, manually install LibreSSL using this method:
- Download the .dll from https://sourceforge.net/projects/libressl-3-2-0-for-windows/files/LibreSSL-3.3.3_MinGW_Windows7%28static%29.zip/download
- Extract the folder in c:/libressl