Feature highlight: automate TradingView alert scenarios, even complex ones


This feature highlight shows how you can turn Gunbot into a TradingView alert bot. You'll use TradingView webhook alerts to automate trading decisions, including complex scenarios with multiple indicators.
Let's consider a scenario where you want to receive alerts based on varying indicators, in any order of time. The end goal? You receive timely alerts for your chosen indicators, and Gunbot does the heavy lifting by placing trades once all conditions are met.
note
This guide assumes that your webhook connectivity is already configured. If you need help with this, please refer to the webhook alerts documentation. Our support team is also on hand if you have any issues.
Let's walk through it.
Step 1: Define Your Conditions
First things first, identify the number of buy and sell conditions necessary for your strategy. Be as specific as possible here; the more refined your conditions, the more custom your trading approach will be.
Step 2: Configure Gunbot
Next, head to Gunbot and add a pair with an alert strategy. Set the desired alert count and investment amount (see image below). Copy all the alerts which should look something like this:
Buy alerts:
passphrase binance customlong USDT-ETH 1 0 1
passphrase binance customlong USDT-ETH 1 0 2
passphrase binance customlong USDT-ETH 1 0 3
Sell alerts:
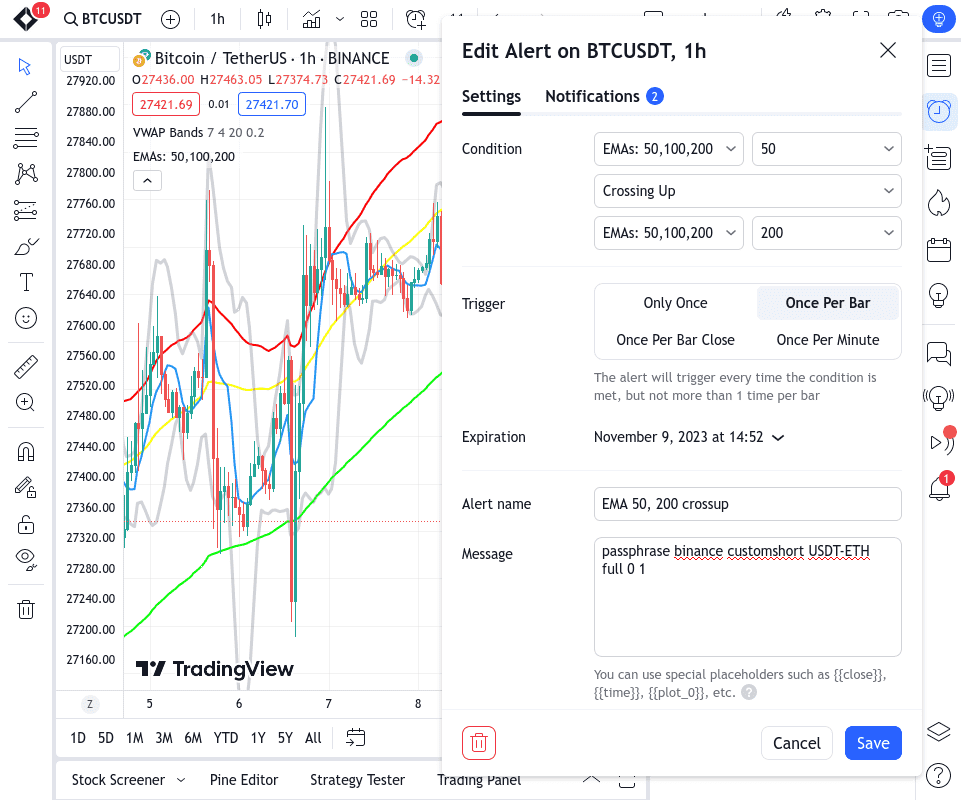
passphrase binance customshort USDT-ETH full 0 1
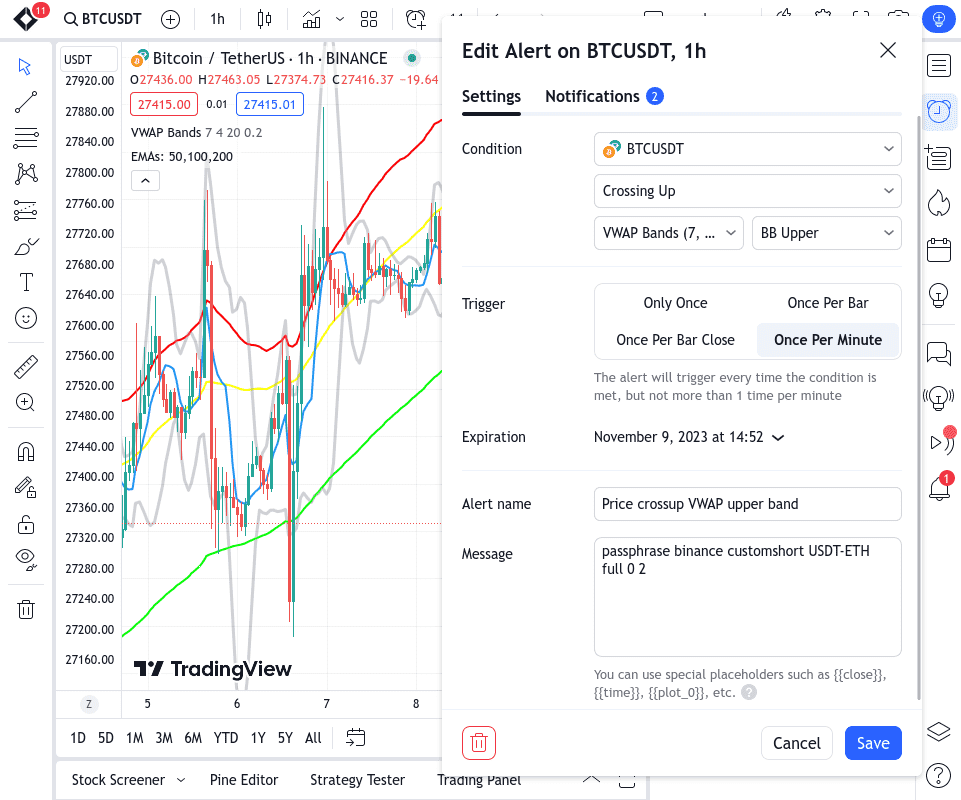
passphrase binance customshort USDT-ETH full 0 2
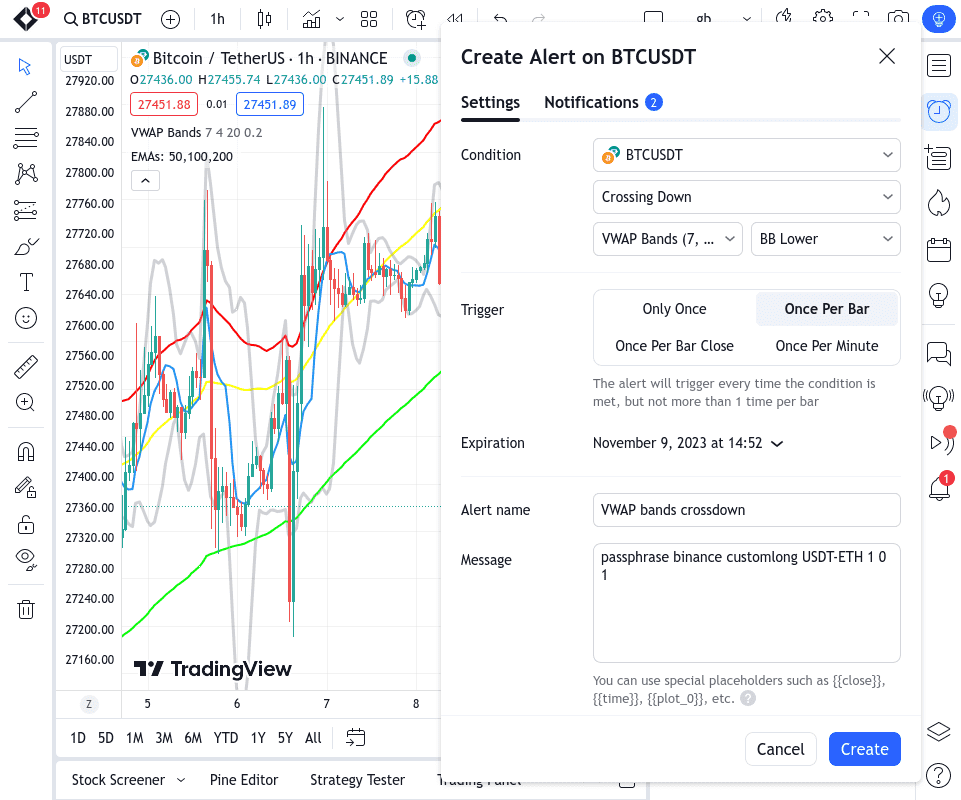
When creating the alerts on TradingView, these alert texts are what you should enter in the message field. One for each alert you'll create.
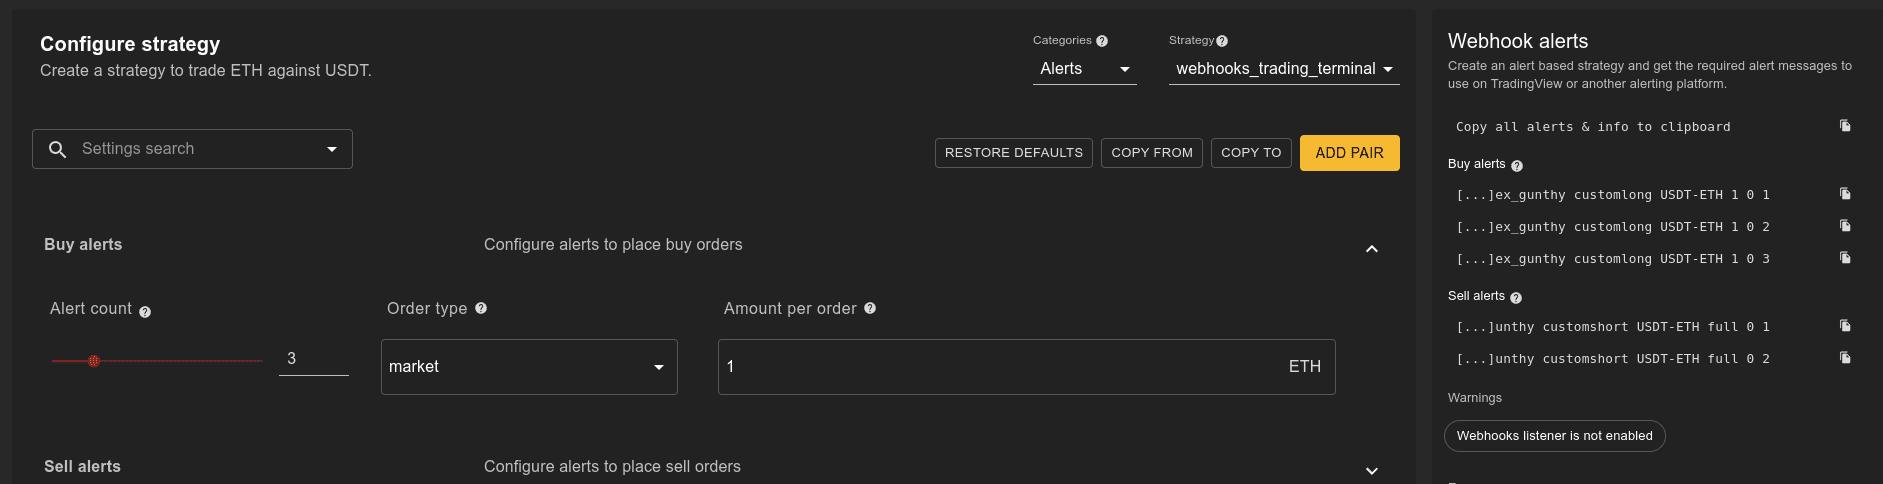
This example uses market orders, it's also possible to use limit orders with the target price added in the alert message by using a placeholder like {{close}} (as provided by TradingView). The passphrase part of the webhook alert message refers to a passphrase you'd setup yourself in Gunbot, so that it only accepts alerts that use the expected passphrase.
Step 3: Set Up TradingView
Now, head to TradingView and open a chart with the asset you want to trade. Apply the indicators you plan to use for your strategy.
Step 4: Create Buy Alerts
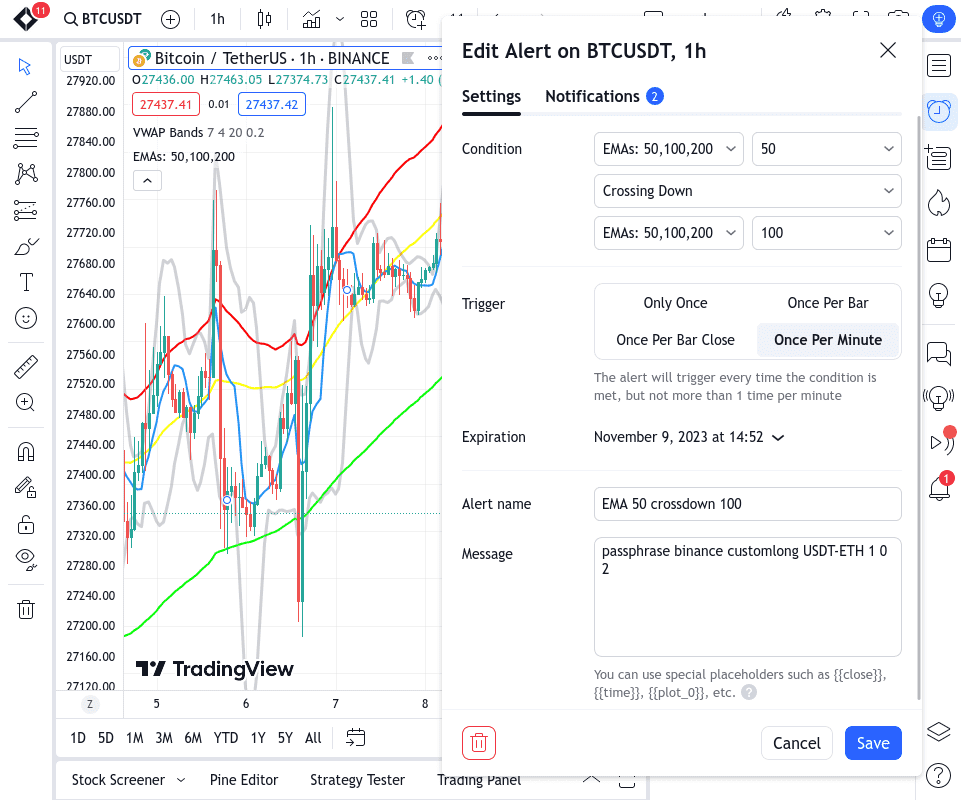
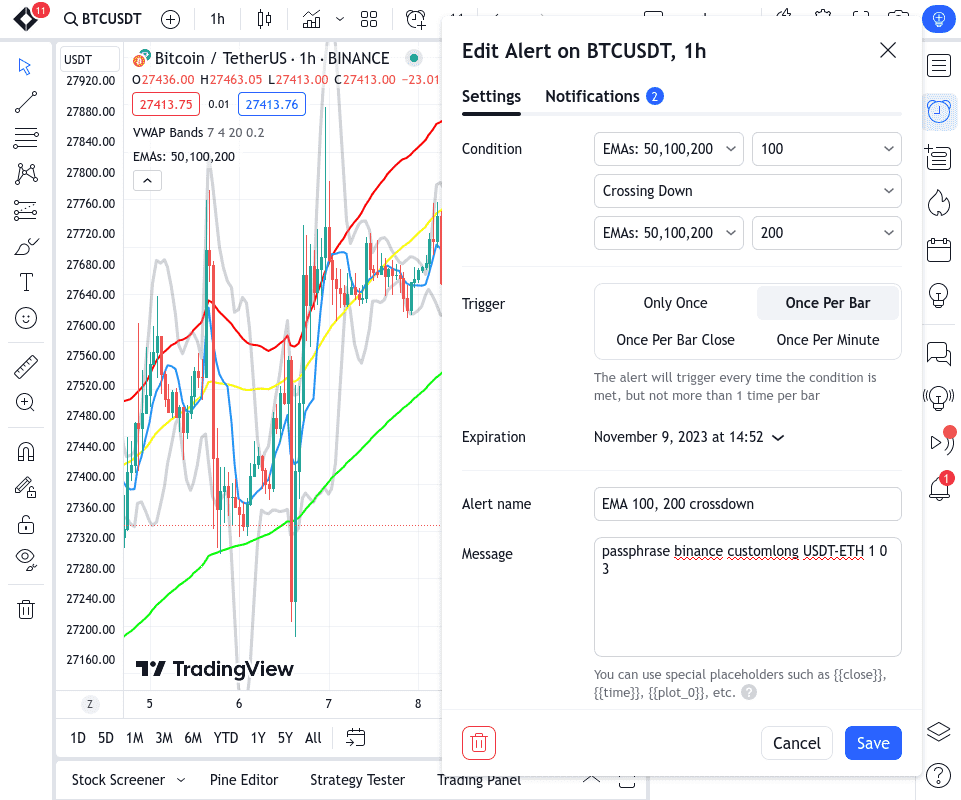
In TradingView, set up your buy alerts (see images below). For this example, we'll use VWAP bands and EMA crosses as our conditions - executing trades when both shorter-term EMAs cross below the longer-term EMA and the price drops below the lower VWAP band.
Buy alert 1
Buy alert 2
Buy alert 3
Step 5: Set Up Sell Alerts
Similarly, create sell alerts for each of your conditions in TradingView (see images below). In our example, we'd set up sell orders when a short-term EMA crosses above the long-term EMA, and the price exceeds the upper VWAP band.
Sell alert 1
Sell alert 2
Step 6: Start Trading
Finally, save all your alerts and hit the 'Start Trading' button in Gunbot. The trading bot will now execute your trading scenario whenever all of these conditions are met! It does not matter in which sequence the alerts arrive, whenever all criteria for a buy order are fulfilled, the bot will place the buy order. (and vice versa for selling)
Wrapping It Up - Power at Your Fingertips 🎯
Gunbot's TradingView webhook integration extends your trading strategies. You can run complex scenarios with multiple indicators without writing code.
In essence, Gunbot makes it possible for traders to capitalize on their strategic insights without needing to code or continually monitor market conditions. 😎
With some initial setup, your trades can execute automatically based on your preferred indicators and conditions. It's never been easier to start making the most out of your trading opportunities!